There are several walking tracks on Te Ahumairangi Hill (formerly Tinakori Hill).
And with that comes some confusion about which route to take given they link up in weird ways. I’m going to call the walk in this post the Te Ahumairangi Hill Loop.
It’s 5-6 kilometres with a little over 300 metres of elevation gain and gives you some amazing views of the city.
It covers the majority of the Ridgeline Track and the parts of the Northern Walkway that runs through the Te Ahumairangu Hill.
TABLE OF CONTENTS
1. Details About The Walk
2. A Map of the Te Ahumairangi Hill Walk
3. How To Get To The Trailhead
4. My Te Ahumairangi Hill Experience
DETAILS ABOUT THE WALK
When1: April 2021
Difficulty2: Easy – medium. There’s a steep climb to start, but it’s not a long walk.
Hike Distance3: The Strava record gave 5.37km which is pretty accurate I feel. Plan for a 5-6km and you can’t go wrong (unless you miss some turnoffs that is).
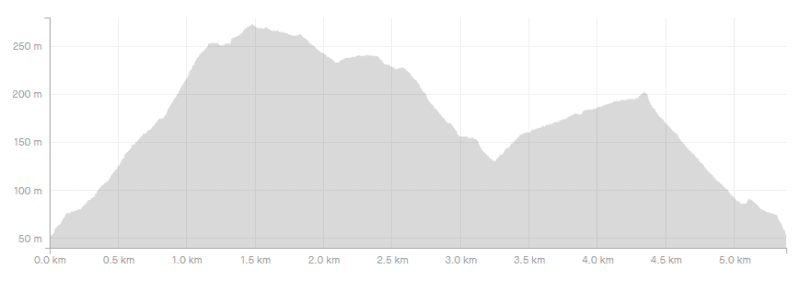
Incline4: There was 322 metres of elevation gain according to Strava. Here’s the elevation profile:
Hike Duration5: It took me 1 hour and 16 minutes to complete the loop. That was with no real breaks to take in the views (I’ve been up the hill a bunch of times), but did pause for photos.
A MAP OF THE TE AHUMAIRANGI HILL LOOP TRACK
The map above is the GPX file (from Strava) of the route I took overlaid on a topo map. It gives you a good idea of how you’ll be walking in a very green part of the city away from the roads.
You can see the majority of the tracks on Google Maps, but I found that a bit confusing to follow. The same goes with the tracks on Maps.me, but I used that app to verify I was going in the right direction.
What I found to be best was a combination of looking at Maps.me and just following the trail signs, which although are confusing at times got me around.
HOW TO GET TO THE TRAILHEAD
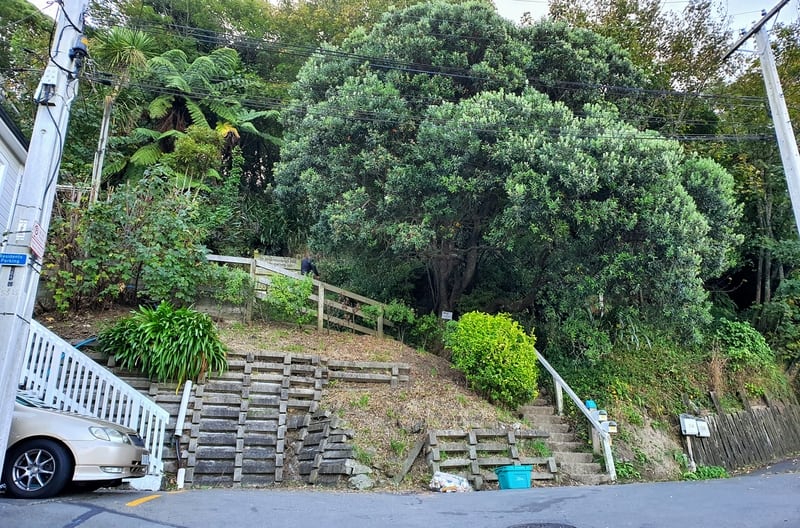
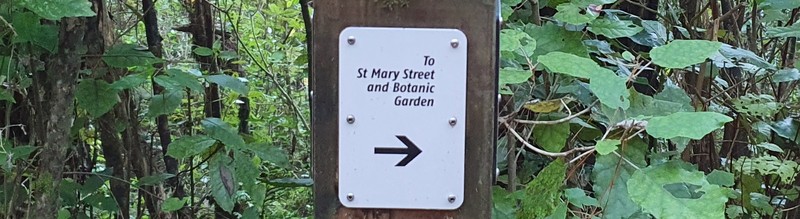
The trail starts at the top of St Mary Street (see photo above) which is pretty central (~1.2km from the train station).
Drive: If you want to drive close to the trailhead, there’s free 2-hour parking on Glenmore Street. It’s usually possible to find a car park along here, but it can be a nerve-wracking parallel park with the traffic (particularly at rush hours).
Walk: If you’re anywhere near the train station, it’s an easy walk to St Mary Street via Bowen Street It’s also possible to walk from the Cuba Street/Courtney Place area. There are direct routes but you’ll probably still be best to walk down Lambton Quay and then go up Bowen Street.
Ride Share: All three of the ride share companies in NZ operate in Wellington and can get you to the trail from all over Wellington.
Public Transport: If you’re coming in from somewhere north of Wellington, it’s easy to catch the train to Wellington and walk from there. If you’re in Wellington and want to get dropped off close to the trailhead, that’s also easy from pretty much everywhere in Wellington.
Google Maps is pretty good for letting you know the best way to get from A to B in Wellington via public transport.
MY TE AHUMAIRANGI HILL EXPERIENCE
After walking up St Mary Street you know it’s not going to be easy getting up to the Ridgeline Track at the top of the hill.
Note: I decided to go in the clockwise direction, up the bigger incline to the Lookout and Ridgeline, following the Ridgeline Track and then making my way back via the Northern Walkway to St Mary Street.
You’ll be straight onto some stairs (under 20) to start with, but don’t worry for those who hate stairs (that’s me), they’re the only ones you’ll see all day.
It won’t take you long to get to the first intersection on the trail (~100 metres). There’s a big board with a map6 with all the trails which is good to equate yourself with.
You’ll see the two major tracks this loop takes you on, the Northern Walkway and the Ridgeline Track.
If you don’t want to bother with navigation issues, the easiest way would be to follow the blue Northern Walkway signs up to the Ridgeline Track in an anti-clockwise direction. But it does leave you with the steeper descent back down to St Mary Street7.
So I prefer the clockwise direction. To get up to the Ridgeline Track I followed the Northern Walkway before turning left onto the Stelling Track, then joined onto the Paehuia Track which took me to the Te Ahumairangi Lookout and Ridgeline Track.
The first part of the Northern Walkway is easy to follow for 200 metres.
The turnoff to the Stellin Track is easy to spot, and is labelled with a white track marker (the track markers look like the above).
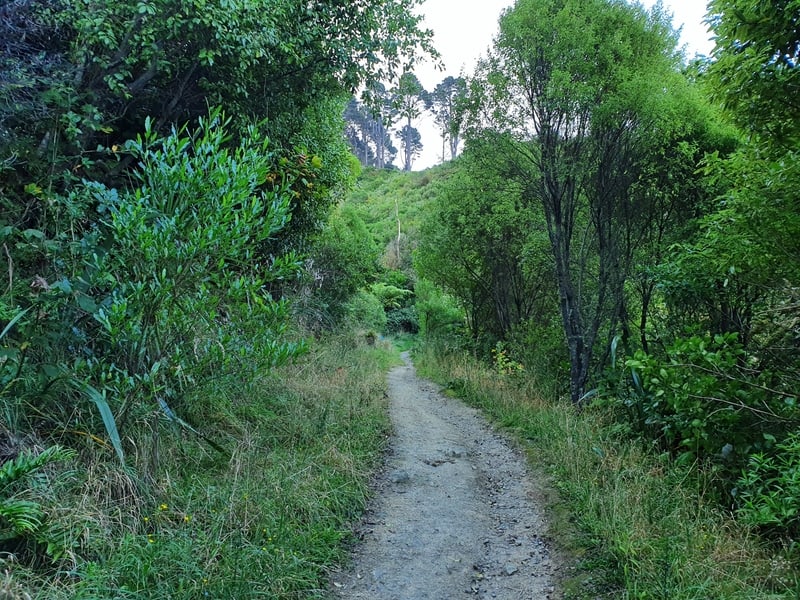
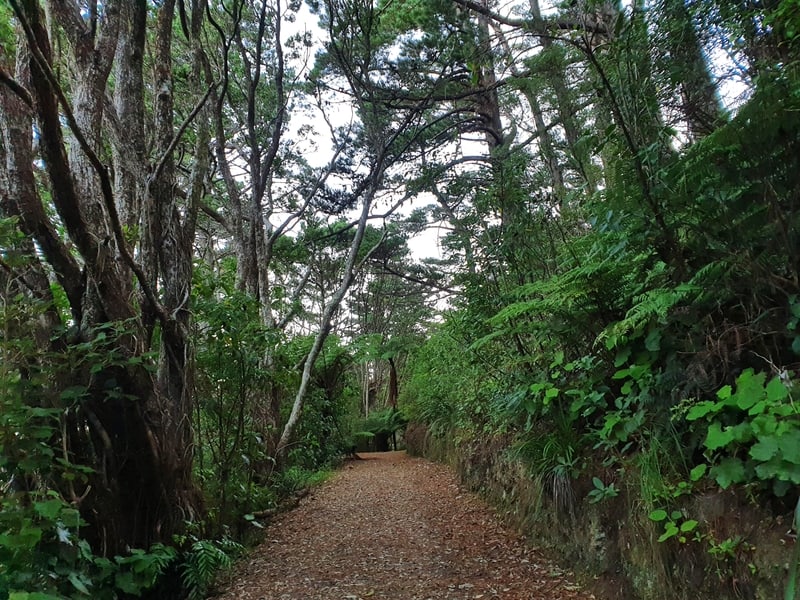
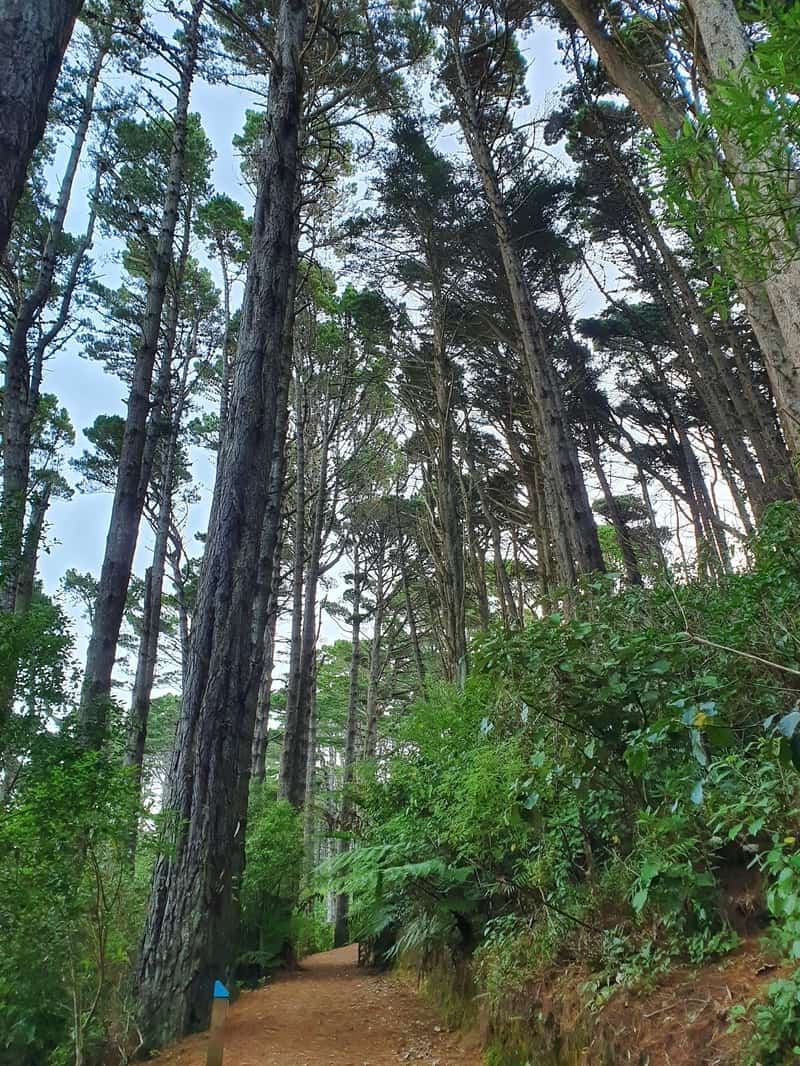
From here on, the track gets steeper, narrower, and it’s slightly more technical than the well-worn Northern Walkway.
The trickiest part for me was to figure out what the white track markers meant with their arrows at times. I would eventually figure it out by verifying with Maps.me but it wasn’t ssmooth sailing.
On the white signs, you want to follow the directions to the Ridgeline Track and/or the Te Ahumairangi Hill Lookout.
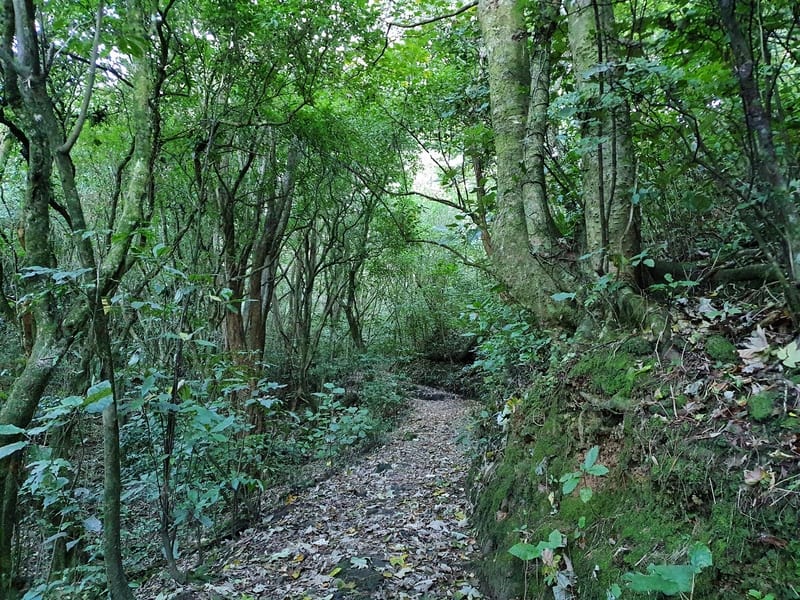
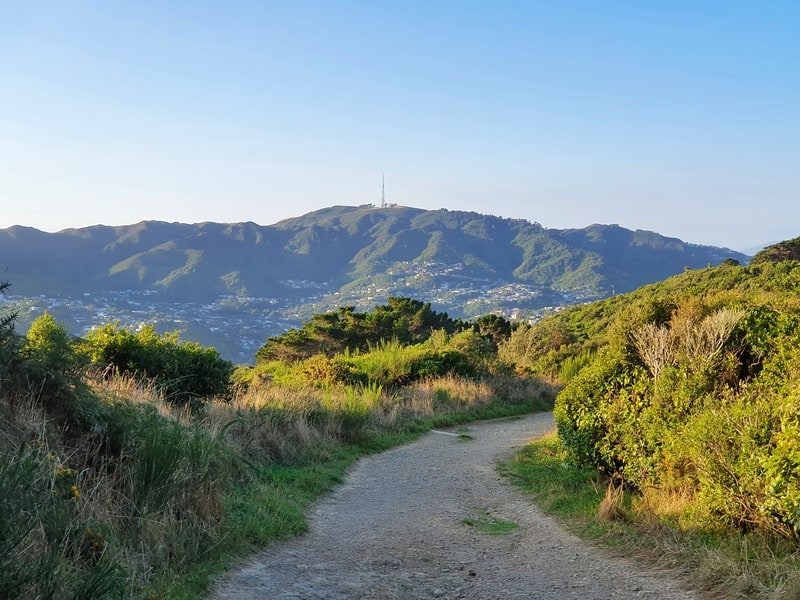
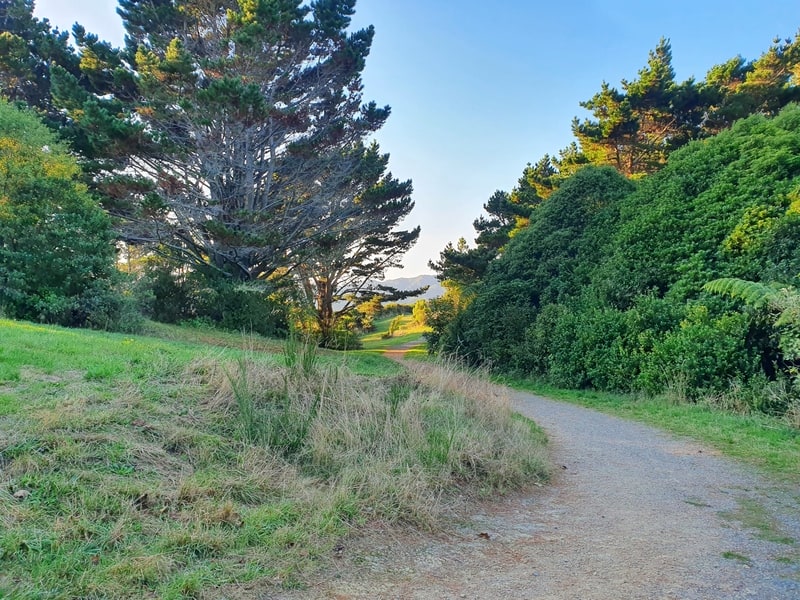
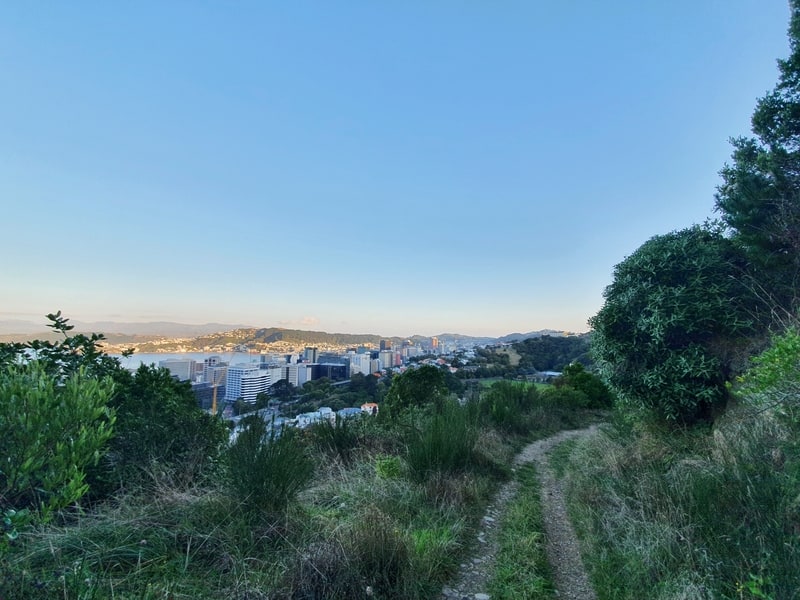
Throughout this, you’re under the beautiful forest canopy. I managed to spot a few tui flying about which was cool. You’ll get a couple of views over the city early on too.
It’s certainly a good incline but it’s only 1.2km from the start of the trail to the Te Ahumairangi Hill Lookout, by which time you’ll have gained ~200 metres elevation.
Note: If you see a field of picnic benches and think this is the lookout, don’t be disappointed. Follow the dirt track on the other side of the field for ~30 metres and you’ll be at the lookout.
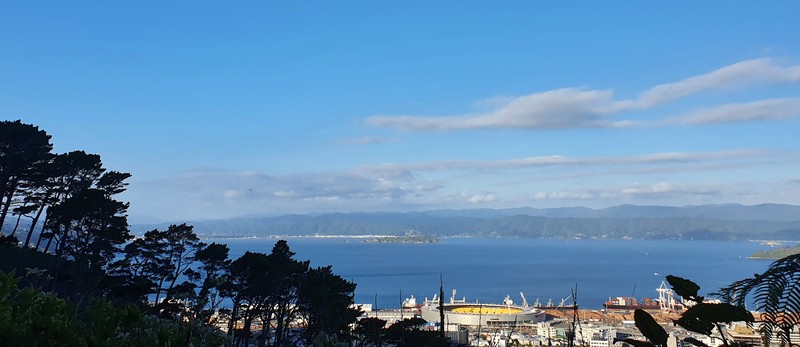
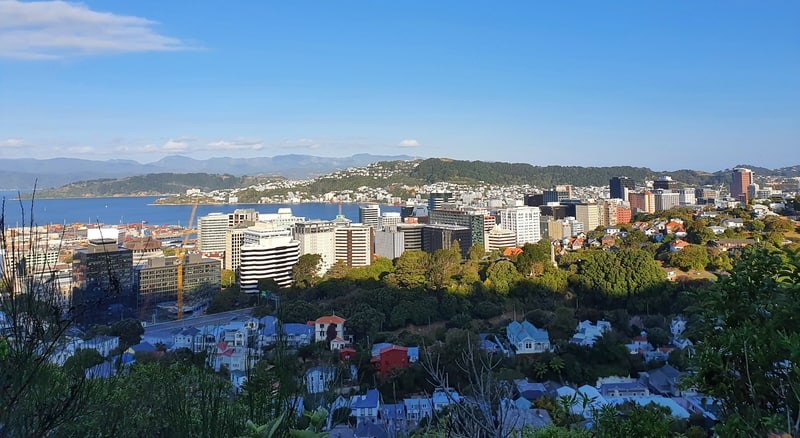
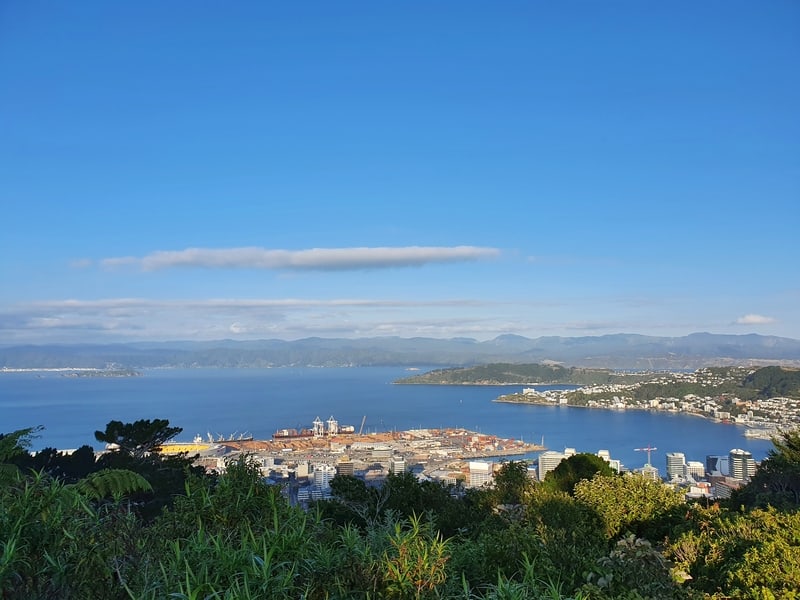
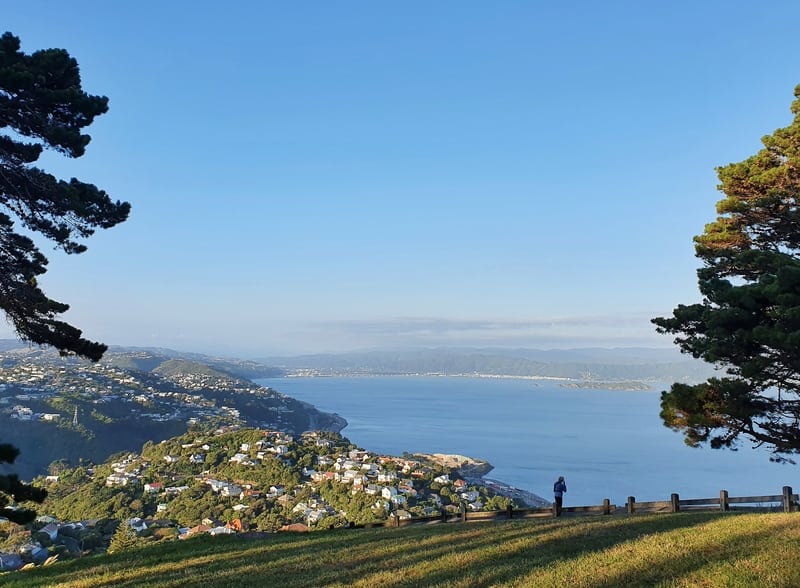
The lookout is awesome, you’ll get some great views of Wellington and it’ll give you chance to figure out where some landmarks are relative to each other (I seemed to have only taken two photos).
You could spend quite some time taking in the views from the lookout. But when you’re ready, it’s time to move on.
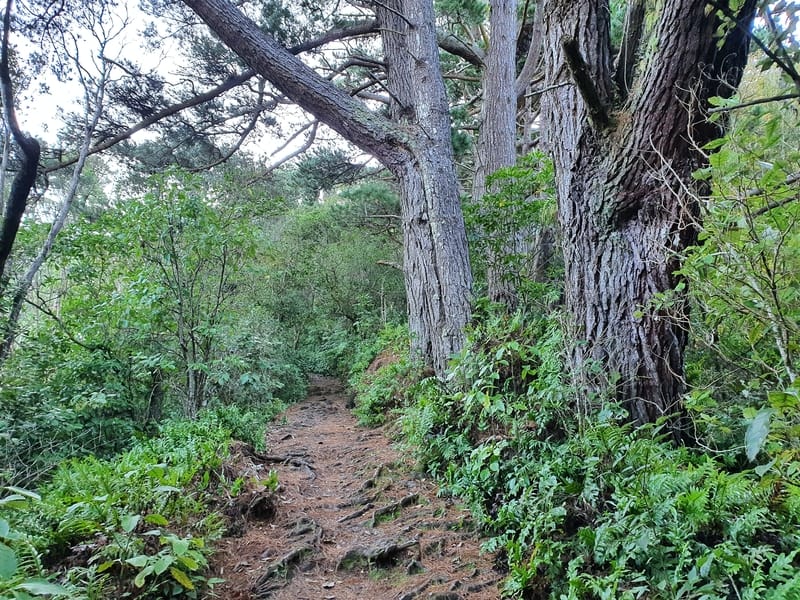
From the lookout, you’ll see a sealed road. This is the Ridgeline Track. It turns into a track soon enough, just follow this north.
The Ridgline Track isn’t on a razor tooth-like ridge, it’s wide open ridgeline that caters to young and old safely.
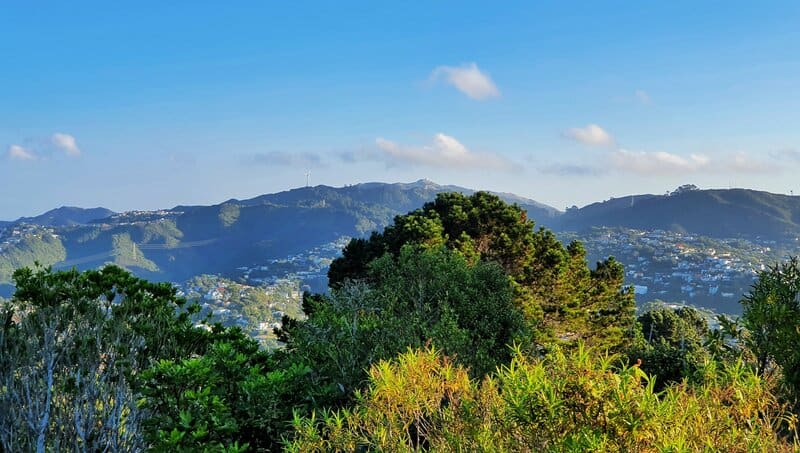
You’ll get views of the ridgeline out towards where the Skyline Walkway and glimpses out towards the harbour again.
This would be a fun place to hang out throw a frisbee around (if it’s not windy).
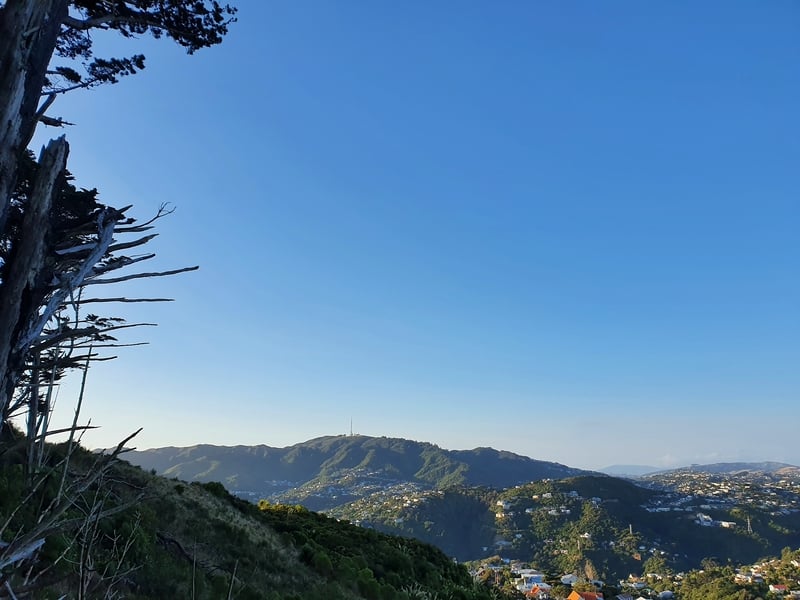
You’ll know when you’re getting to the end of the Ridgeline Track when you reach the small car park here. There’s a cool viewpoint just past the car park looking North, and you’ll spot Mount Kaukau where the big radio tower is.
If you go back to the parking area, you’ll see a dirt path heading towards the harbour (there’s a white sign marked as Northern Walkway). Follow this down the hill and follow where the track naturally takes you.
You’ll see a concrete tennis court, follow the track past this, then turn right at the interesection. This will take you onto the Northern Walkway where you’ll be able to follow the Blue Signs back to where we started.
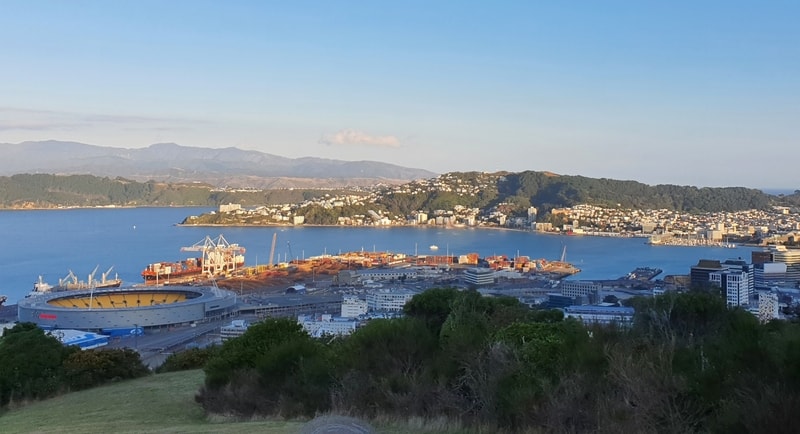
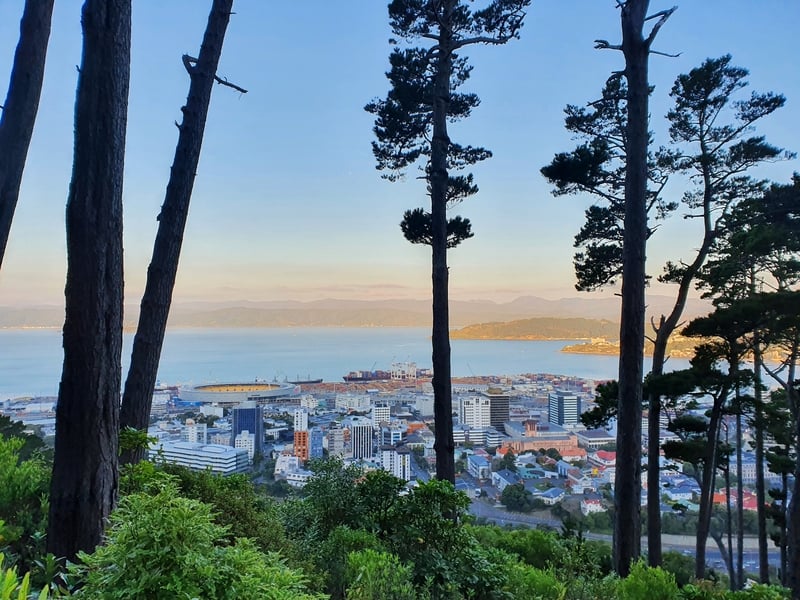
There’s another cool viewpoint along here which gives another perspective of the city. I like how you can see into Sky Stadium.
After the viewpoint, you’ll drop down for a few hundred metres before taking a steady climb on a gentle ascent for another kilometre or so.
I like the walk-through here…for no reason in particular. I think it’s just easy to follow and not heavily used which is nice. You also get a few more views of the city.
The final kilometres is a quick descent back to St Mary Street, but it’s not as steep as the climb up to the Ridgeline Track. And then you’ve completed this loop! Great success.
You’ll be stoked to know at the bottom of St Mary Street, turn left and you’ll see the Sprig and Fern Tavern.
Mount Victoria gets a lot of love for its walk leading to great views over Wellington, but the Te Ahumairangi walking tracks aren’t shabby!
It’s another great example of how great the green belt is for walks around Wellington.
If you got any questions or comments, leave a message below or email jub@churnewzealand.com.
RECOMMENDED READING
16+ Things to do in Wellington
Other things to do in the cool Capital.
Day trips from Wellington
If you’re looking to escape Wellington, there’s some amazing options.
Rating Wellington’s vegan burgers
After a good hike, here are some good eating options.
Hey, it’s Jub here. I’m the guy behind Chur New Zealand, helping you have the best time hiking, trekking, walking…whatever you want to call it…in NZ. I’m based in Queenstown and am always out and about exploring trails, old & new. If you have any questions, reach out.