The Wanaka Skyline Track is a 23km end-to-end hike up and over both Mount Alpha and Mount Roy (you follow Roys Peak Track to start).
This post will give you all the details you need to know about the walking Wanakas Skyline Track.
Before getting started, it’ll be useful to know I’ll be talking about the Skyline Track Wanaka starting from Wanaka Mount Aspiring Road. This means you’ll be going up the biggest climb to start and cruising down the descent.
If your knees don’t like steep drops, this will be the best option for you.
TABLE OF CONTENTS
1. Details About The Skyline Track Wanaka
2. The Wanaka Skyline Track Map
3. How To Get There
4. My Experience On The Skyline Track In Wanaka
DETAILS ABOUT SKYLINE TRACK WANAKA
Fun fact: The manager at the hostel I stayed at told me that before Roy’s Peak became Instagram famous the Wanaka Skyline Track was more popular than the return trip up and down to Roys Peak<.
Quick Note: Some people get them cofused, this has nothing to do with the Rob Roy Glacier Track.
That certainly isn’t the case now, but that doesn’t mean you can’t do the whole skyline. It makes for a great day out, and an out-and-back hike isn’t that fun. Is it?
When1: January 2021
Difficulty2: Medium (in good conditions).
For reference, this is how the track is broken down on the Wild Things website:
- Untracked / Route only: 8%
- Technical Single Track: 5%
- Moderate Single Track: 8%
- Easy Single Track: 35%
- Farm Road / 4WD Track: 40%
- Gravel Road: 4%
Hike Distance3: The Strava information recorded 23.23km. The DOC website states 23km and Google Maps, 22.1km. So let’s go with 23km.
Incline4: Strava recorded 1,611 metres of elevation gain. The majority of this is on the way up to Roys. From there you’ve got a few short climbs of 100-200 metres the rest of the way.
Hike Duration5: It took us 6 hours and 25 minutes to complete the hike. I would estimate our moving time to be about 6 hours once breaks are factored in.
The DOC website states it’ll take 10-11 hours (conservative). So for most people, set aside between 6.5 and 9 hours.
THE WANAKA SKYLINE TRACK MAP
The map above is the GPX file from Strava overlaid on a topo map.
You don’t need a topo map for this route though, it’s marked (or you can at least see where to go). You can see the track marked on Google Maps here. And of course, it’s on Maps.me as well.
HOW TO GET THERE
You’ve got a few different options for transport to/from the Skyline Track Wanaka.
Hitchhiking
Hitchhiking around the Wanaka region is very popular. You can hitchhike both to and from this track easily. To hitchhike to the Roys Peak Track car park, most people stand opposite this spot in Wanaka.
And at the end of the track you can hitchhike from the car park straight back into Wanaka ~10km away.
Car
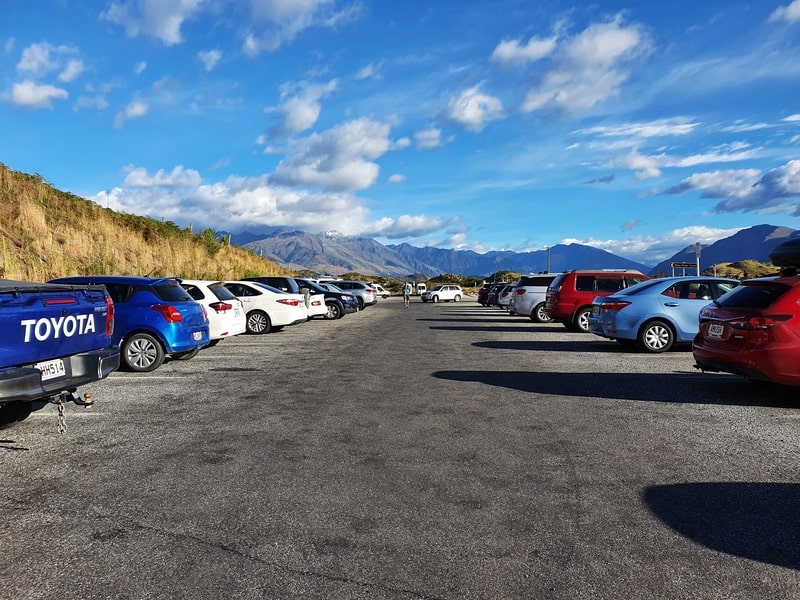
If you’ve got two cars, you can leave a car at both ends. The Roys Peak Track car park can be busy, but if you get there at a reasonable time you’ll find a park alright.
Alternatively, you can drive to Roys Peak, then hitchhike back to your car after you finish.
Walking
If you’ve got heaps of energy, you could walk the 7km to Roys Peak Track car park and the 11km or so back to Wanaka along the Crown Range Road (it’s not a nice walk on the side of the road).
Booking a Transfer
If you want an easy option, you can book a transfer to/from the trailheads with a number of companies. This is particularly good if you’re planning to start early for sunrise.
Here’s a list of companies who do this in a variety of capacities.
I haven’t used any of these services, so can’t make any personal recommendations.
MY EXPERIENCE ON THE SKYLINE TRACK IN WANAKA

I was looking forward to this hike, one of best Wanaka hikes according to the guy at the hostel. I knew there’d be plenty of people on the way to Roys Peak, but after that, people would be few and far between.
A friend and I met at the car park at 8.30 am and were both surprised that there was a $2 track fee. We didn’t have any cash on us, and no doubt lots of people don’t pay the fee (we assume it is voluntary), but we made sure to contribute once he returned to pick up my mate’s van post-hike.
Note: the toilet at the car park is about 50 metres along the track. You can’t miss it.

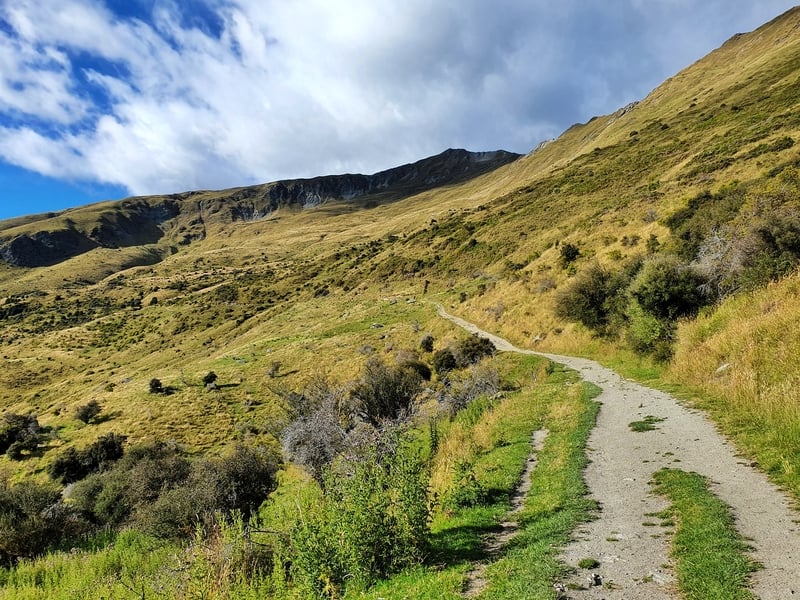
The track doesn’t muck around with any flat sections for a warm-up. You’re straight into the ascent up Mount Roy. And beyond a couple of 100-metre sections that are kind of flat, you’re going to be going uphill for the next 8km.
Given it’s such a popular route to start with, there are no issues with following the trail. There are lots of switchbacks that made the gradient relatively comfortable. Though you’ll see some people trying to take the more direct route, shortcutting the switchbacks. Their calves won’t appreciate that!
We decided to take all the switchbacks as we weren’t in a hurry. If you were short on time, you could shave a few minutes off by taking the direct line.
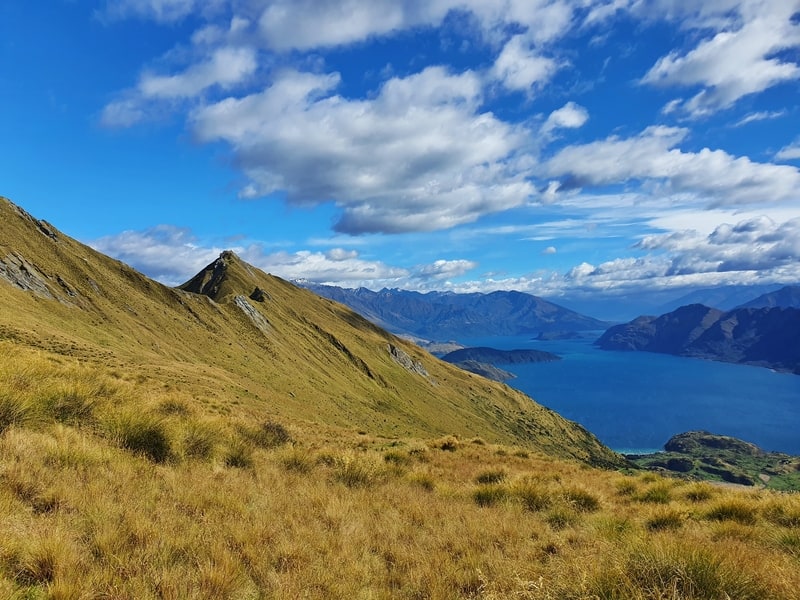
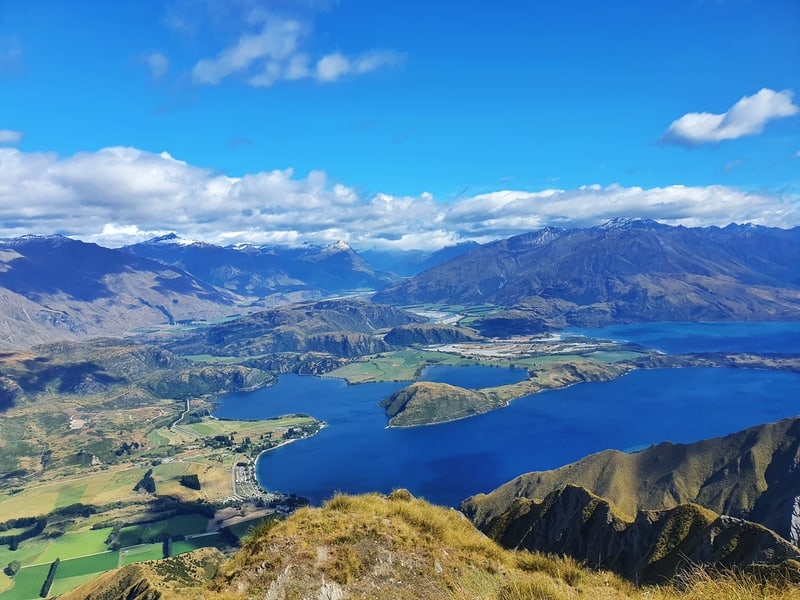
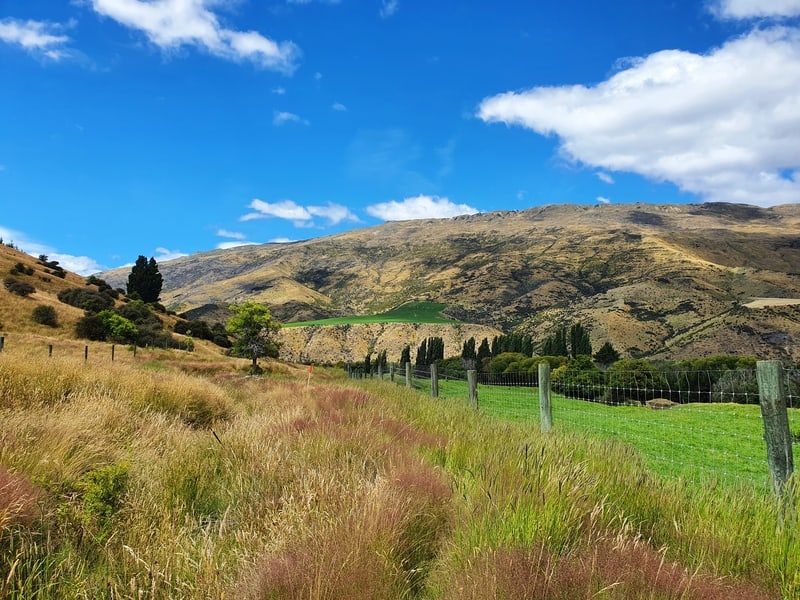
In terms of views, they start right away as you quickly climb up above Lake Wanaka. Don’t worry about taking too many photos in the first few kilometres, the views only get better.
We passed quite a few people on our way up. Most who were wearing way too much clothing (not to say it doesn’t get cold up the mountain but jeans aren’t exactly suitable for the walk).
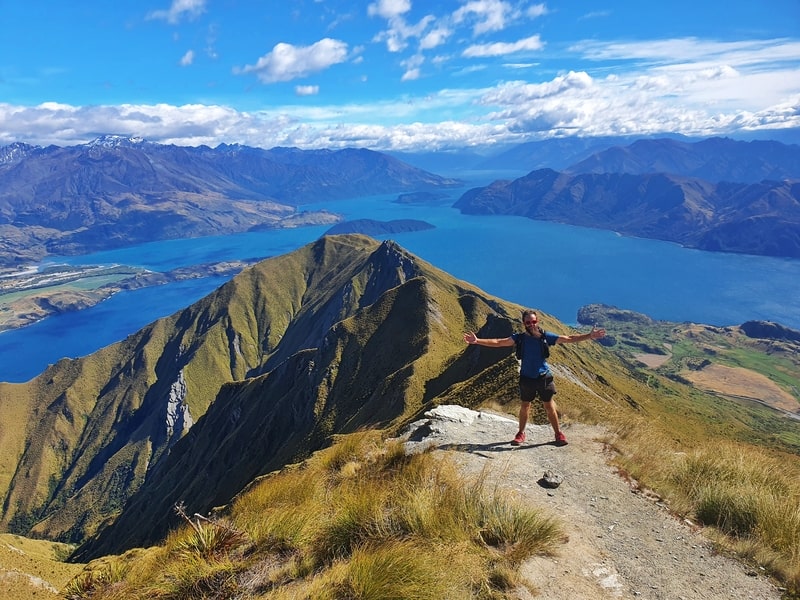
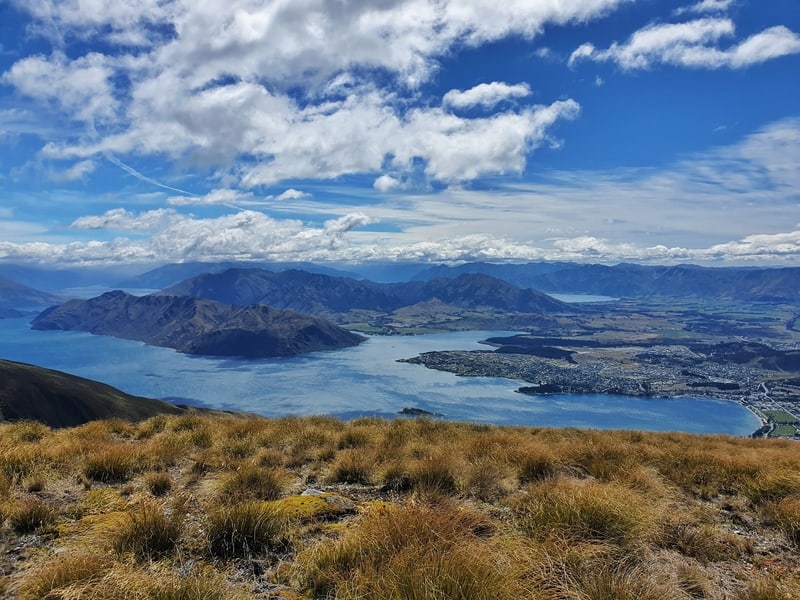
After 1 hour and 35 minutes, we reached the world-famous viewpoint. You can see why it’s popular, the little peninsula is amazingly placed and the path leading to ‘the spot’ framed by the lake works a treat.
But there’s no way I’d be queueing for 30 minutes plus to get a photo. It was annoying enough waiting for a few minutes so I decided to skip the classic tourist photo.
Note: There’s a toilet at the viewpoint.
We spent ~10 minutes at the viewpoint, watching, drinking, and eating before continuing on to the summit of Mount Roy.
The views continue to be amazing, with more photo opportunities available (potentially better – such as the photo at the top of this post), but it wasn’t until the summit until you really get to appreciate the full glory of Glendhu Bay.
The summit (1,578 metres above sea level) doesn’t give much information, but it’s a good spot for a break. There are a few solar panels there that’ll provide shade if need be. Though the sheep like the shade too so you may need to kick them out of there 😉
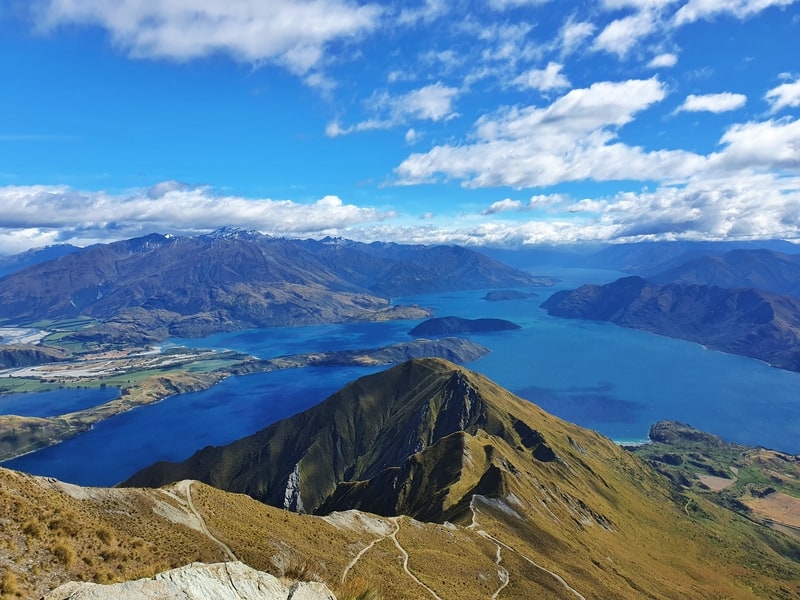
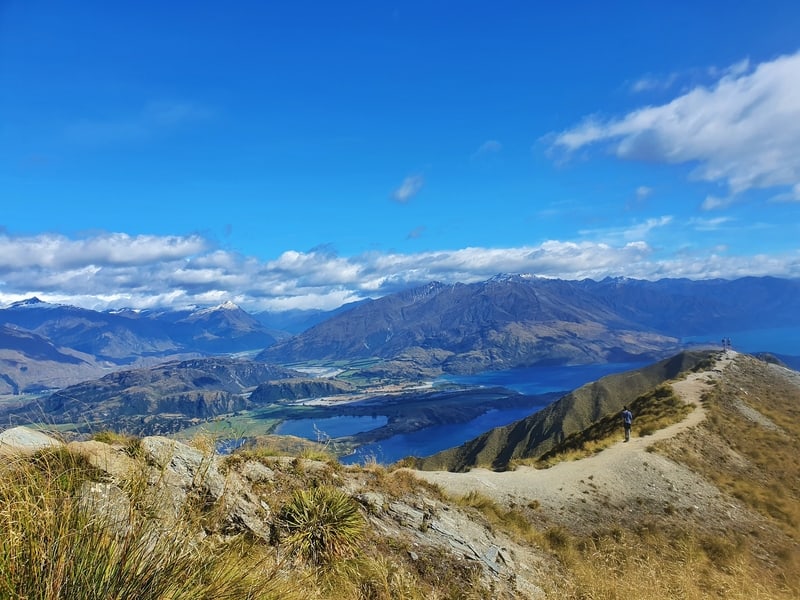
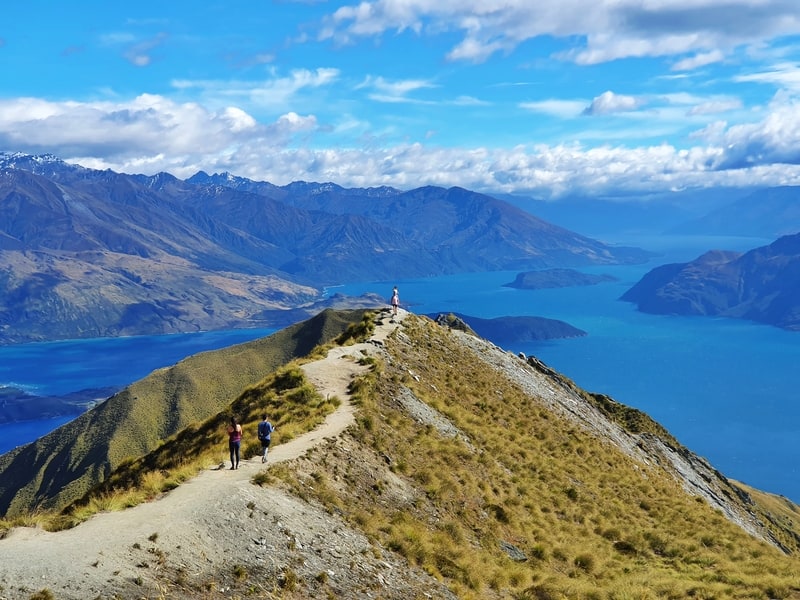
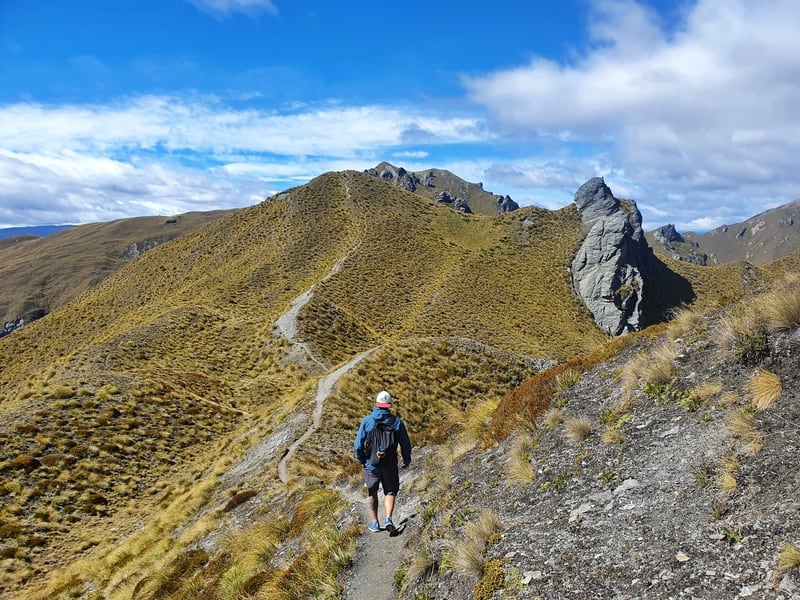
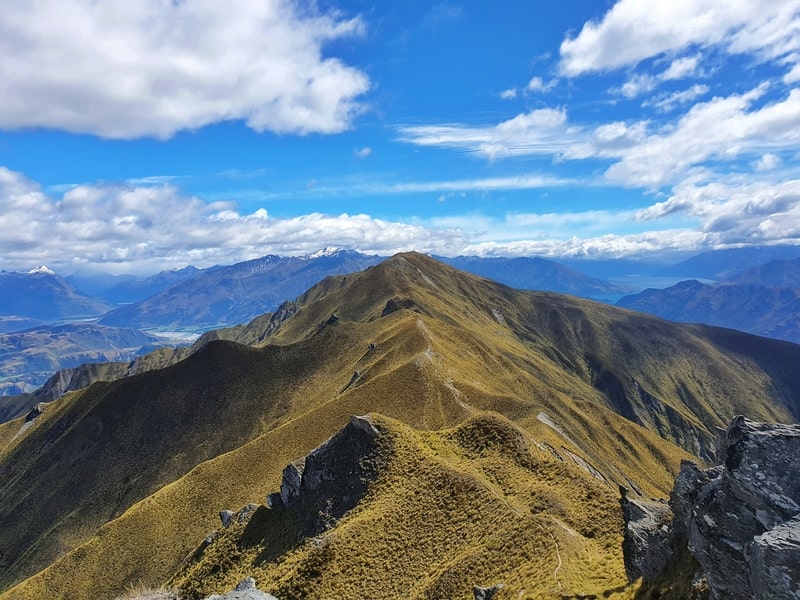
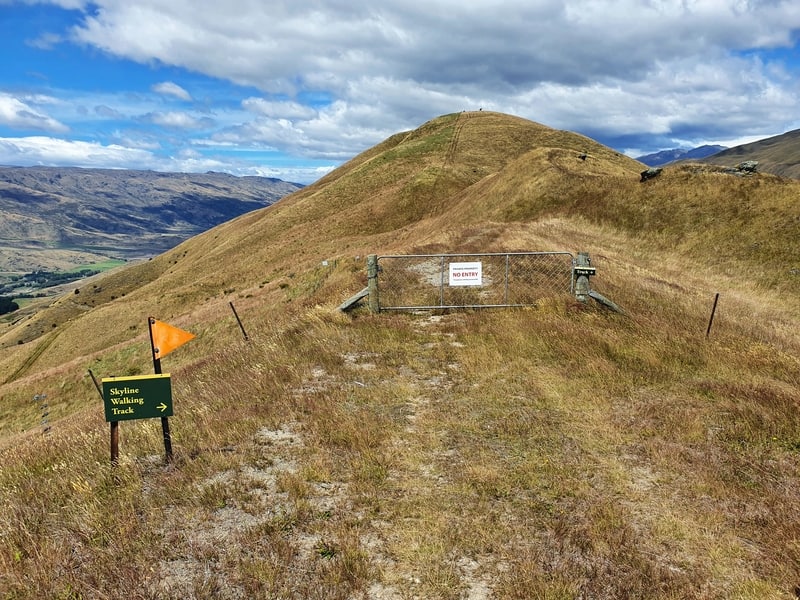
Now you’ve got a fun 2.4km to reach the next peak, Mount Alpha. You’ll descend a steep little section down Mount Roy before following the ridgeline between the two peaks.
The terrain along here isn’t as nice as what you’ve walked on so far but isn’t overly difficult barring a couple of sections through the large boulders (see photo).
That’s why some locals will say this track isn’t suitable in high winds/rain/snow. If you’re an experienced hiker you should be okay, there are orange poles leading the way, but people new to hiking should think twice.
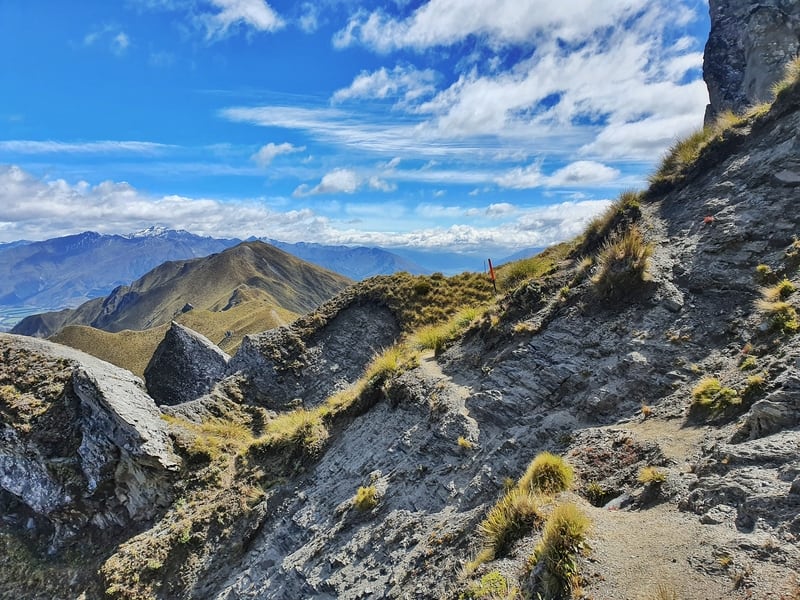

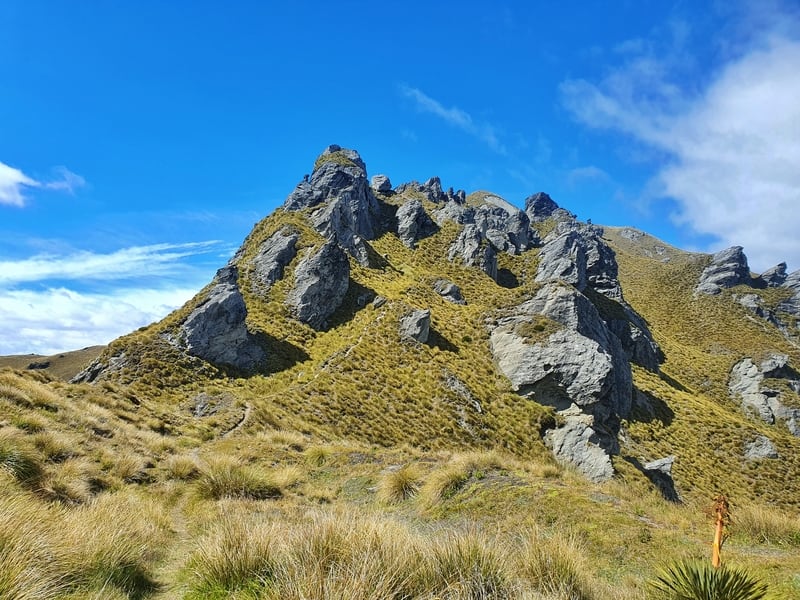
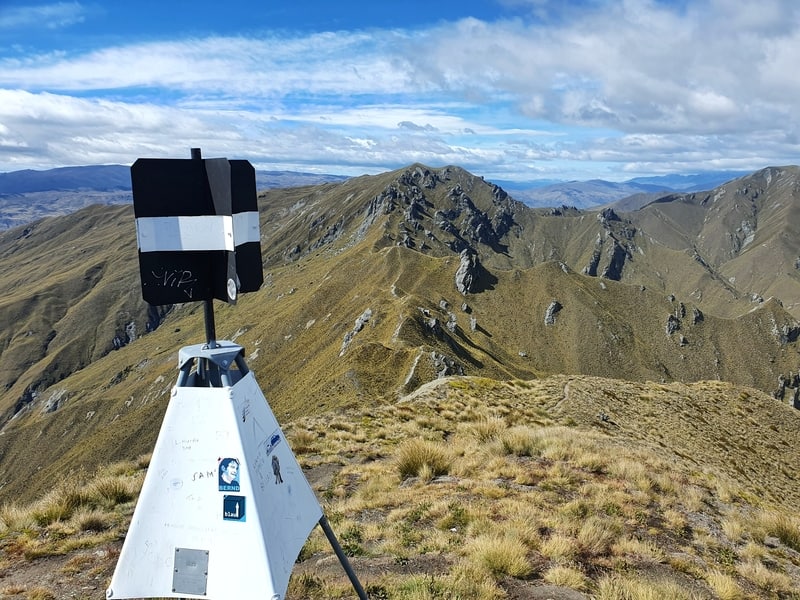
Walking through the section of large boulders and rocks is awesome. They’ve been eroded over millions of years, and have left behind some awesome shapes. They also make for more amazing photos.
You’ll know when you get to Mount Alpha when you see a lone pole at the top of the highest point you see. It’s pretty underwhelming, they could have at least put a trig here?
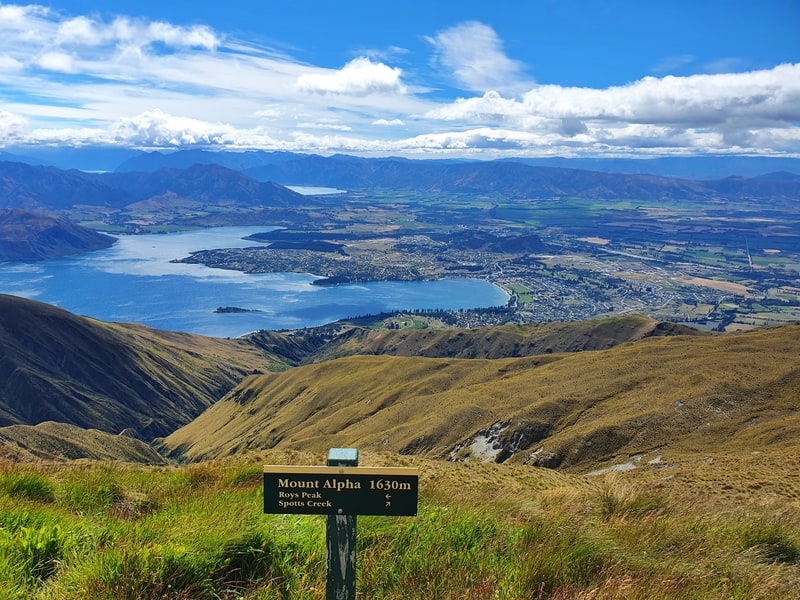
The Mount Alpha summit is 1,630 metres above sea level, your highest point on the hike.
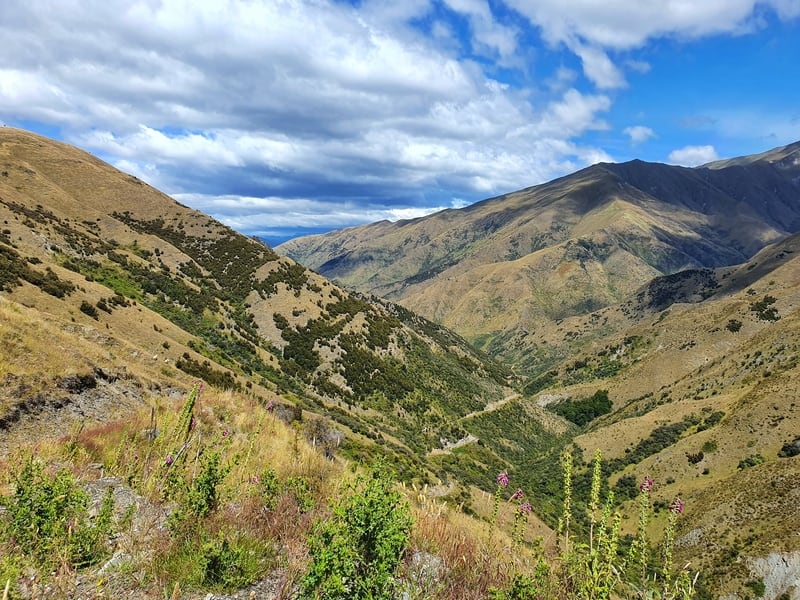
From here you can see your next few kilometres of hiking as you begin the descent for the next 13km (you’ve gone about 10km to this point) with epic views, Mount Iron will look small from here.

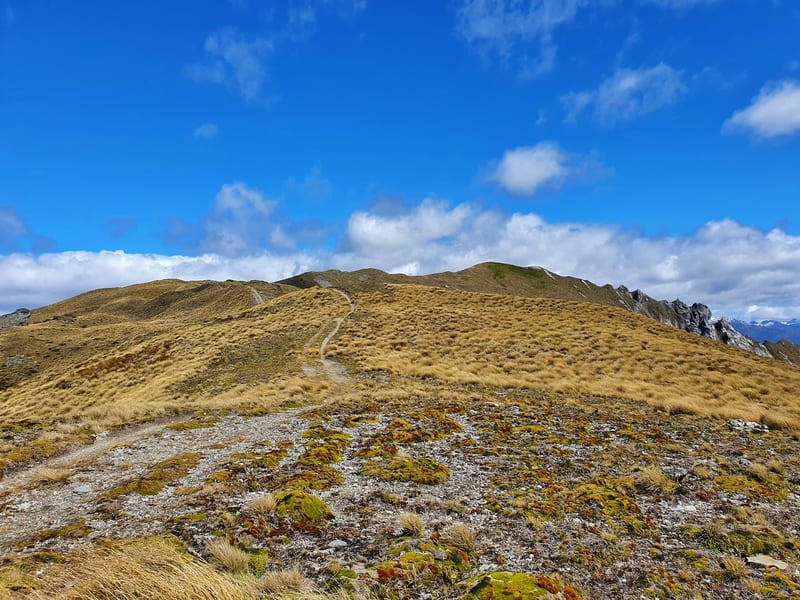
The start of the descent takes you along the ridge (kind of) running parallel to Lake Wanaka.
Once again, the track is easy to follow. At any point where you can potentially take the wrong track, you’ll be pointed in the direction. Thanks, signs! Then it turns into a little bit more of a technical descent at about the 16km mark with a not so well maintained 4WD track.
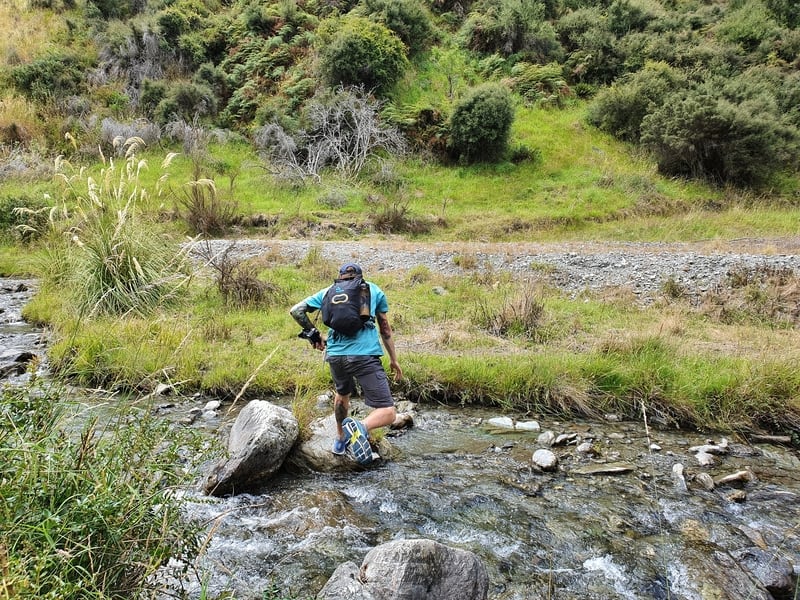
This continues on for a few kilometres, and you’ll need to cross the river twice once you get to the bottom of the gully (you’ll lose phone reception here for a while). I managed to hop the rocks across the river without getting my feet wet, but my mate opted to take his shoes off and walk through.
The last few kilometres of the track took us through some farmland, and the pole markers were useful to ensure we were on the right track. There’s a couple of little boggy spots, but nothing too crazy.
And then you can hear the cars driving along the Crown Range Road. We counted down the steps. I must say the last couple of kms weren’t overly fun, but that’s okay.
The Skyline Track Wanaka is amazing. Yes, you get to go to Wanaka’s most famous viewpoint, but there’s a whole lot more to see when you continue hiking along the track.
If you’ve walked the Skyline track, or have any questions, feel free to email jub@churnewzealand.com or leave a comment below.
RECOMMENDED READING
200+ Things to do in New Zealand
Amazing things to do in New Zealand
The Grandview Mountain Track
Another awesome walk close to Wanaka to put on your list
Amazing Hikes on the South Island
This is going to make your list get longer and longer 😉
Hey, it’s Jub here. I’m the guy behind Chur New Zealand, helping you have the best time hiking, trekking, walking…whatever you want to call it…in NZ. I’m based in Queenstown and am always out and about exploring trails, old & new. If you have any questions, reach out.
Wow, what a comprehensive, detailed guide! I would love to do this hike in December. Just one question: Do you think the views would be much nicer if I start the hike from Cardrona Valley Road, onto the Skyline Track towards Mt Alpha, then end at Roys Peak? i.e. South to North? Or are the views stunning in any direction? I want to start this hike early, about 3-4am, to capture the sunrise — not sure if hiking in the dark from Cardrona Valley Road is a good idea (I know many people hike at night up towards Roys Peak with no problem).
Thanks!
Hey Dening, thanks for the awesome comment! The views are stunning in either direction, but if you’re planning to go for sunrise I’d start at the Roys Peak end. In the dark coming up from the Cardrona Valley side is doable, but the terrain is more technical which can make it slow going…would hate for you to miss out on the epic sunrise views.
If you were to leave during daylight, the views are epic both ways, but I’d probably lean towards starting from Cardrona Valley.
Have an awesome hike 🙂 I can’t wait for the summer warmth haha.
Walked yesterday. Those small climbs around the rocks to Mt Alpha burnt the lungs a bit! Enjoyed the ridgeline between Roy and Alpha the most. Didn’t see a single sole after Mt Roy. Beer at the Cardrona pub afterwards was well earnt. Thanks for the content bro!
Hey Cam,
Stoked you enjoyed the hike. Nothing wrong with getting the lungs burning a bit 😉 Always funny how you don’t need to venture that much further and all the humans disappear….always worth it.
Cheers,
Jub
Jub, appreciate the effort you’ve gone to to document all of this. So much more helpful than DOC. Keep up the exploring. Cheers Gary
Hey Gary,
Cheers for the kind words, much appreciated. Enjoy the rest of ya summer!
Cheers
Jub