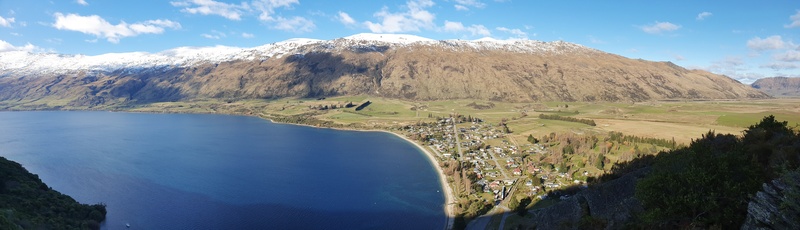
The Shirt Tail Track is an awesome short walk in Kingston.
It’s less than 1km each way to the viewpoint which has an amazing view over Kingston and its surroundings. Don’t go in your jandals though, it gets tough at the end 😉
And if you’re a super keen hiker who loves a challenge, there’s an additional route you can take which is tough work. I’ll give you the details about that towards the end of the post. You won’t find this written about in many spots.
Note: Some people refer to the Shirt Tail Track as the Shirtfront Track. They’re the same.
Let’s get into it this walk, one of the best walks in Kingston.
TABLE OF CONTENTS
1. Shirt Tail Track Details
2. Shirt Tail Track Map
3. How To Get To The Trailhead
4. My Shirt Tail Track Experience
5. The Brutal Addition You Can Do
1. SHIRT TAIL TRACK DETAILS
How long is the Shirt Tail Track?
My Strava measured about 800 metres to the viewpoint which is consistent with other trip reports. That makes for a 1.6km return trip.
How much incline is there to the Shirt Tail Track Viewpoint?
My Strava recorded right on about 200 metres of elevation gain. Over 800 metres that’s a steep incline, especially given the majority of that is in the last part of the hike to the viewpoint.
How long does the Shirt Tail Track take?
The DOC sign at the trailhead says it’s a 2-hour return hike. That’s going to be the maximum time for pretty much everyone. I was at the top in a bit under 25 minutes. For most people, I’d put aside 90 minutes to do the hike which will include some time to hang out at the viewpoint.
How hard is the Shirt Tail Track?
The majority of the track is easy. It’s the section after the waterfall that is tough. It’s less than 200 metres long, but is steep and you’ll likely need to scramble up with your hands at times. The descent back down isn’t any easier.
2. SHIRT TAIL TRACK MAP
The map below is a screenshot from the Maps.me, a free map app you can use offline. You can also find the track on Google Maps here.
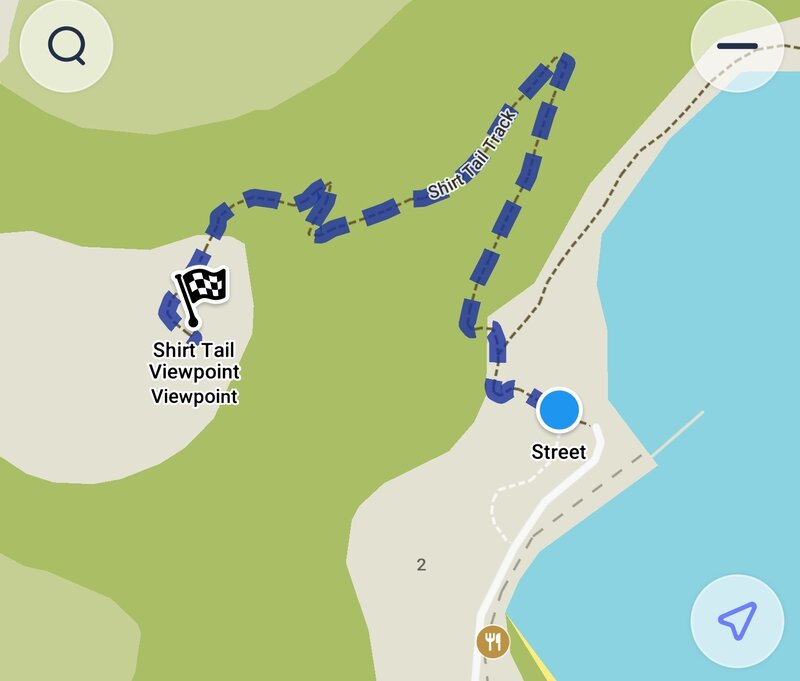
Note: If you decide to do the additional section I mention below, you should definitely have this NZ Topo Map app downloaded. It’s one of the must have hiking apps for NZ.
3. HOW TO GET TO THE TRAILHEAD
The trailhead is here on Google Maps which is shared with start of the Te Kere Haka walk.
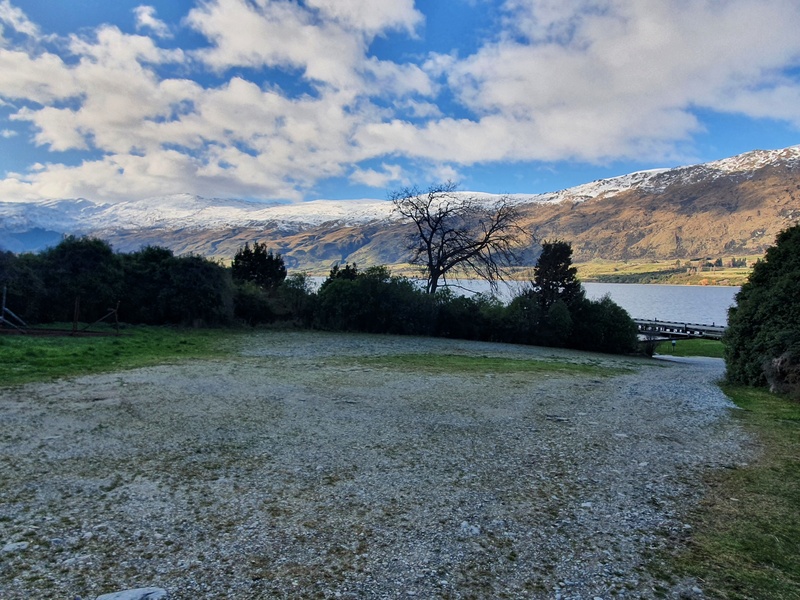
The trailhead is a short distance from the middle of Kingston, making it an easy walk to get to (it’s less than 300 metres from The Kingston Flyer Cafe & Restaurant).
There’s a large car park so if you’re on a day trip from Queenstown or passing through Kingston, there’s no need to worry about finding a park.
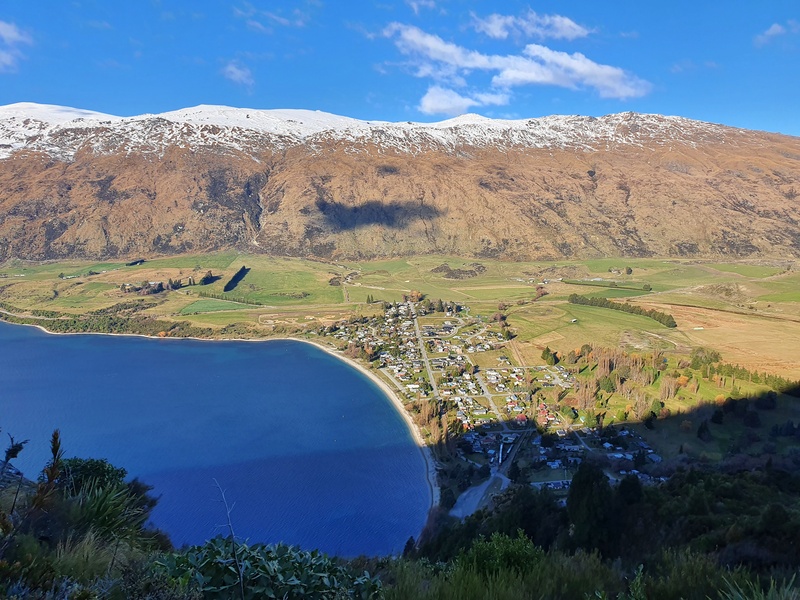
4. MY SHIRT TAIL TRACK EXPERIENCE
I haven’t heard much about the Shirt Tail Track as Kingston is often forgotten about by Queenstown locals. But if you’re looking for an awesome viewpoint, this is the walk to do.
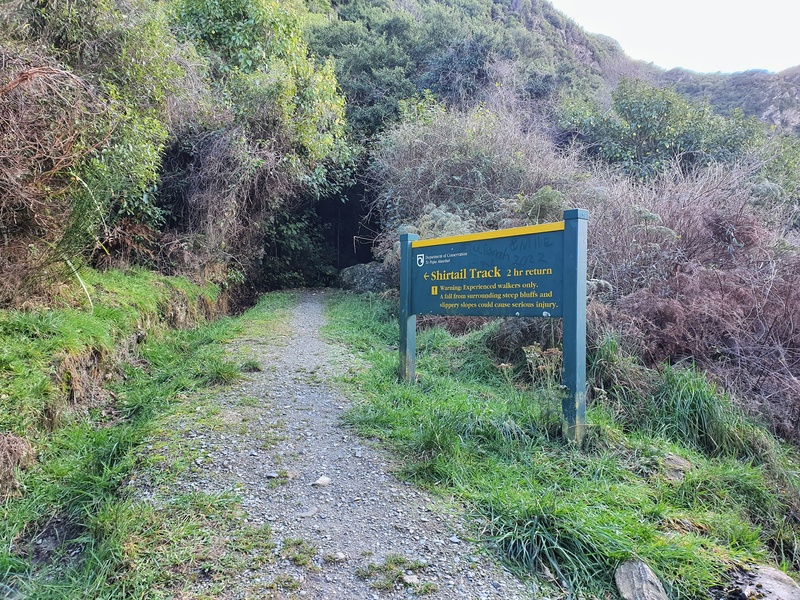
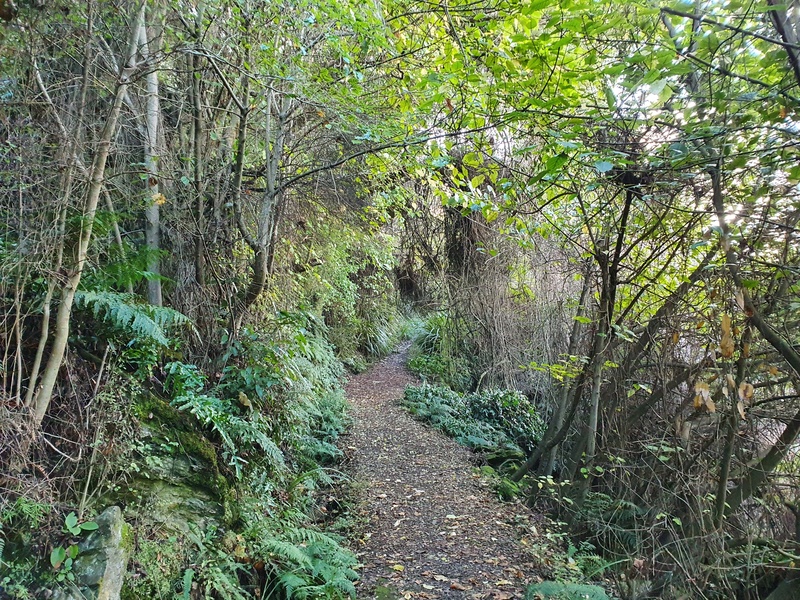
From the car park you head straight into the bush. The trail is maintained at the start, but it’s not overly manicured. You’ll veer left at the big DOC sign which you can’t miss.
Walking in the bush is nice! It’s not often you get a chance to do this when walking/hiking in Otago.
The incline is noticeable through this section, but it’s nothing too bad and is nothing on what’s to come! There’s also a couple of glimpses of the view along the way.
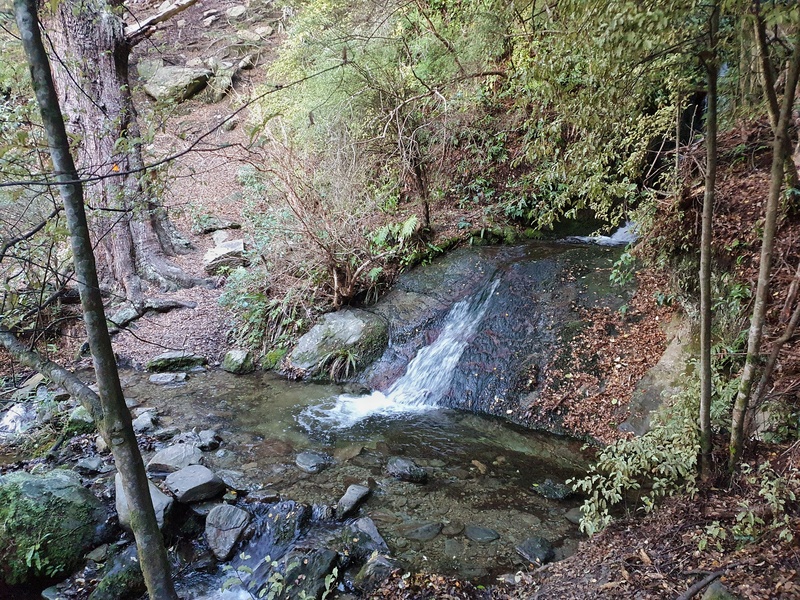
After about 600 metres in, you’ll reach a small waterfall you need to cross. Luckily there’s some well placed rocks in the stream that let’s you avoid getting your feet wet.
And then the climb begins. You’re in a beech forest now which is lovely. And their roots will help you get up the hill.
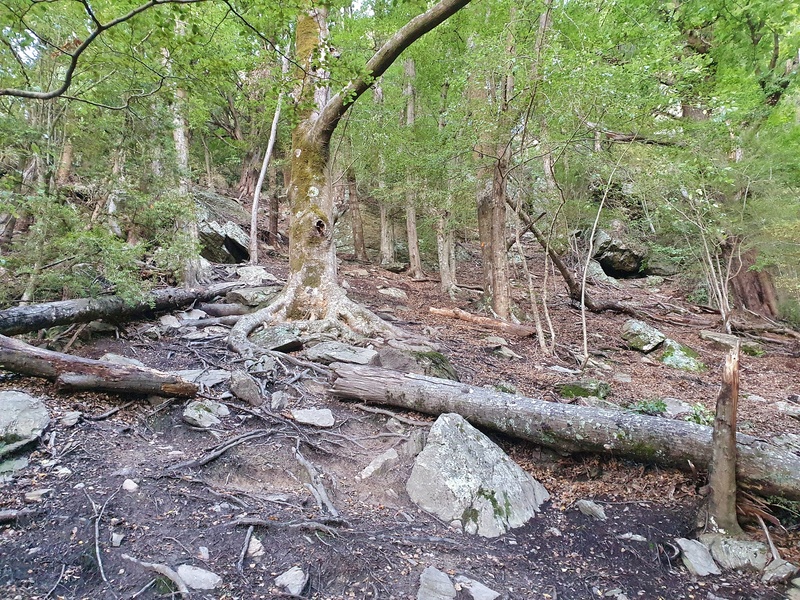
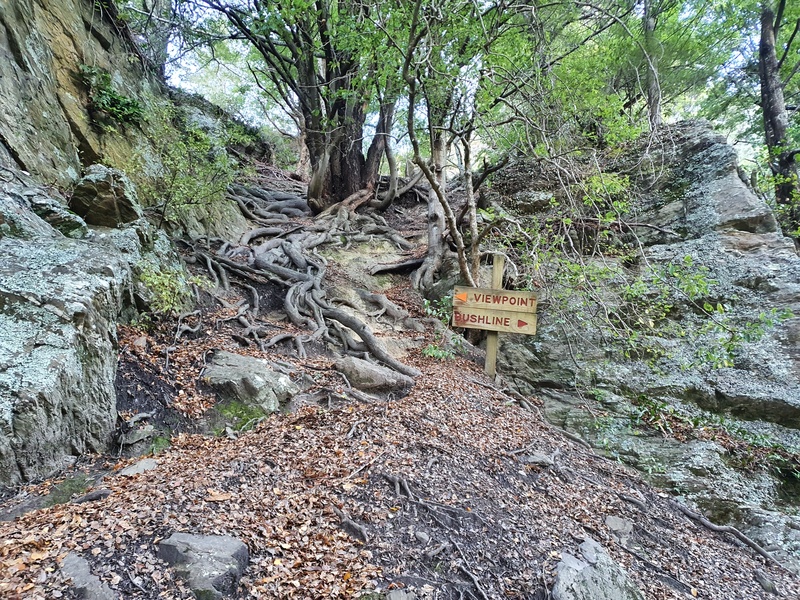
You’ll see some orange triangles on some of the trees, but I still found it hard to know exactly where I was going as the track kind of fades away. That might just be me. But just keep going up.
In the distance you’ll see a wooden sign pointing left to the viewpoint and right to the bushline (I’ll talk about this in the next section). One you’re at the wooden sign you’re not far from the viewpoint.
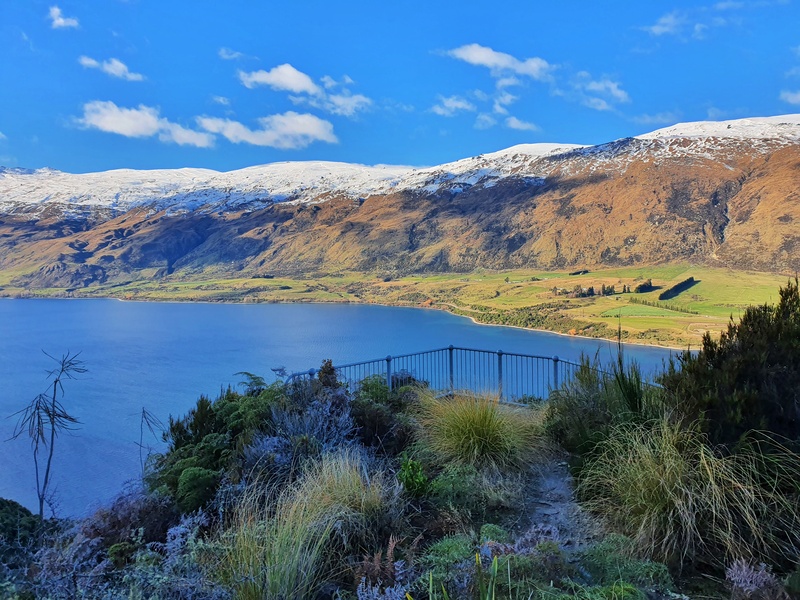
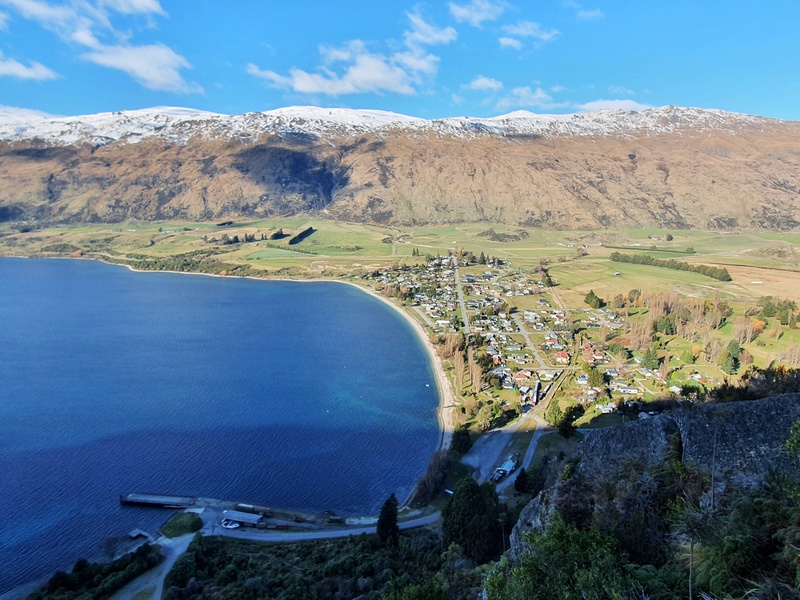
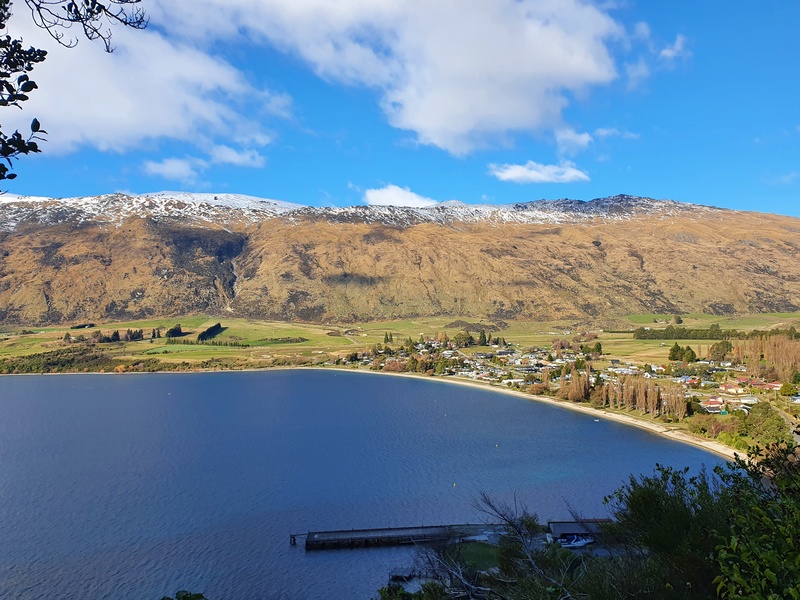
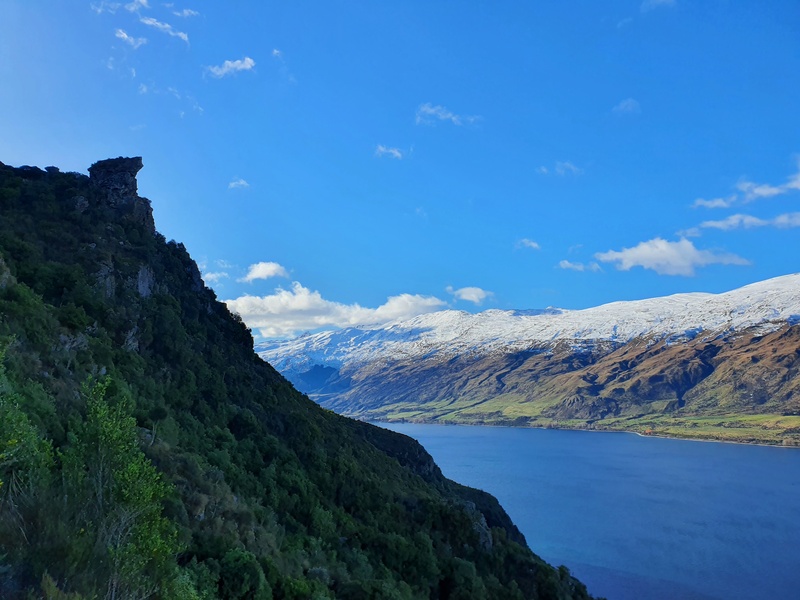
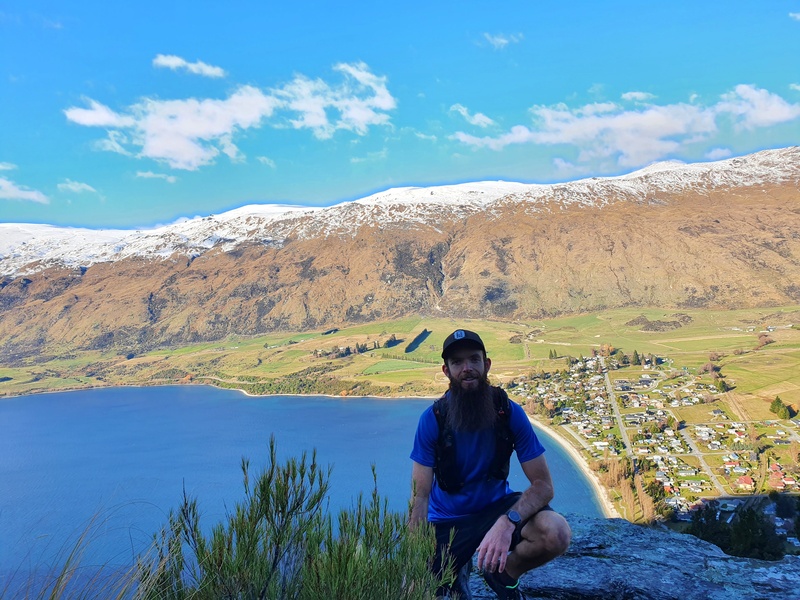
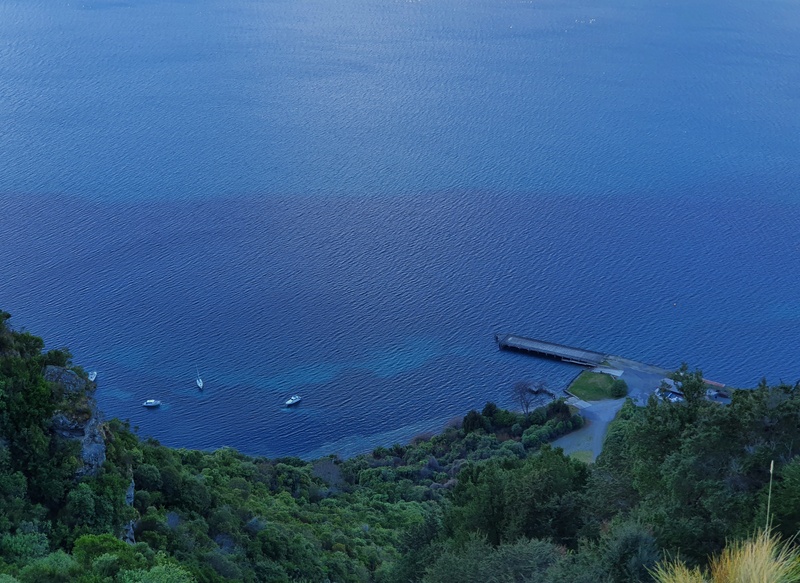
You’ll emerge from the bush and you’ll see the viewing platform 10 metres in front of you.
Wowee. What a view. Enjoy it, you earned it.
The return walk is the way you came. The descent down to the little waterfall won’t be pretty, but scramble down as best you can.
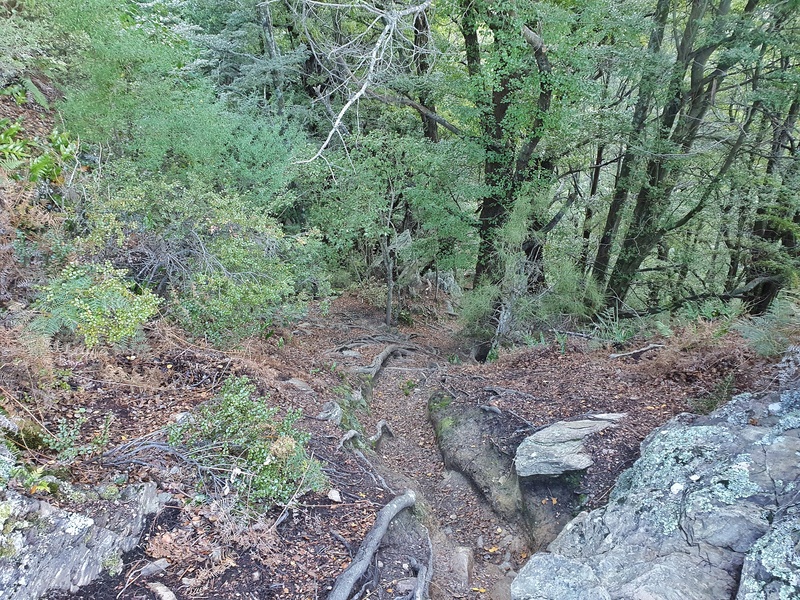
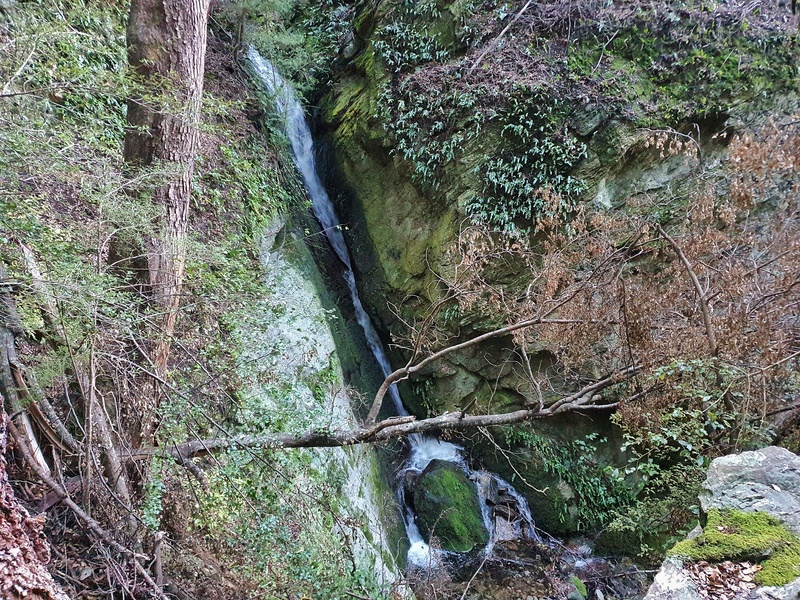
If you want, follow the bushline arrow for 50 metres or so and you’ll get to see another waterfall.
Before you know it you’ll be rolling out into the car park ready for your next NZ adventure.
5. THE BRUTAL ADDITION YOU CAN DO
I was too curious!
The wooden sign said bushline, but I’ve never heard of anyone doing this route and it’s not mentioned on the Department of COnservation site at all. I decided to follow the track and see what happens.
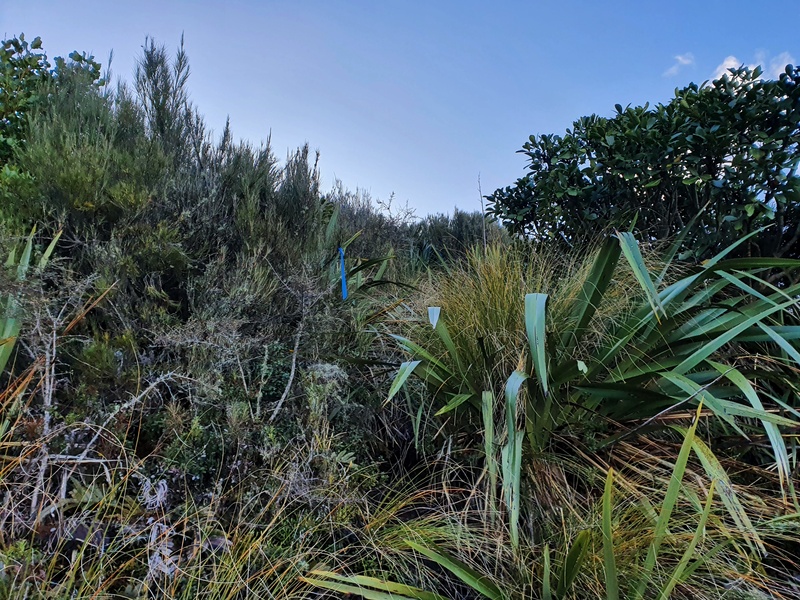
Following the blue ties on the trees, I was excited straight away as I crossed in front of the other waterfall and scrambled around the side of a massive boulder. The blue ties were frequent which is helpful. There’s a trail but it’s not super obvious.
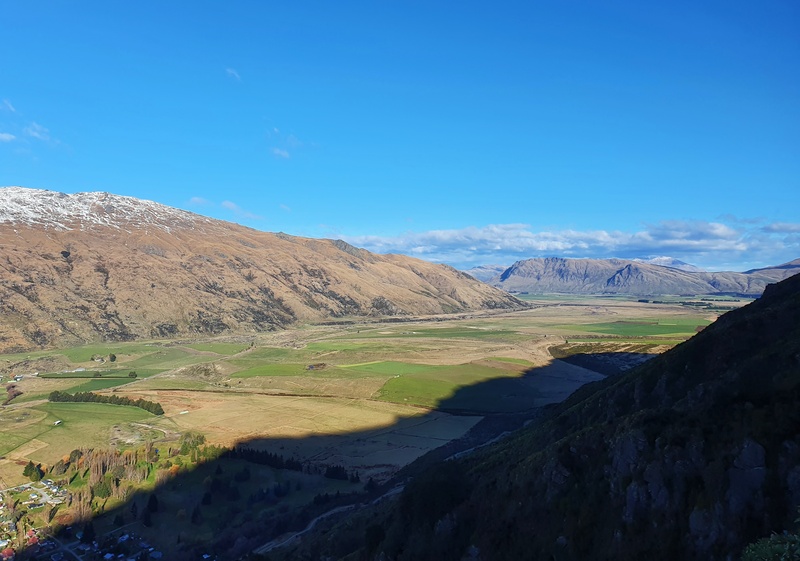
The trail is all up and I had no idea where the trail was going to end. But the views over Kingston continued to be awesome and the views out either side continued to open up. Some of the rock formations you pass would make for the perfect Instagram photo.
After about 700 metres of hiking since the sign the last of the blue ties was found. There didn’t seem to be any reason they stopped here, but the view was epic. If you’re interested, the total walk distance to the last blue tie was about 1.6km one way (via the lookout) and had about 450 metres of elevation gain.
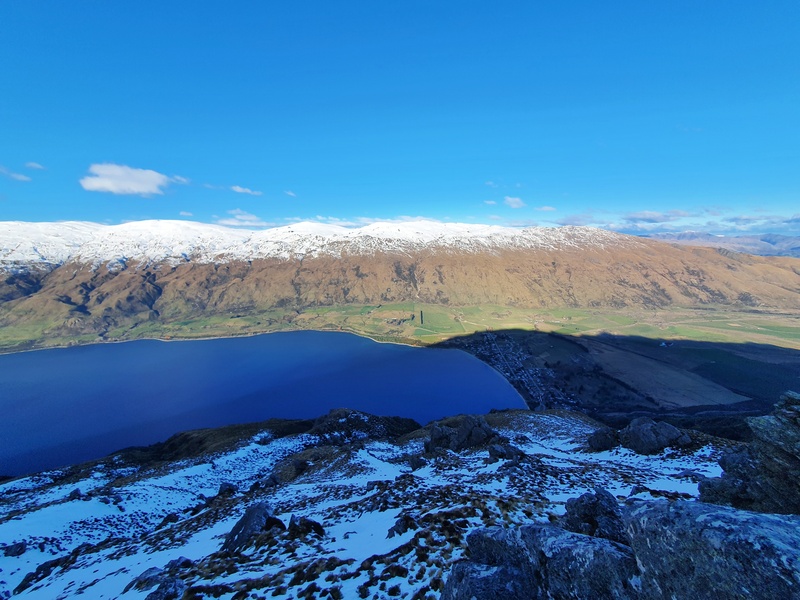
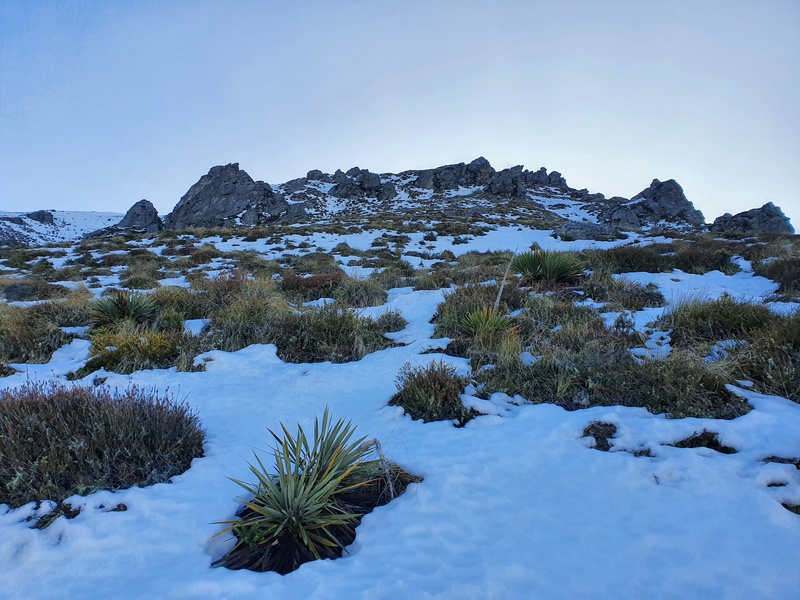
From here you can turn around to head back…but I decided to keep going up into the snow. There wasn’t much snow but I was still prepared to turn back if need be.
The goal was to reach the 4WD track that leads to Mount Dick, then go back to Kingston via the 4WD Track. It’s longer, but much easier terrain.
You’ll need to pick your own line if you keep going up as there’s no blue ties to follow. There are some rocky sections which looked a bit too steep for my liking, but there was always an obvious alternative route to take. The views on this whole hike were awesome.
If you want, here’s my GPX file from the Shirt Tail Track trailhead to the 4WD Track. Depending on where you intersect with the 4WD track, you can expect around about a 10km hike back own to Kingston.
In 3.1km there was 1100 metres of elevation gain. Huuuge. It took me 2 hours and 28 minutes to reach the 4wd track which involved a few short breaks.
The Shirt Tail Track is a short, challenging hike to an awesome viewpoint. It’s like the Tiki Trail in Queenstown, but half the distance. And it’s cool how there’s the track up to the bushline for those who want a tough challenge.
If you’ve got any questions about this walk, let me know in the comments below or email jub@churnewzealand.com.

Hey, it’s Jub here. I’m the guy behind Chur New Zealand, helping you have the best time hiking, trekking, walking…whatever you want to call it…in NZ. I’m based in Queenstown and am always out and about exploring trails, old & new. If you have any questions, reach out.
Just thought I’d comment and say that after stumbling across your blog post I decided to do this walk. Good grief- talk about steep! Climbing and scrambling, not walking for sure. There was no way I was even going to try going back down the way I came up. Absolutely loved it though, the views were incredible and still a wee bit of snow on the tops although it was a beautiful sunny day for me. For anyone thinking of doing it- It took me 2 hours to get to the top, then another 2 to follow the 4wd track down the ridge and the cycle track into Kingston. So 4 hours total.
Hey Nikki,
Thanks for your trip report! So steep aye 😀 But sounds like you made good time, and the views are 10/10 worth it.
Enjoy your next adventure.
Cheers,
Jub