The Sharks Tooth Peak Track is an advanced hike, with a steady ascent up to the 2096 metre summit.
There are a few hikes with a similar name, but this Sharks Tooth we’re talking about is the hike in Mount Aspiring National Park starting from the Raspberry Flat Car Park.
This post will give you all the details you need to know about hiking Shark’s Tooth Peak in Mount Aspiring National Park.
TABLE OF CONTENTS
1. Sharks Tooth Peak Details & FAQs
2. Sharks Tooth Peak Track Map (& GPX file)
3. How To Get To The Trailhead
4. My Sharks Tooth Peak Experience
1. SHARKS TOOTH PEAK DETAILS & FAQ’S
How hard is the hike?
This is a short and sharp hike that’s not for beginners. If you’ve got a blue sky day you can follow the ridgelines easily enough, but there are various points of exposure and a couple of points you’ll need to figure out the best route to take.
How long is the hike?
My Strava recording came in at 9.83km. This will vary slightly depending on your exact route/tracking method, but it should always be in the 9-11km region if you follow the route/ridges we took.
Either way, it’s relatively short but the incline and terrain are what make this a big day out.
What is the Sharks Tooth Peak elevation profile?
Here’s the elevation profile from my Strava data:
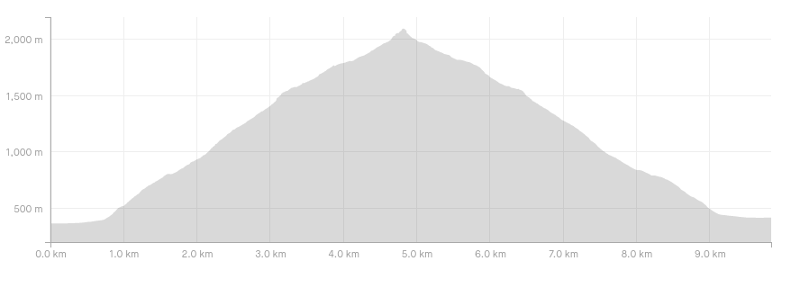
Raspberry Flat Carpark is at 371 metres above sea level and the summit is at 2096 metres, for a difference of 1725 metres. My recording came in with 1,797 metres of elevation gain which is going to be pretty accurate as there’s little flat, let alone descents on the way to the peak.
How long does the hike take?
How long is a piece of string? Yea, it’s that kind of hike. We made it in 6 hours and 30 minutes total. This was with three 15 minute breaks (one on the way up, at the summit, and on the way down) along with some other short breaks to eat snowberries, take photos and whatnot.
From reading other trip reports, this does seem to be on the quicker side with some people taking closer to 10 hours.
WARNINGS
- This is not a marked DOC track so you’ll need to have some nav skills.
- I did this hike in late summer when snow wasn’t an issue. There’ll come a time when you’ll need to be an experienced hiker/climber with an ice axe and crampons to survive over winter through to early summer…you’ll know if you’ve got the skills to do this safely.
2. SHARKS TOOTH PEAK TRACK MAP (& GPX FILE)
Clicking the image below will open it in a new window.
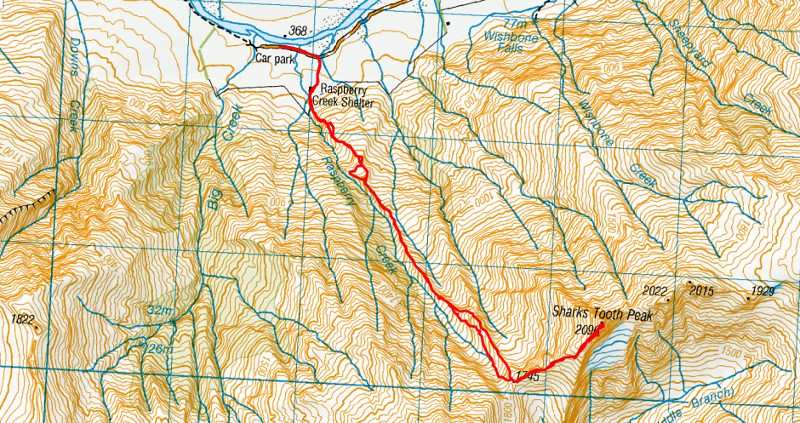
Above is the GPX file overlaid on a topo map which is helpful as the route isn’t marked on the topo map.
Here’s the GPX file for Shark’s Tooth Peak.
You won’t find this route on Google Maps or Maps.me so it’s best if you’ve downloaded a good topo app.
Read why I think NZTopoS is the best topo map app in NZ.
3. HOW TO GET TO THE TRAILHEAD
The start of this hike is from Raspberry Flat Carpark, 52km from Wanaka.
This car park is the start of many of the famous hikes in Mount Aspiring National Park like the Rob Roy Glacier Track, Liverpool Hut, and Aspiring Hut.
The easiest way to get here is by car which takes about an hour from Wanaka. Do keep in mind, the road after Treble Cone is a gravel road with a few fords to cross. If it’s been raining recently, a car with a low wheelbase/no 4WD isn’t going to be suitable to get here.
You could book a shuttle there with the likes of KT Taxis but do check the price. It’s also worth giving the local DOC office a call to see what other providers there are.
We did manage to hitchhike from Wanaka to Raspberry Creek which is pretty easy as there’s minimal places to go once you’re past Glendhu Bay. Just make sure you get back down early enough so you don’t miss a ride back out…or bring a tent as a back up if you really need too.
RELATED READ: HITCHHIKING IN NEW ZEALAND
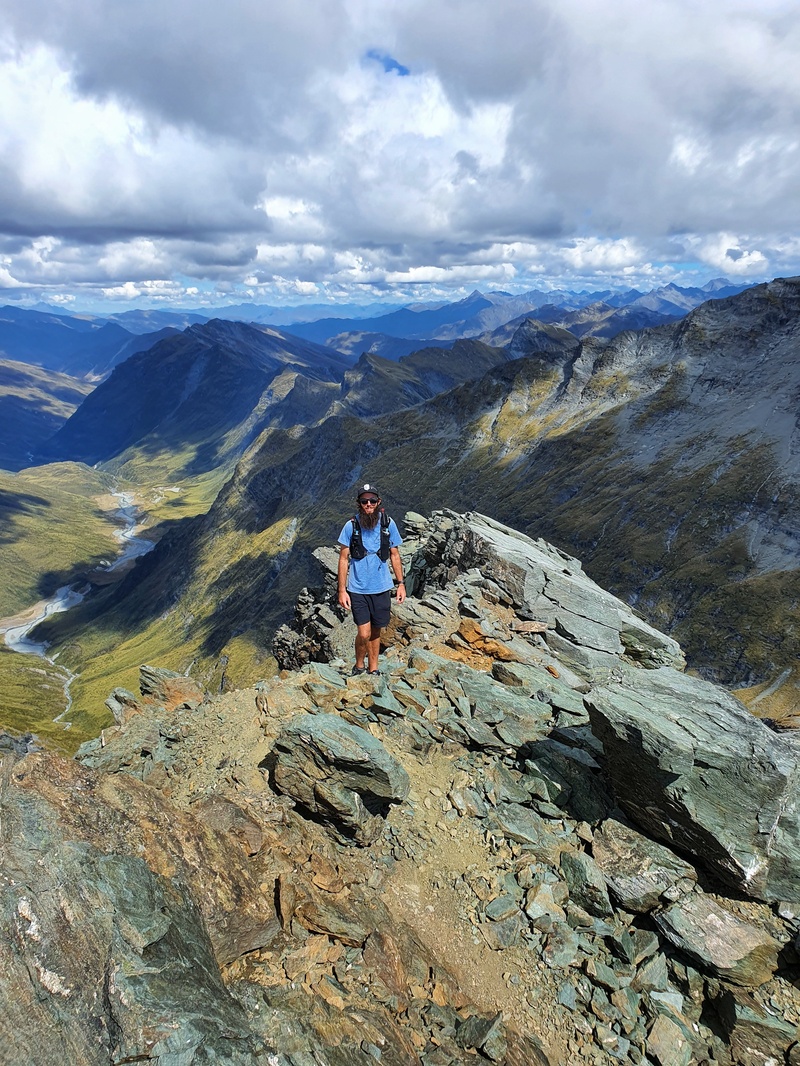
MY EXPERIENCE HIKING SHARKS TOOTH PEAK
Given Sharks Tooth Peak isn’t a DOC Track, I only heard about the peak a couple of weeks before going up when a friend mentioned he was keen to give the summit a go. After a little bit of research, it wasn’t hard to convince me.
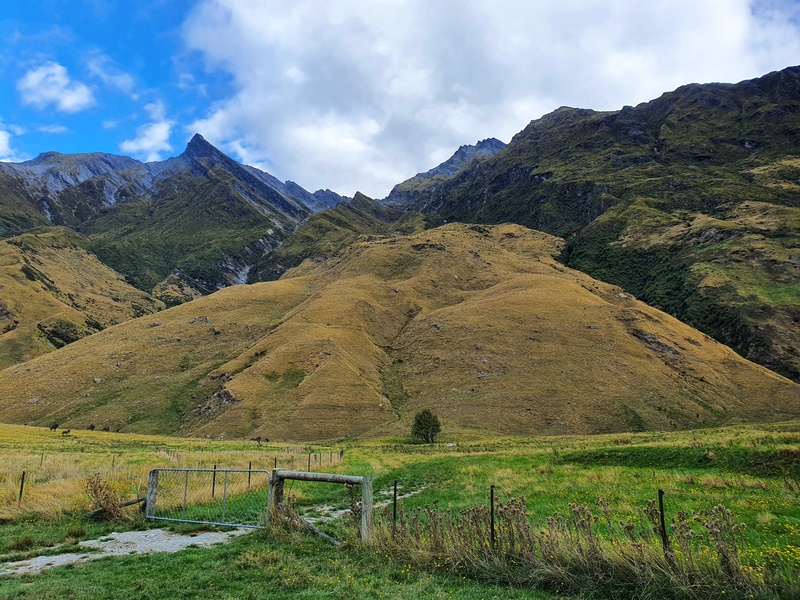
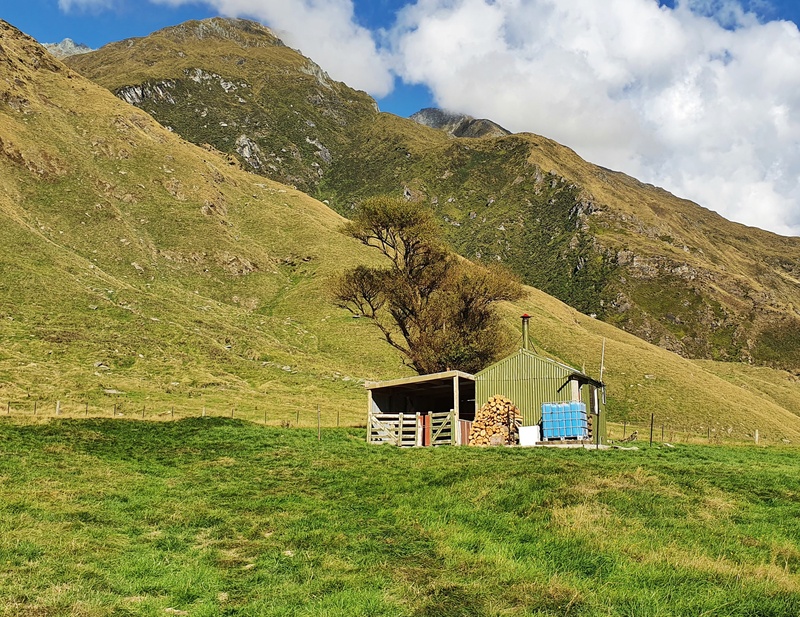
After arriving at Raspberry Flat Carpark a little after 10am, we faffed about a little before setting off towards the Raspberry Flat Shelter (private) which you can see from the car park.
We walked back down the road we came from for 300 metres, and passed through this gate (in the photo above) and followed the track leading to the hut. Passing the shelter, it’s pretty easy to know which ridge to follow…the one straight ahead.

Let it be known, there’s no proper tracks on the hut, but the sheep have done a pretty good job at creating a semblance of tracks so we followed them often in between bursts of going straight up the tussocks.
After a couple of km of steep incline (400 metres plus of elevation gain in each kilometre), you’ve got a choice to make. You can head right and follow the valley (red line above) or head left and follow the ridgeline (yellow line above).
The less scary is to go via the valley, though there’s no tracks at this point and the tussocks do get frustrating.
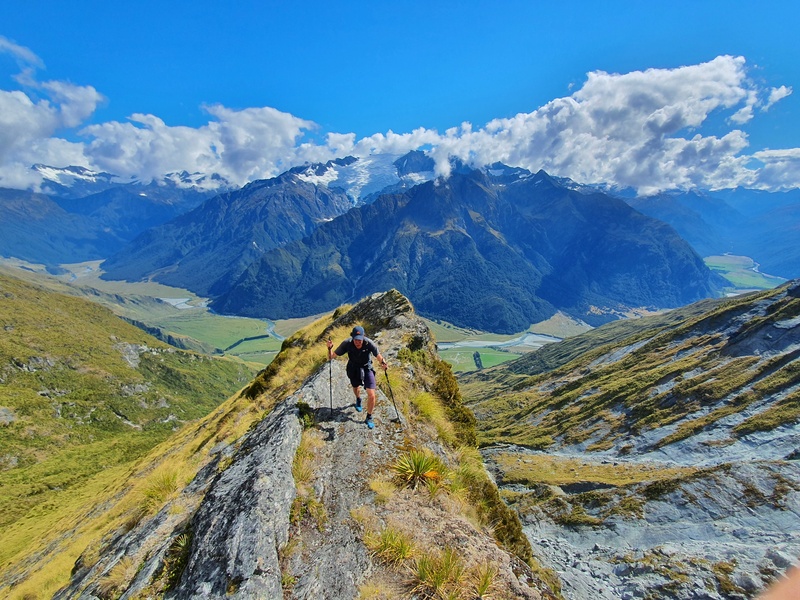
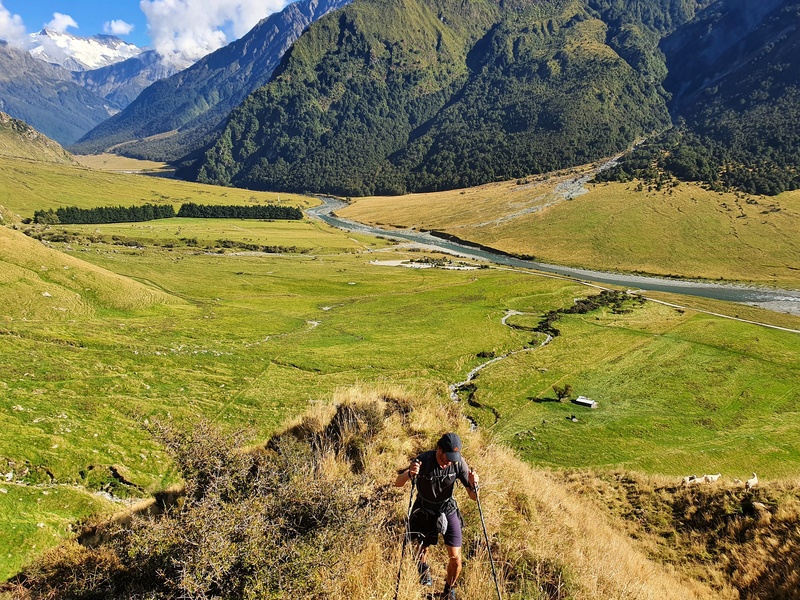
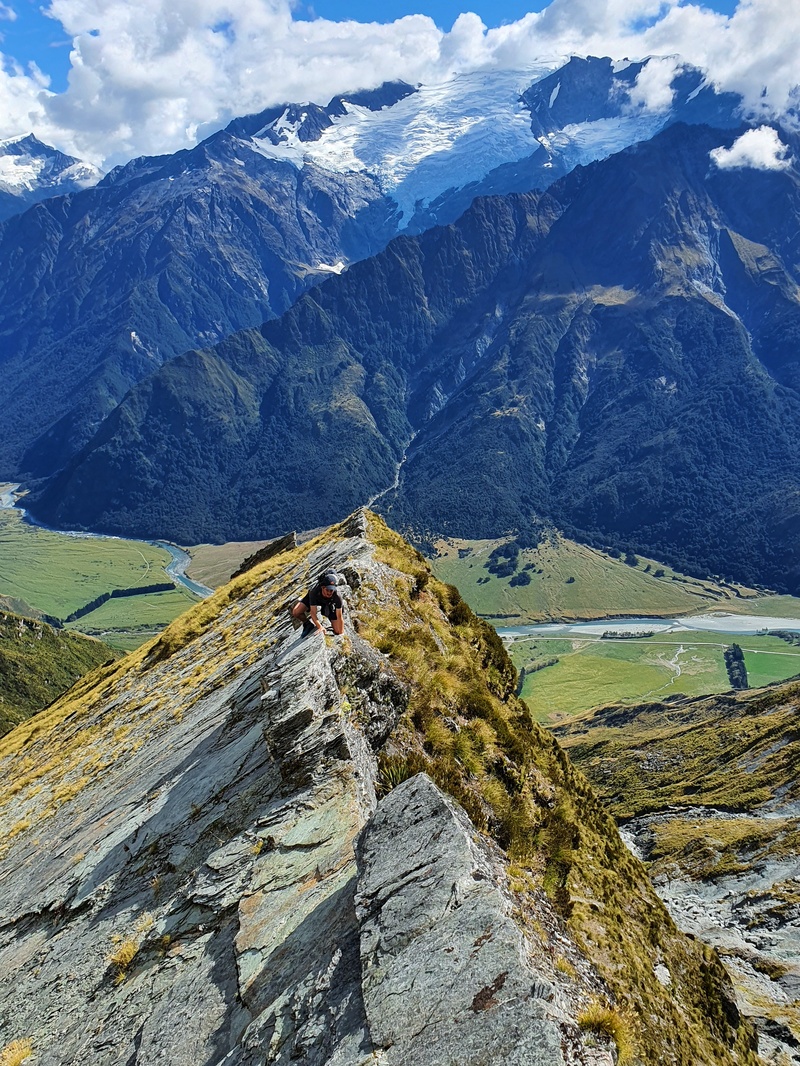
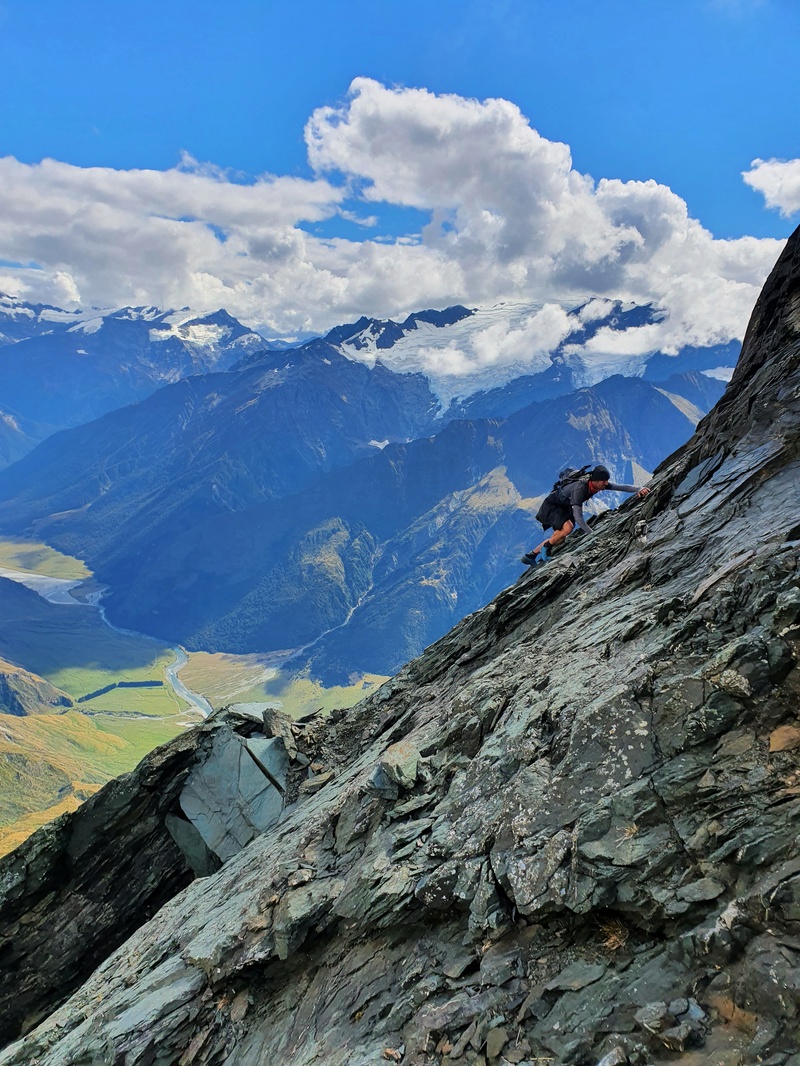
The ridgeline on the other hand is pretty hectic! With near vertical dropoffs on the left hand side, and a steep slope on the other side. My friend and I both found ourselves on our hands and knees at some points.
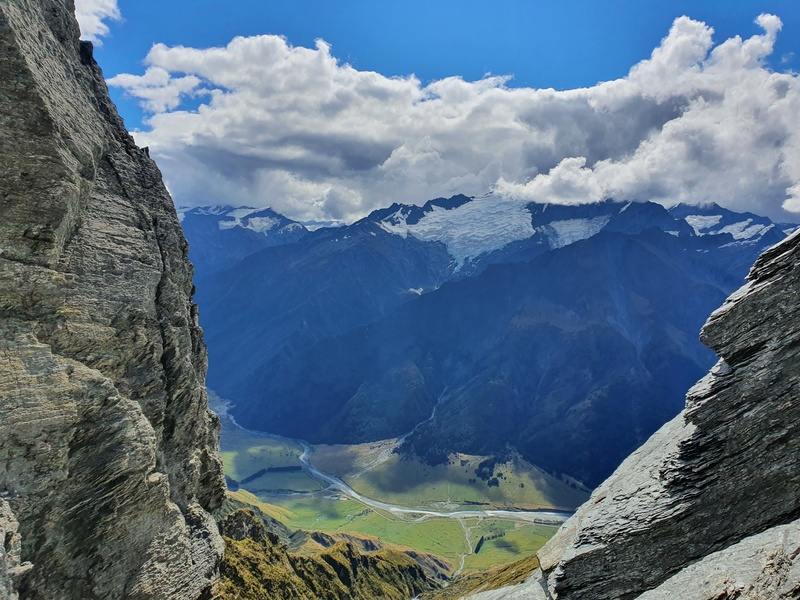
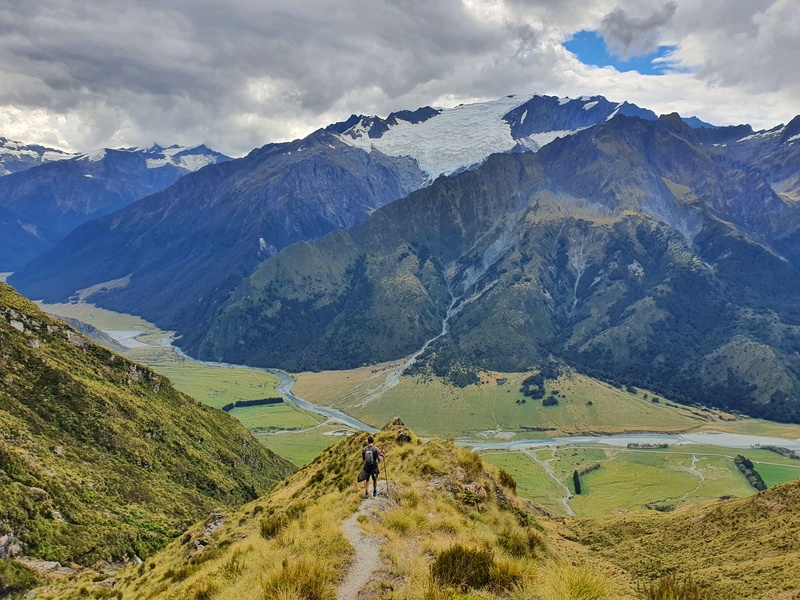
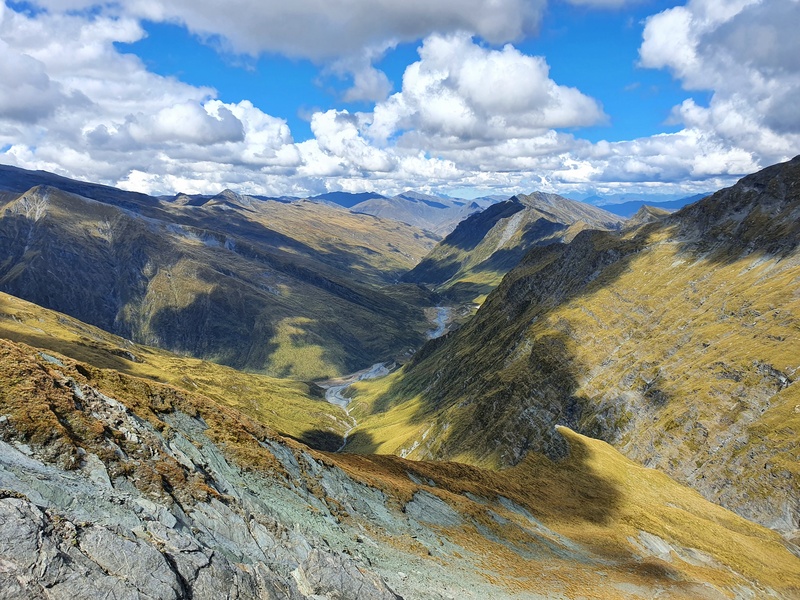
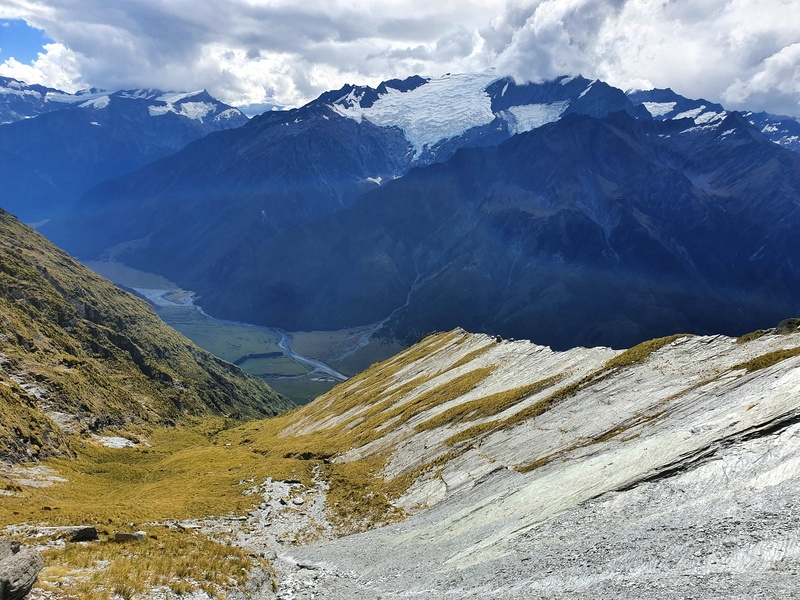
p.s. don’t forget to look behind as you get higher, the view is pretty sweet and you’ll quickly see Roy Roy Glacier too.
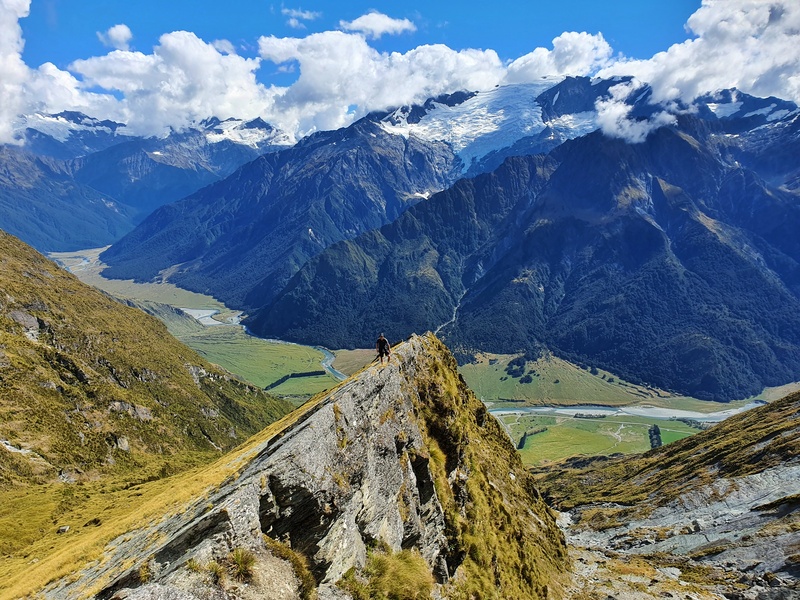
I love a ridgeline, and this was awesome but we had perfect conditions. In even a slight breeze the threat of exposure would scare the bejesus out of me. It’s up to you, at worst if you decide the ridgelines not for you, you can hustle back down the to the valley.


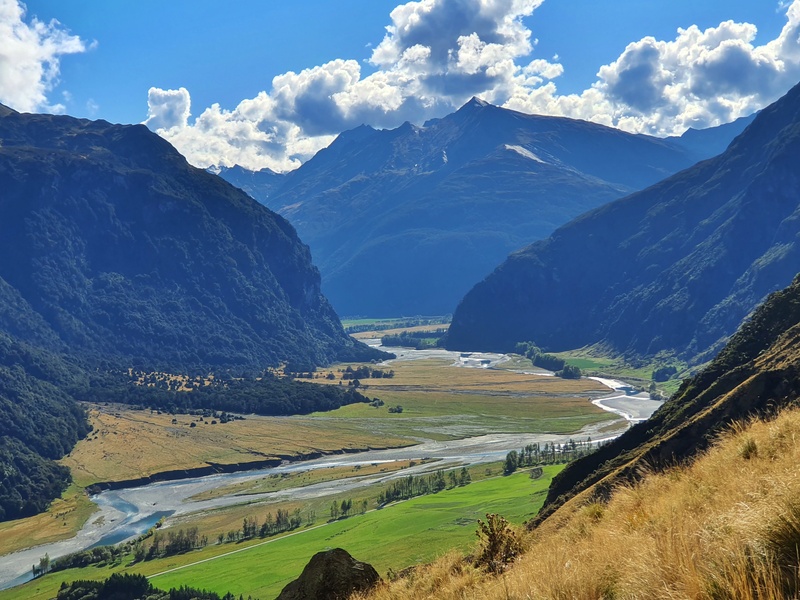
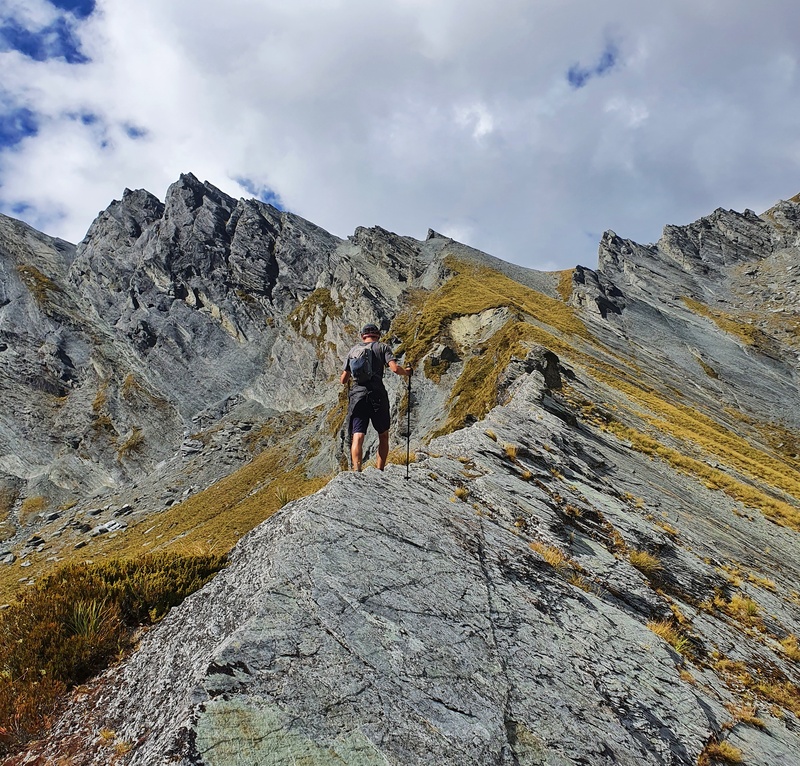
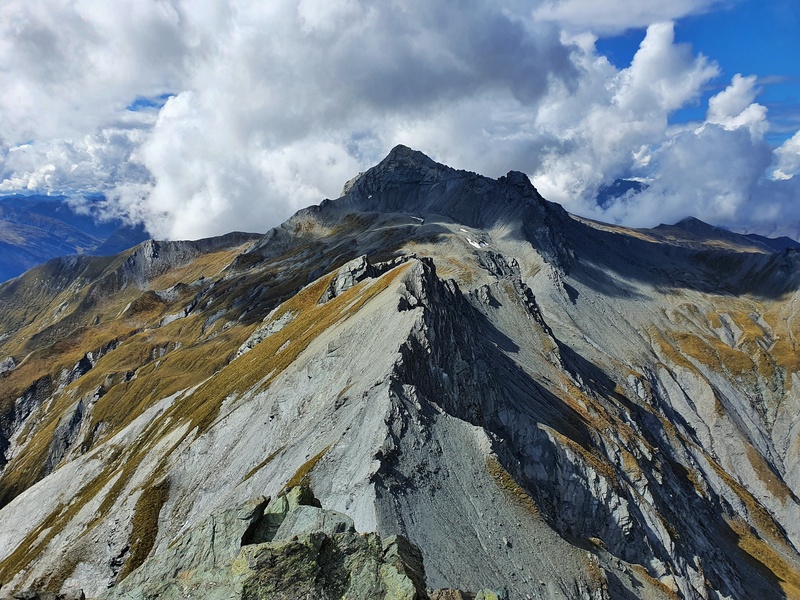
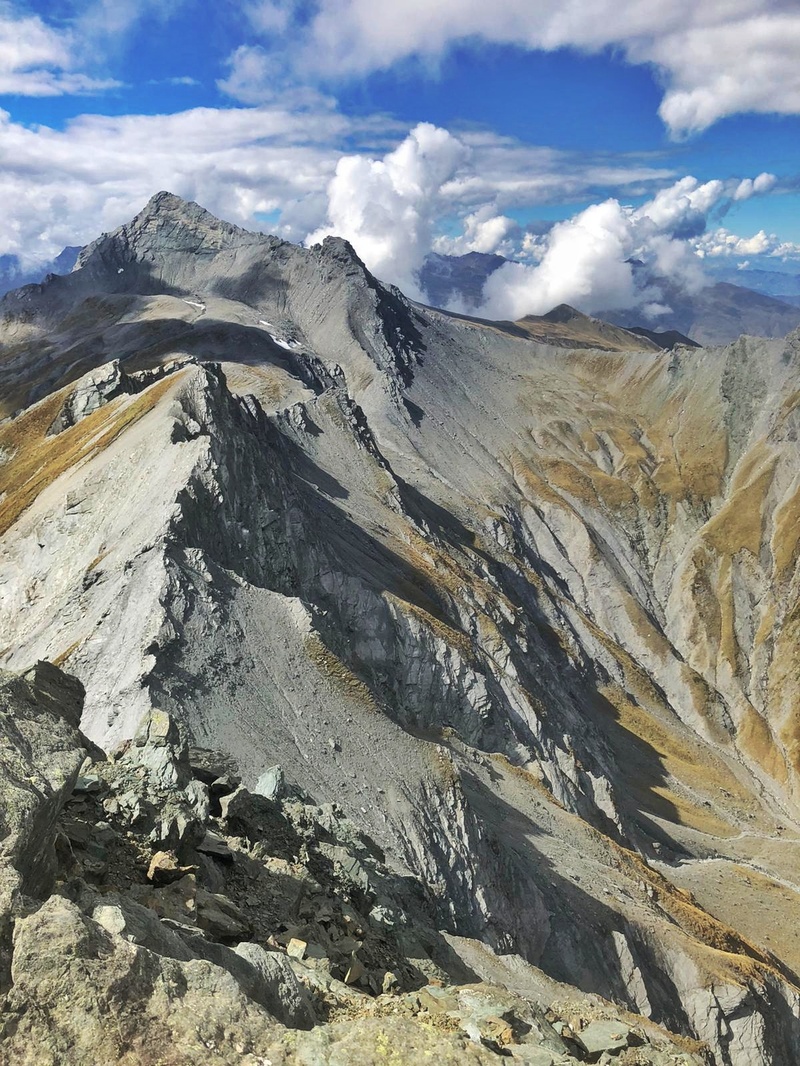
And before long we reach the col between Sharks Tooth Peak and Craigroystone.
It’s a left hand turn at the col as you get to see all the valleys and mountains over the outerside open up. And you’ll see you destination in the distance.
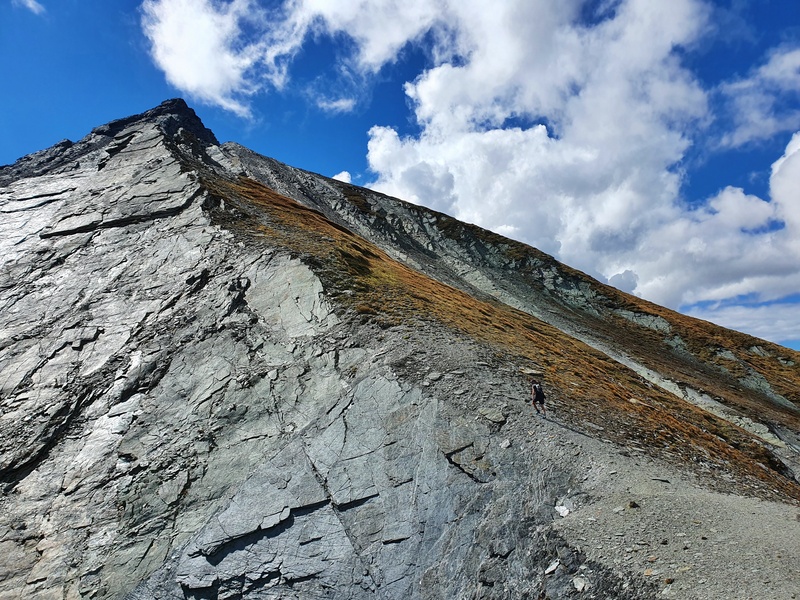
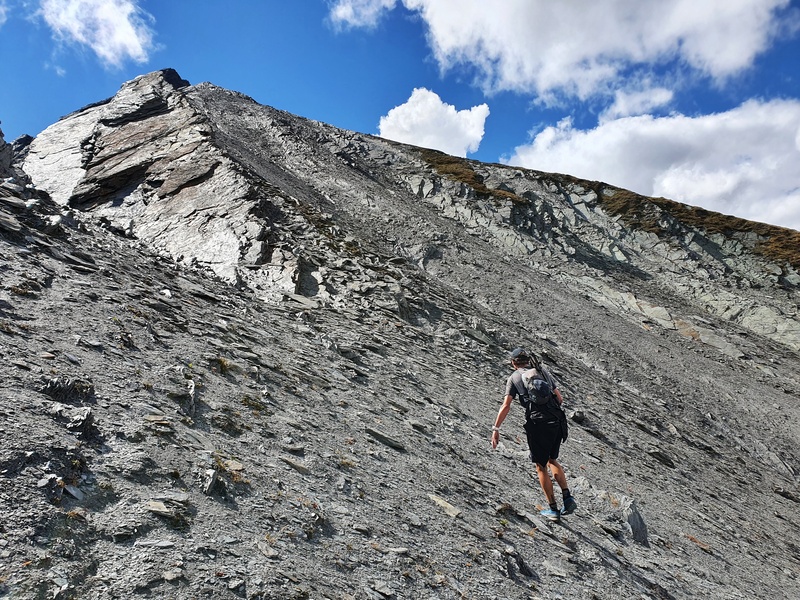

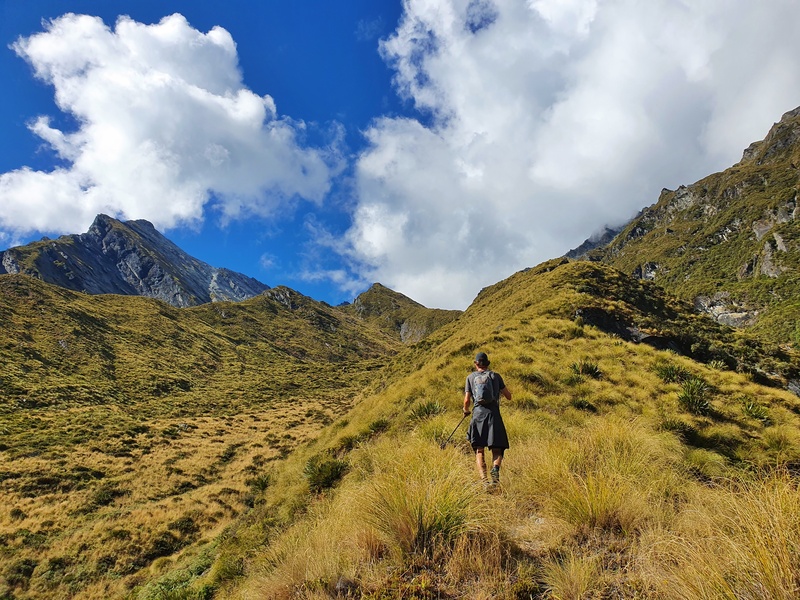
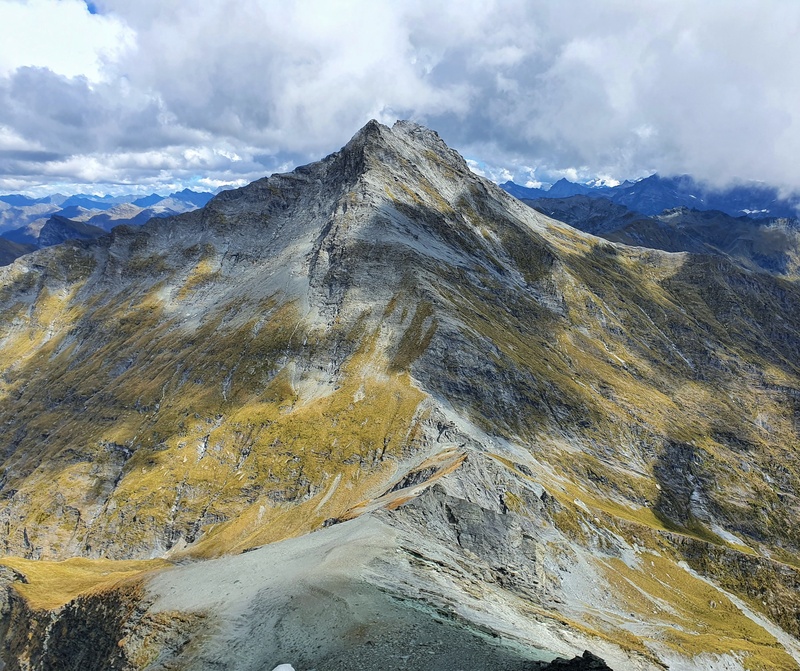
From here you go up another ridgeline. You’ll see faint tracks along here which leads up the scree (in summer). The scree is easy enough, but you do need to be careful of your footing.
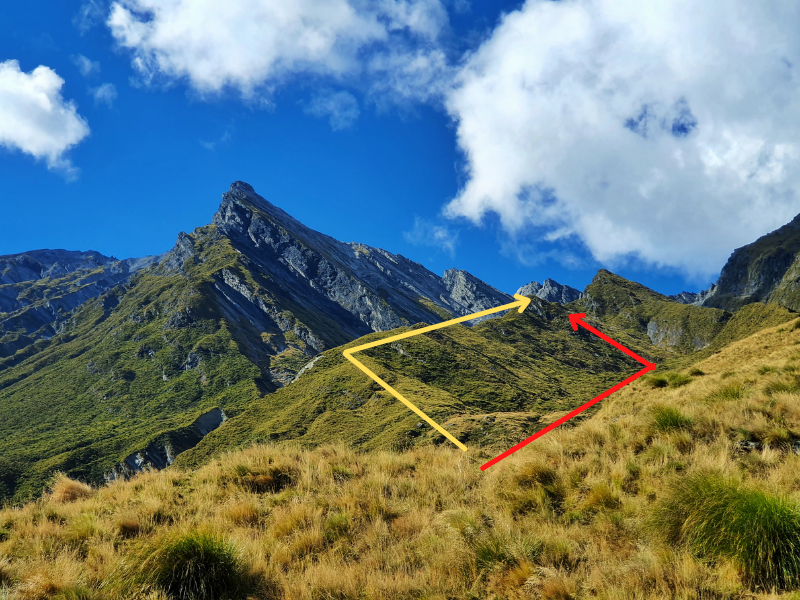
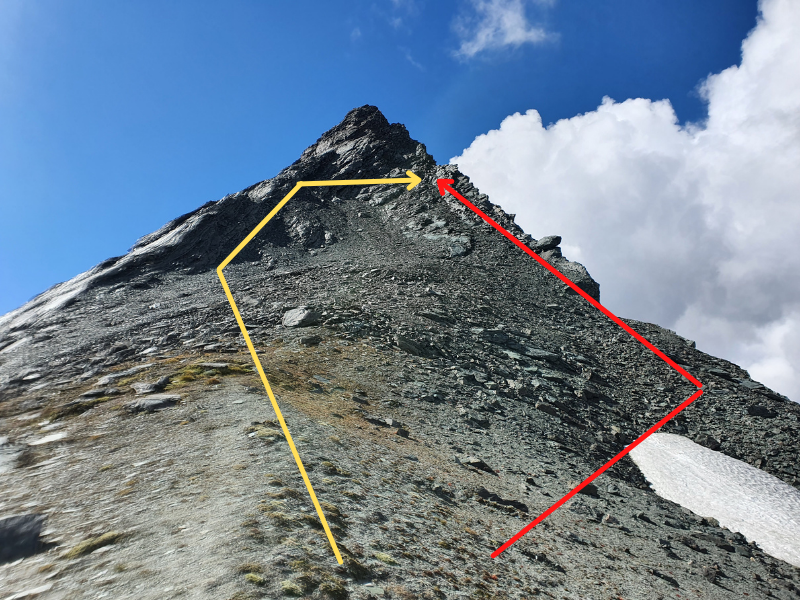
I’ve drawn a couple of lines in the image below as the climbing aspect starts about 100 metres below the summit, where the scree gets noticeable larger. We went up via the yellow line…approximately. As we went up the scree we were convinced veering left was the better option, but then we couldn’t see an easy way to get to the last part to the summit. We should have followed the red line (more or less).
We siddled right after a while which was a little hairy but that enabled us to find a route going up that was doable without too many extremes.

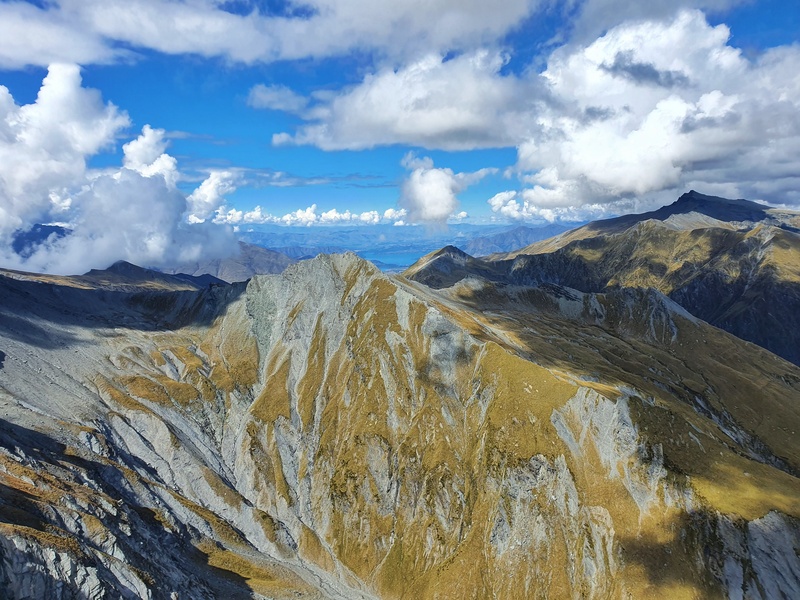
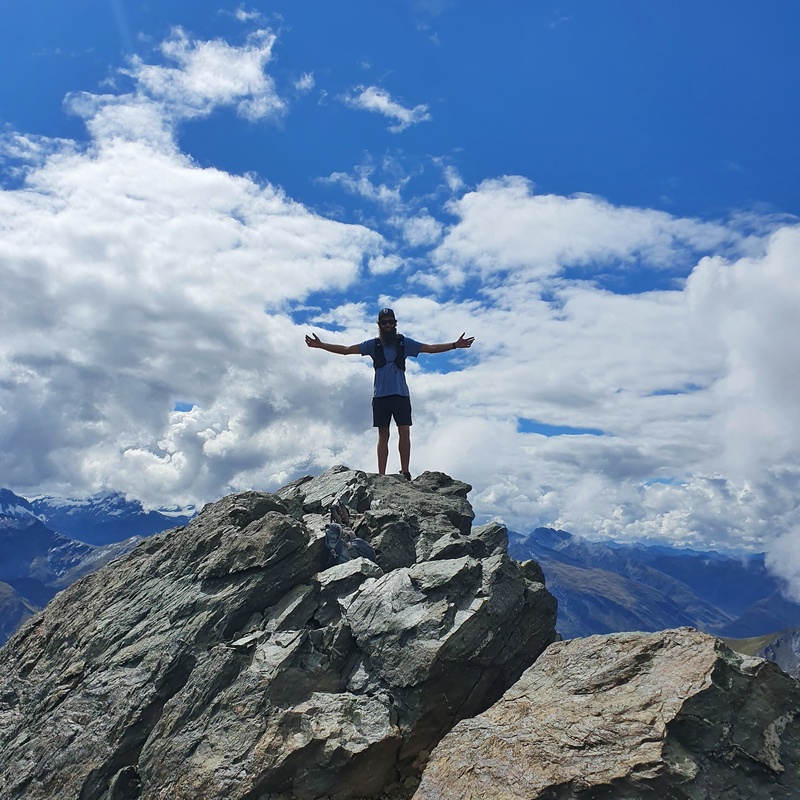
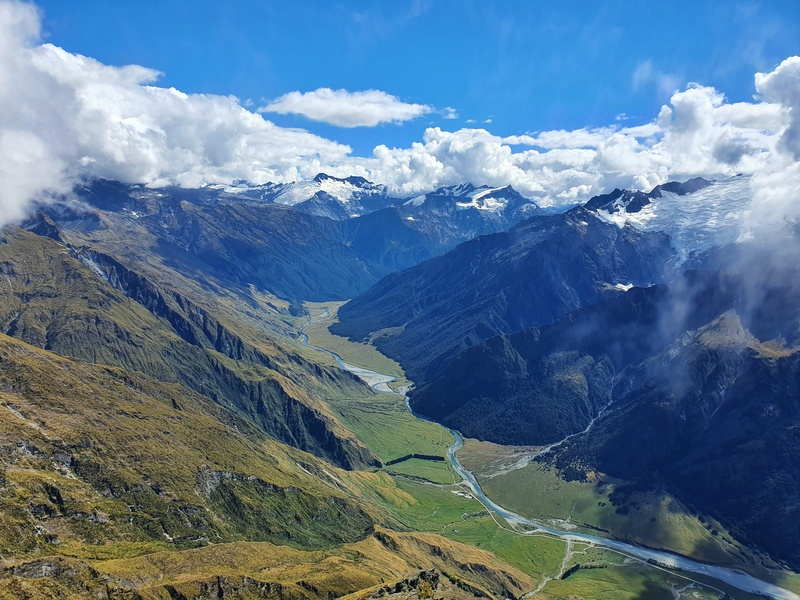
After a bit more climbing, things became more logical and then we were at the summit! What a great success. The views were awesome, and I enjoyed being able to see Lake Wanaka in the distance.
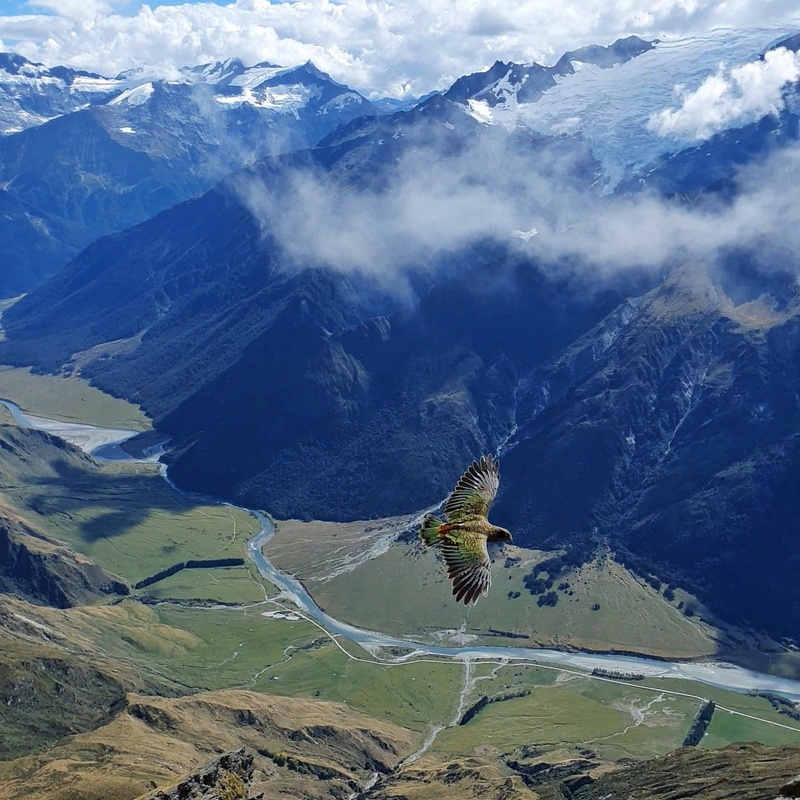
Two kea welcomed us by flying about. They did proceed to watch us on the way down…maybe hoping our snacks would come loose?
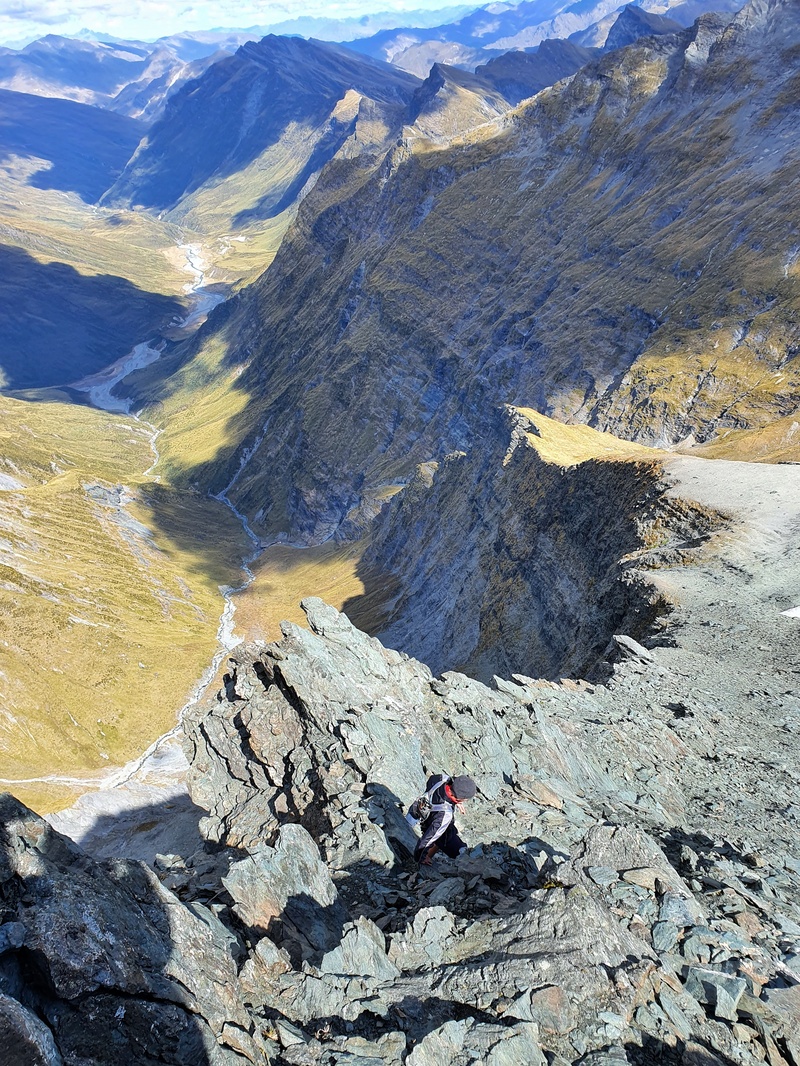
The descent back down started the way we came, but rather than sidlilng for a section the way we came, we went down the other side of the scree which felt much easier (red line in the earlier image). There was definitely a few eeek moments.
We made sure to give each other time to navigate sections solo where loose rock would go tumbling down.

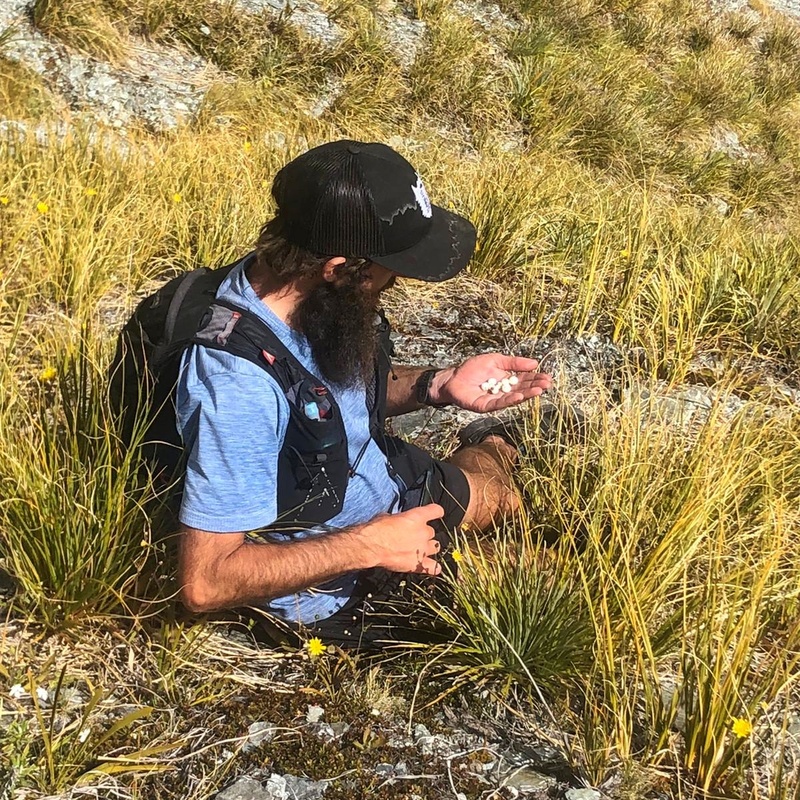
From there on it was a breeze more or less. Though we decided to go back down the valley route rather than the ridgeline. It didn’t seem any faster though, especially after stopping a bunch to eat the snowberries!
The descent is steep but we kept hustling to ensure we got back to the carpark in good time to hitch back. My quads were definitely feeling the descent the following day!
The Sharks Tooth Peak isn’t an easy hike. It’s steep, and relentless especially when you add in the exposure, you’ve got yourself an advanced hike.
If you have any questions about Sharks Tooth Peak, leave a comment below or email jub@churnewzealand.com and I’ll get back to you.
WHAT TO READ NEXT
Amazing hikes to do in Otago
Dragonfly Peak
Hey, it’s Jub here. I’m the guy behind Chur New Zealand, helping you have the best time hiking, trekking, walking…whatever you want to call it…in NZ. I’m based in Queenstown and am always out and about exploring trails, old & new. If you have any questions, reach out.
Can you reupload the GPX file 😀
Heyya,
Hopefully this works: https://drive.google.com/uc?export=download&id=1li5ZqQng515Mrx-fWgM7beYCyi4X2EVQ