Planning to do the Mount Te Aroha summit track?
It’s hard work, but you’re in for a treat!
This post will be about the Mt Te Aroha summit track, the most popular route to the summit.
With 900+ metres of elevation in less than 10km, read on to get the nitty-gritty details and my thoughts on the out and back summit track.
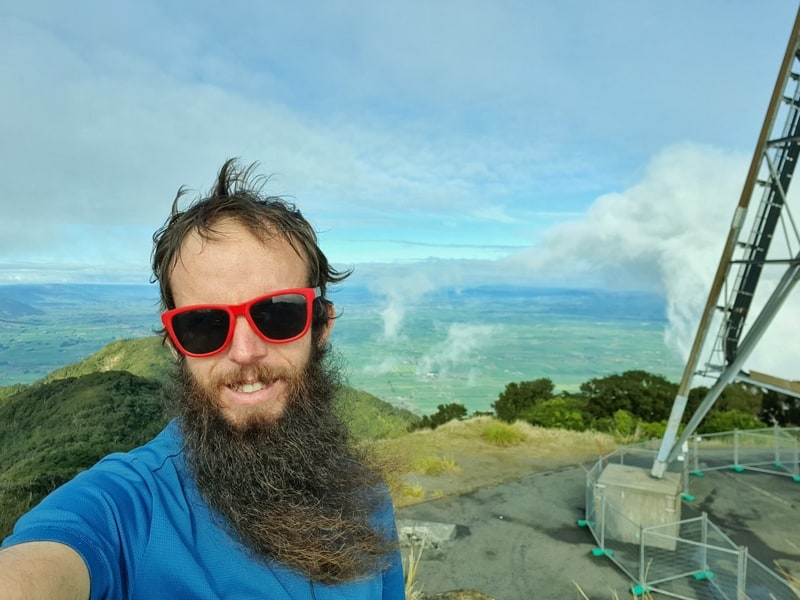
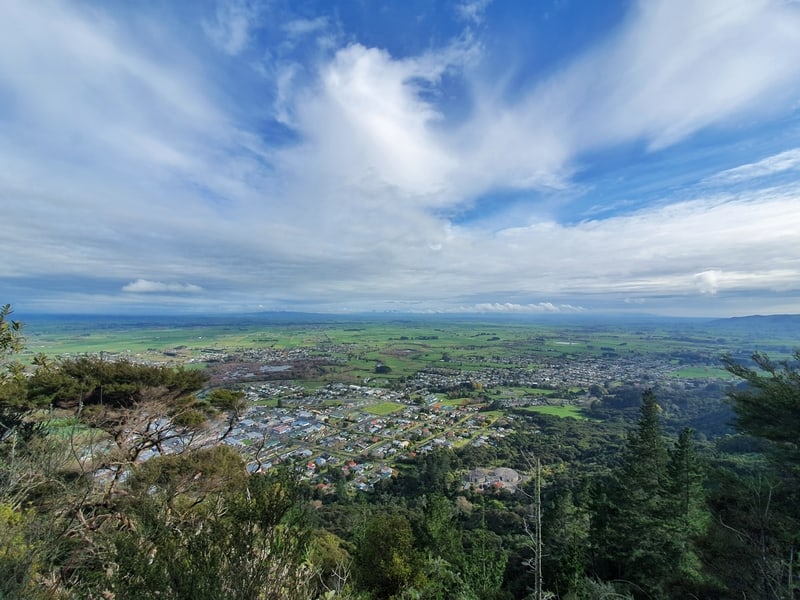
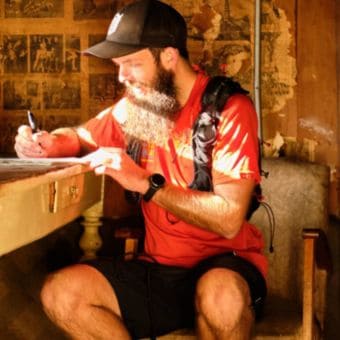
Proof that I’ve been to the Te Aroha Summit (that’s the power station on the right-hand side).
TABLE OF CONTENTS
1. Te Aroha Summi Track Details
2. Mount Te Aroha Map
3. How To Get There
4. My Mount Te Aroha Summit Trip Report
1. DETAILS ABOUT THE WALK UP MOUNT TE AROHA
It’s not the length that gets you on this walk, it’s the steepness. It’s unrelenting. But the fact that everyone has the ability to reasonably easily access the summit of Te Aroha, the highest point in the Kaimai Ranges is pretty awesome.
You can’t help but notice the broadcast tower when you reach the summit but like the Mt Kaukau tower it doesn’t overly dominate and you get to genuinely enjoy the 360-degree views. I do wish there were some more information boards on the way through, even something just at the summit, and at the Whakapipi Lookout would be cool.
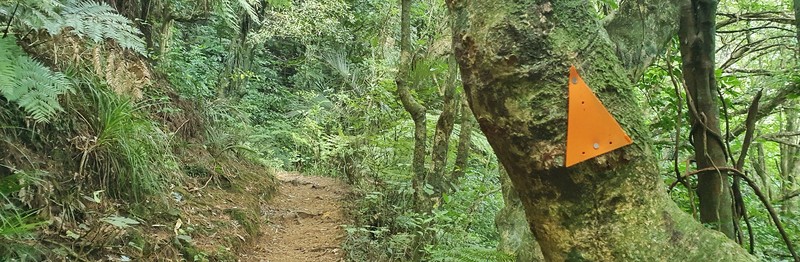
You’ll be following the orange markers to the summit.
How long is the track?
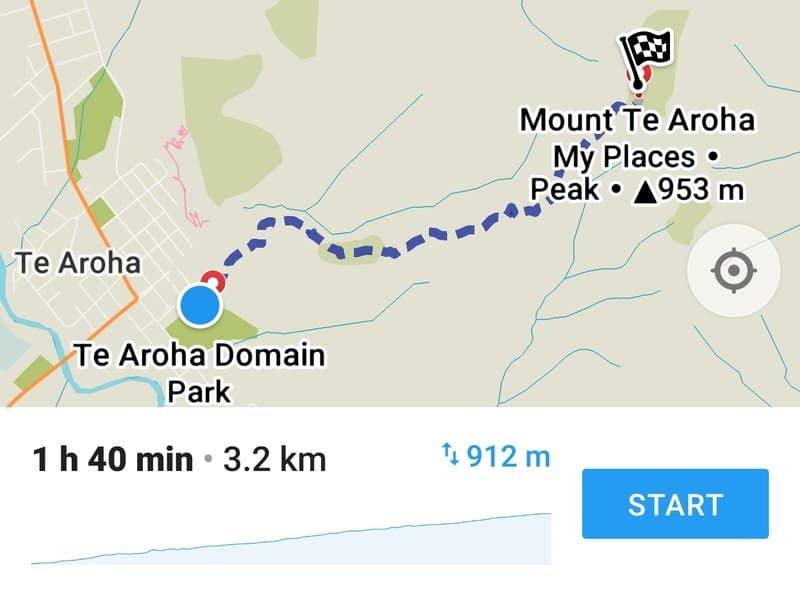
The details on my Strava record have the walk at 8.2km return. Department of Conservation lists that track at 7.8km return, the same as Maps.me.
How hard is the track to Mt Te Aroha?
Medium-hard. It’s a lot of incline for a short distance. The track is in good condition, but there are some tricky spots to navigate going up and down (at the summit end).
How high is Mt Te Aroha?
Mount Te Aroha is 953 meters above sea level.
Based on my Strava details, the Mt Te Aroha elevation gain is 907 metres for the hike.
How long does it take to hike Mt Te Aroha?
It took me right on 3 hours to complete the walk up and down. Going up wasn’t too much slower than going down, and I spent maybe 5 minutes at the summit. The signs around the track suggest it’ll take 3 hours one way to reach the summit one way. Based on others I saw walking on the way, a lot of people will take up that full 3 hours. So you can get up and down in 3, but it could take 6 hours if you’re not feeling fit at the moment.
2. MOUNT TE AROHA SUMMIT TRACK MAP
This screenshot is from one of my most-used apps, Maps.me which is great for hiking as the maps are useable offline.
You can see some of the track on Google Maps, but it’s definitely not accurate so I won’t include that here.
But, you should really download an NZ Topo Map app, they’re the best resource for hiking maps in NZ. This is what I consider to be the best topo map for hiking in NZ.
3. HOW TO GET THERE
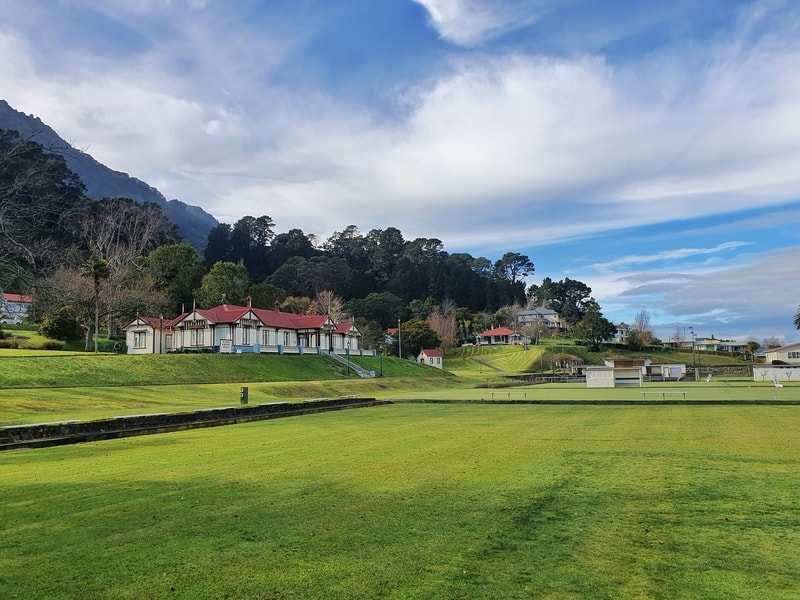
The Te Aroha Domain where the trailhead is.
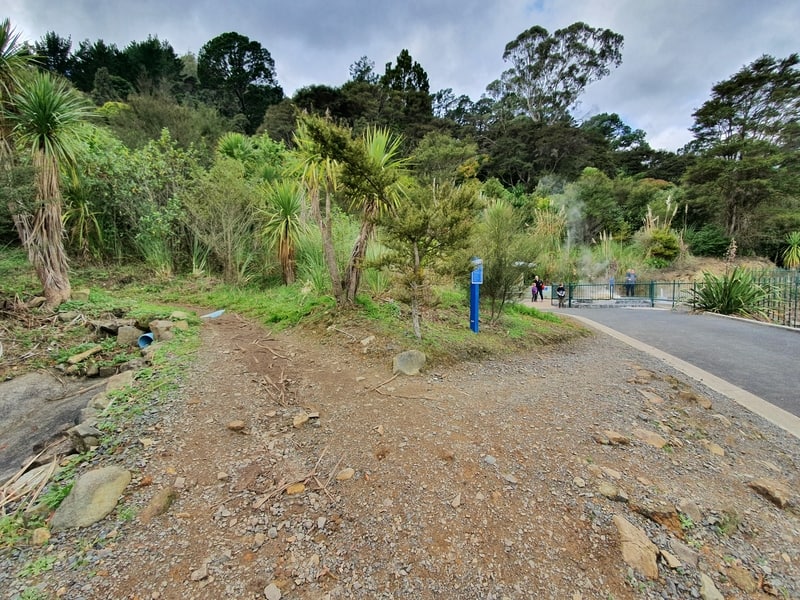
The Te Aroha trailhead is right here, next to the Te Aroha Mineral Spas behind the domain. If you’re staying in Te Aroha, it’s a short walk from anywhere to the trailhead.
If you’re driving to Te Aroha, there’s no shortage of free parking on Whitaker Street near the i-SITE (the staff there are super friendly). From there you’ve only got a few minutes to walk to the trailhead. There’s also a Countdown over the road for hiking snacks.
4. MY TE AROHA SUMMIT TRACK EXPERIENCE
The trail begins…
Having stayed at the nearby Te Aroha Holiday Park I arrived at the Mount Te Aroha Summer trailhead on a nice Saturday morning.
The trailhead starts all of a sudden really (turn left at the point in the above photos) and away you go, we’ll be following the orange markers.
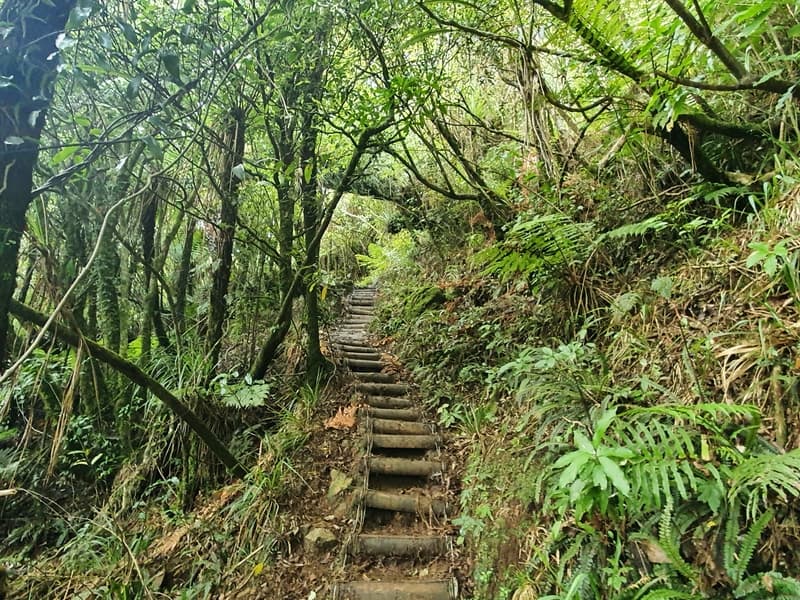
A few of the stairs early on the trail
Scenes from early on the track.
There are very minimal flat sections to this hike, so right away we’re starting with a small incline along a well-built track. We are straight into the canopy of the forest. There are a number of switchbacks on the way to Whakapipi Lookout. Normally I don’t like switchbacks, but wow it’d be steep if they weren’t there.
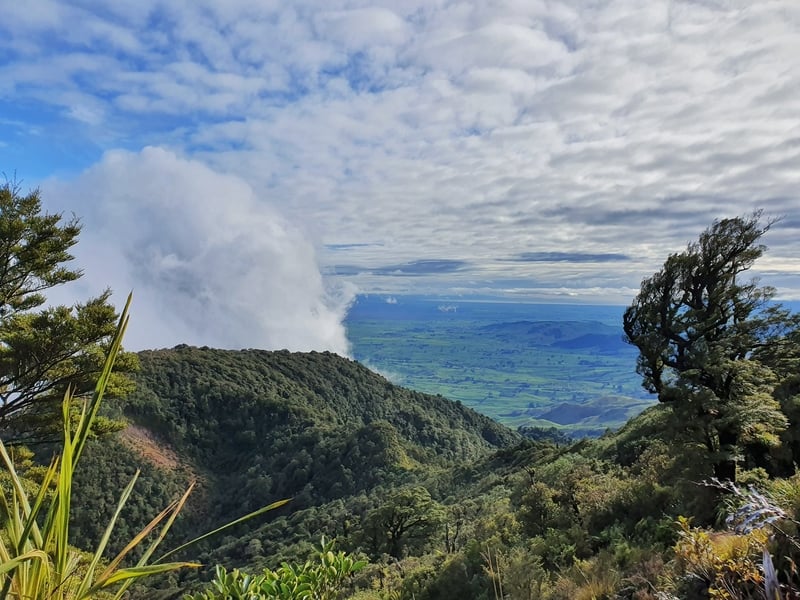
Whakapipi Lookout is a well-constructed platform with the sweeping views you see below.
As it’s only 1.5km or so into the track, if you’re struggling already you might want to consider this your summit for the day as it’s only going to get steeper beyond this point.
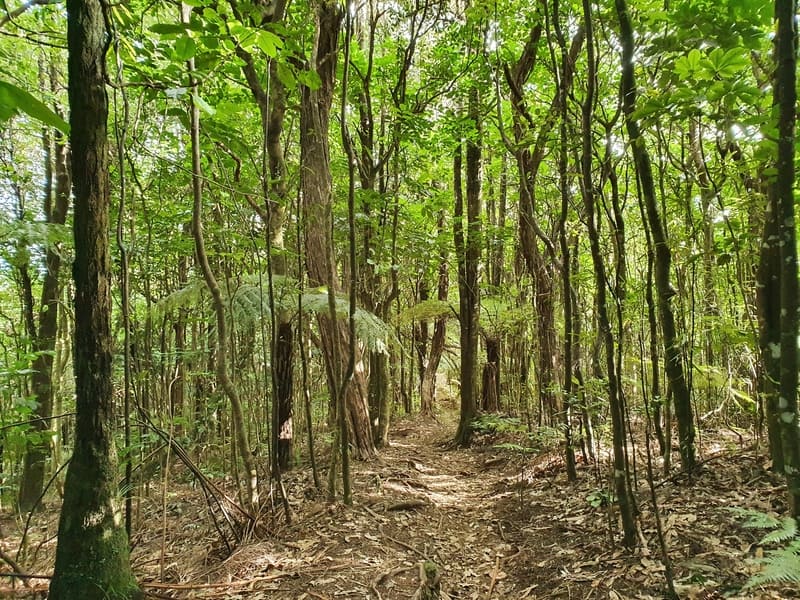
Continuing on, the terrain doesn’t alter too much after the lookout with only the one switchback to go. But the trail does get a little steeper bit by bit.
I can’t recall exactly where it was on the track, but I do remember starting to notice more roots on the trail. It’s super easy to follow, yet from what I understand many locals walk to the Whakapipi Lookout and back down so that part of the track is a lot smoother.
Then you start to see some rocks on the tracks which are a bit more technical. And from here on it’s a bit of a slog, and those with hiking poles will be using them frequently.
The trail gets tighter and technical, especially if there’s been some recent rain. With that said, you can cruise up as you’re not in a race against the clock assuming you’ve started in the morning. It’s not easy though, as I was coming back down everyone was asking me how long to go until the top.
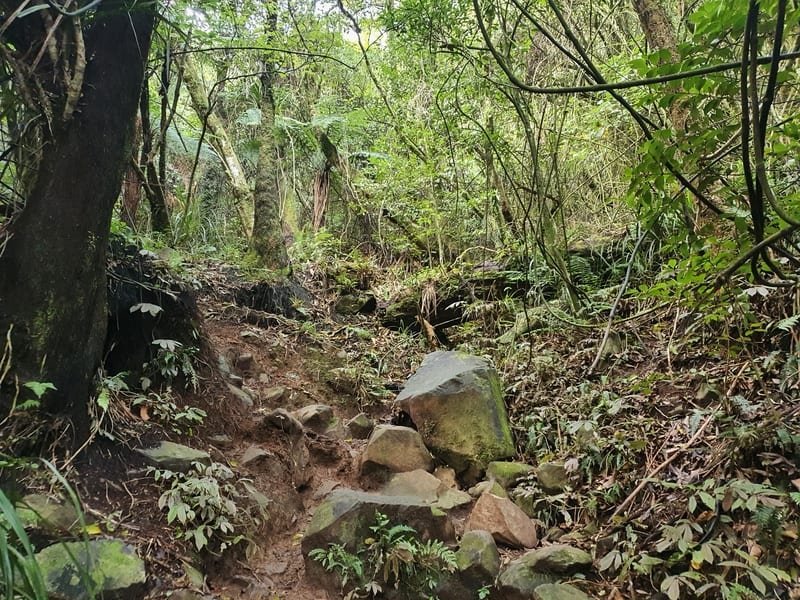
This is about the point it gets tricky.
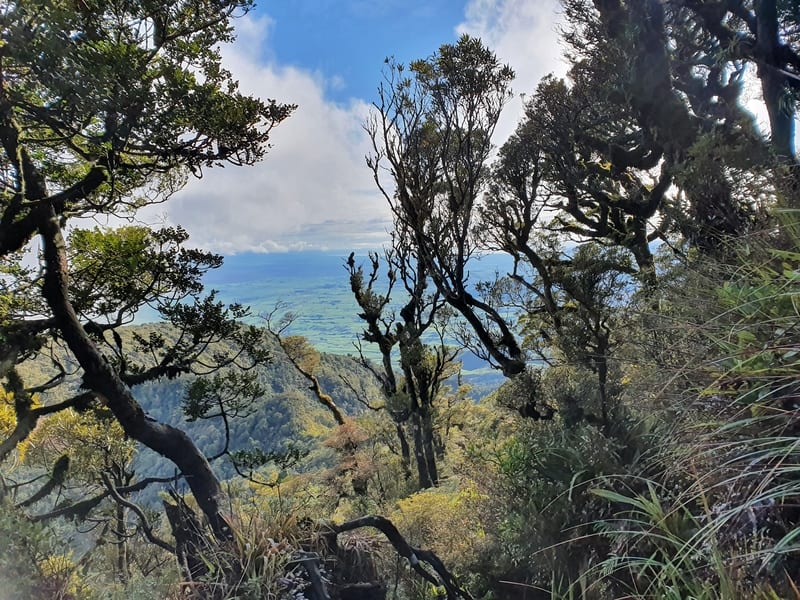
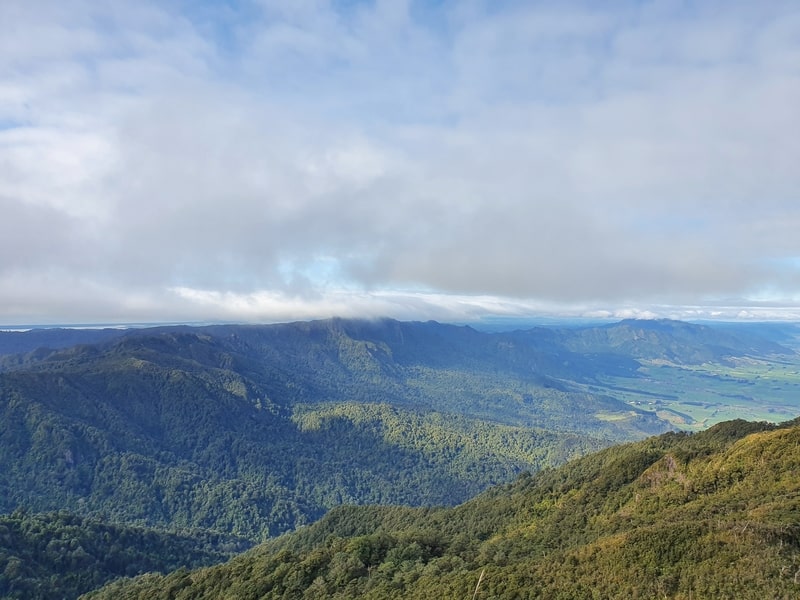
Another one to give you more of an idea of the terrain closer to the summit.
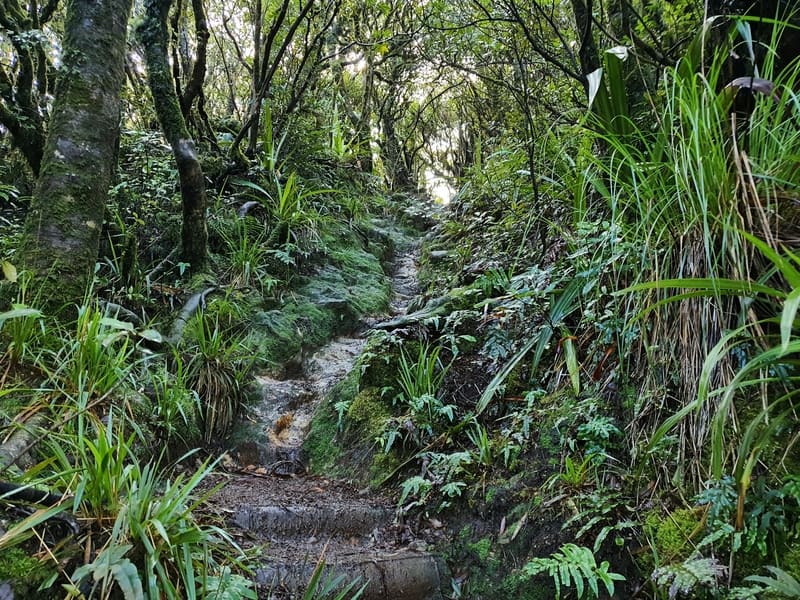
The trees even get gnarlier, with a little bit of goblin forest that reminded me of the ruthless Kapakapanui Track.
Some goblin forest on the way up.
A couple of hundred metres before the top you’ll emerge and the broadcast tower will be in full view. Turn right and follow the concrete path until you reach the summit viewing area.
The views are epic. The broadcast tower blocks them in one direction but assuming it’s a nice day you’ll be able to see the full Kaimai Ranges, and out to sea beyond Mount Maunganui. It’s magic.
Spend a bit of time up here, you deserve it. There’s heaps of room for a picnic if that’s your jam.
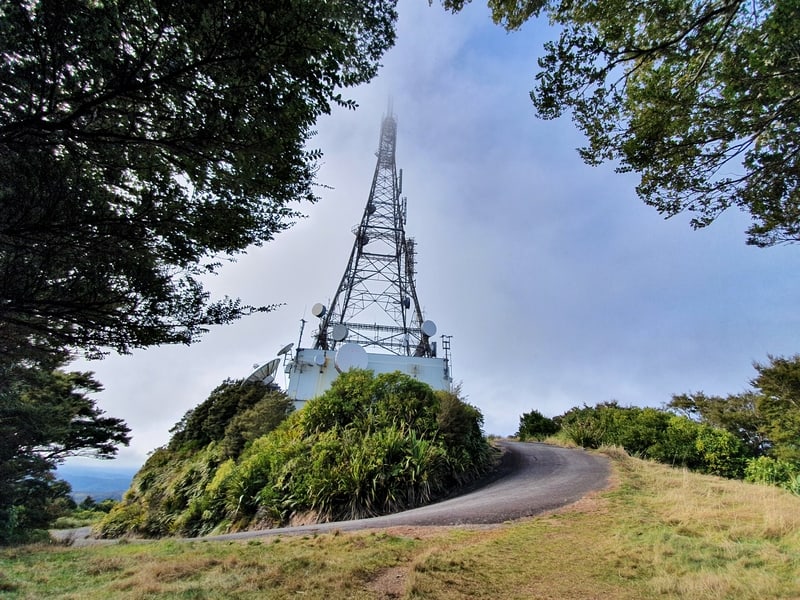
As you emerge from the forest, the broadcast tower greets you
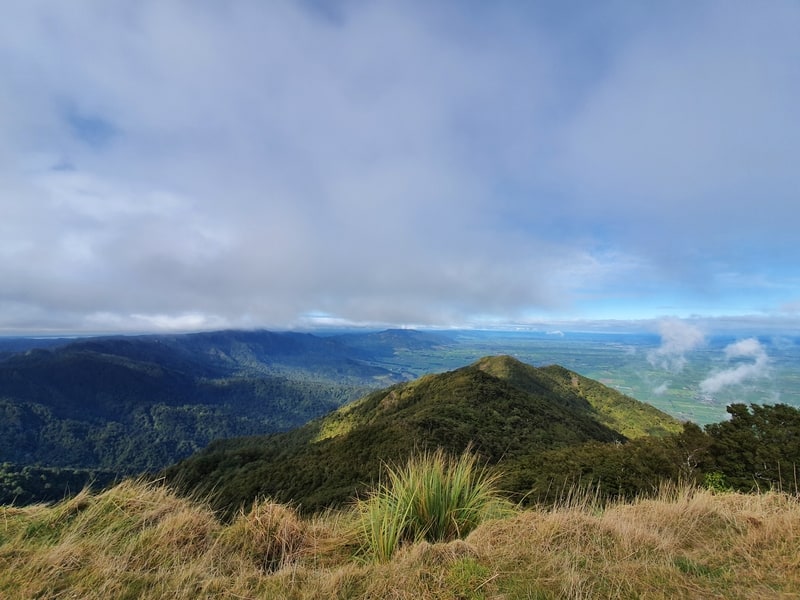
Summit vieeeeeews.
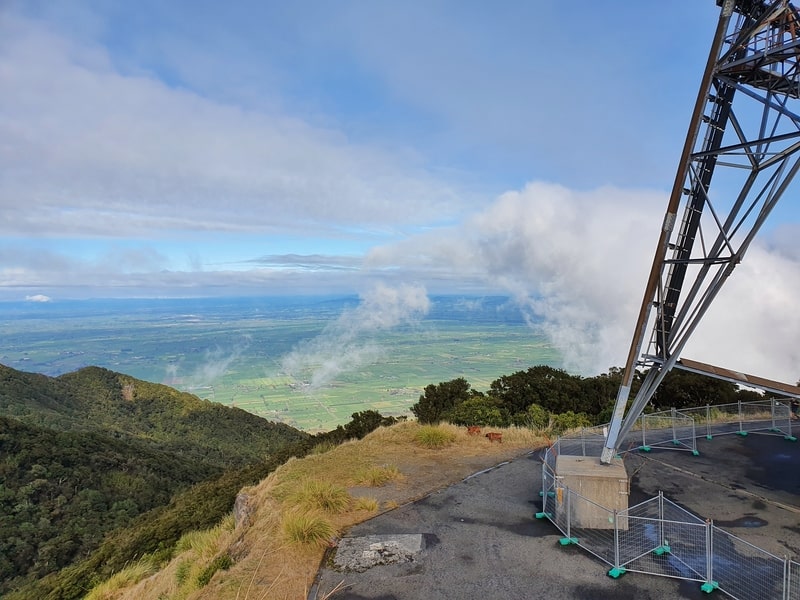
Summit vieeeeeews.
More vieeeeeeews.
Annnnnd it’s time to go back down.
You’ll be taking it slowly to start with, but just keep chipping away and the second half of the descent is a breeze. I made it down faster than I did going up, but the difference wasn’t crazy. If your knees are struggling big time and the thought of the descent scares you, check Maps.me for alternative routes down. I haven’t taken other routes, but there are longer and less steep options.
This is sneaky cool! Te Aroha should advertise they have the highest point of the Kaimais on their literal doorstep in my opinion. Do it.
If you’ve got any questions or trip reports, leave them below or email jub@churnewzealand.com.
Chur.
p.s. Here’s a map of all the hikes documented on Chur New Zealand. You can click the icon to see brief details, as well as a link to read more about the hike (like this post).
Hey, it’s Jub here. I’m the guy behind Chur New Zealand, helping you have the best time hiking, trekking, walking…whatever you want to call it…in NZ. I’m based in Queenstown and am always out and about exploring trails, old & new. If you have any questions, reach out.
Your right Jub,was a great walk,we took it slowly as we had all day,and the views at the top worth it!! We had lunch up there and stayed at the top 1/2 an hour. It was hard for me,mainly the descent down,killed my knees! Definitely worth it,but you need reasonable fitness.
Hey Lois,
Thanks for sharing your experience! Hope the knees didn’t take too long to recover 🙂
Cheers,
Jub
Did it yesterday for tje second time with wife and 17 year old son in the rain. It was muddy and treacherous and beautiful. We did it a couple of years ago on a perfectly clear day and got the stunning views… yesterday was closed in and dark and cold and silent and lonely… it was great
Hey Alpal,
Two contrasting experiences there. I’m stoked you went in the not so ideal conditions, always surprised more people don’t. A different kind of beautiful aye.
Chur,
Jub
I’ve climbed it four times. Each time was different weather. Last time I did on my own snd it was perfectly clear. The views were amazing