Emily Pass was on my bucket list has been on my bucket list for years, and in mid-January everything finally lined up for an Emily Pass attempt.
That attempt? Successful.
This post will give you all the details about going up and over Emily Pass. There’s plenty of photos too.
Note: I’m only going to talk about the section where you leave the Routeburn Track and then rejoin it to keep it short
What makes Emily Pass so fun?
The full Emily Pass track starts on the Routeburn Track before leaving the trail of the Great Walk to go up over the pass before it rejoins again the Routeburn Track. Distance wise, it actually cuts the corner, so it is a shorter trip. But timewise it’s going to be longer.
And on one side of Emily Pass you’re in Mount Aspiring National Park, then on the other you’re in Fiordland National Park. How fun.
Alright, let’s get into it.
TABLE OF CONTENTS
1. Details About Emily Pass
2. Emily Pass Track Map
3. How To Get There
4. My Emily Pass Experience
1. DETAILS ABOUT EMILY PASS
QUICK DETAILS:
- Distance: 7km (from when it leaves and then reconnects to the Routeburn)
- Elevation Gain: ~800 metres
- Difficulty: Hard! Experienced off route hikers only
- Downloadable GPX File Here
How hard is Emily Pass?
Hard. As soon as you venture off the Routeburn Track, it’s tough going with steep terrain where traction can be iffy at all times. You’ll definitely want to have experience at tough off route terrain, and be confident when things get steep.
If you’re looking for something a little easier, go with the Valley of the Trolls/Lake Wilson. Equally as awesome.
What distance is the Emily Pass Route?
The distance between leaving the Routeburn Track at Emily Creek and rejoining the track at Lake Mackenzie Hut is right on 7km according to my GPX file (downloadable above). It may vary a little bit depending on what lines you take etc.
What is the elevation gain of Emily Pass?
When you leave the Routeburn Track, you’re at about 842 metres above elevation. Emily Pass is 1607 metres above sea level. There’s no much descent on the way up, and not much ascent on the way down from the pass, so call it 800-820 metres of ascent total. I did venture a bit higher than the pass to see the best route through the snowline on the southern side of the pass.
How long does it take to hike Emily Pass?
I’m not going to put a number on this. Anytime you go off route, times vary massively for all sorts of reasons. Anywhere from a 1 to 3 day mission is needed. It’s a route you’ll want to start earlier in the day rather than later.
What’s the best direction to hike Emily Pass?
I can confidently say that it’s better from north to south, Routeburn Shelter to The Divide, from Routeburn Flats to Lake Mackenzie.
That’s because the waterfall climb, the real crux, is easier to tackle going up than down.
When is it safe to do Emily Pass?
For most, I would say wait until after Christmas at the earliest…though it depends on the snow year. Alice Adventuring completed it with a lot more snow on the pass, but did need a lot of gear. If you decide to go, be prepared to turn back.
Can you climb Emily Peak?
I’ve heard you can, but that’s out of my league.
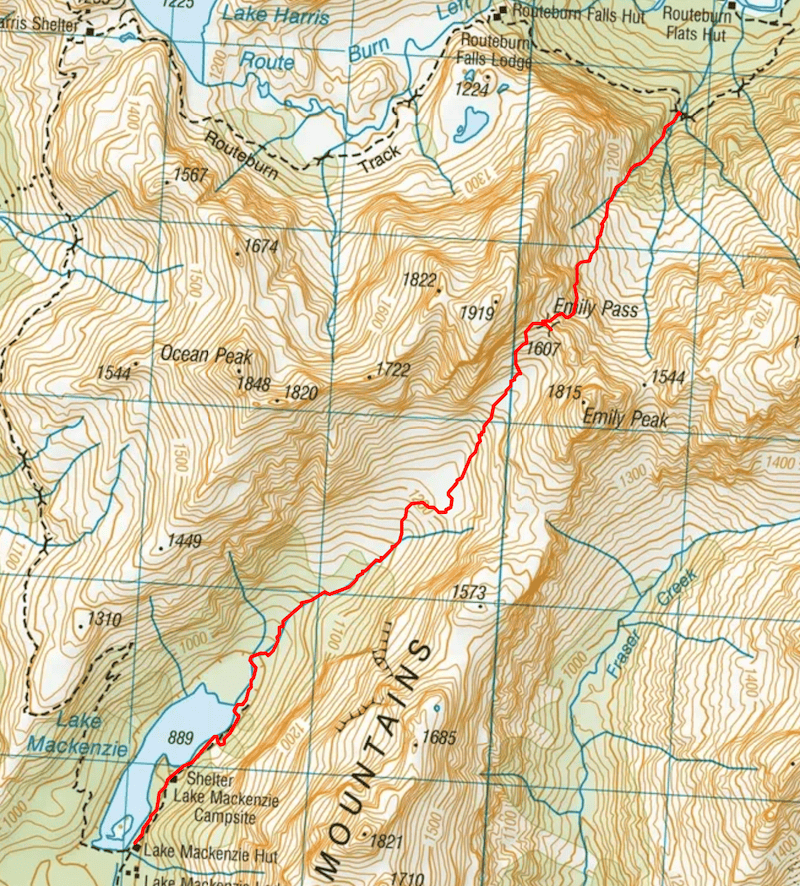
2. EMILY PASS MAP
The map below it the GPX file from my adventure going over Emily Pass. I cut out the Routeburn sections of the GPX file as they aren’t necessary. You do you.
3. HOW TO GET THERE
A great thing about Emily Pass is that access is from the Routeburn Track, one of the most popular Great Walks.
To get to the Routeburn Track, you need to get to Routeburn Shelter.
You can find out more about Routeburn Track transport here.
4. MY EMILY PASS EXPERIENCE
It took us a while to decide if we should attempt Emily Pass or not due to the below average summer and unknowns about the snow line on the south side of the pass. But after some deliberation, we committed and at worst we would turn around.
I’ll never complain about being on the Routeburn Track. We didn’t muck around on the Routeburn section as we knew it’d be way slower as soon as we got off the trail.
The first obstacle about Emily Pass is making sure you get to the right bridge to start going up the creek. As you can see on the topo map below, there are three bridges…but on some topo maps there’s only two bridges.
The key…from Routeburn Flats, you are targeting the third bridge as per the photo below (which is the bridge on the left of the photo).
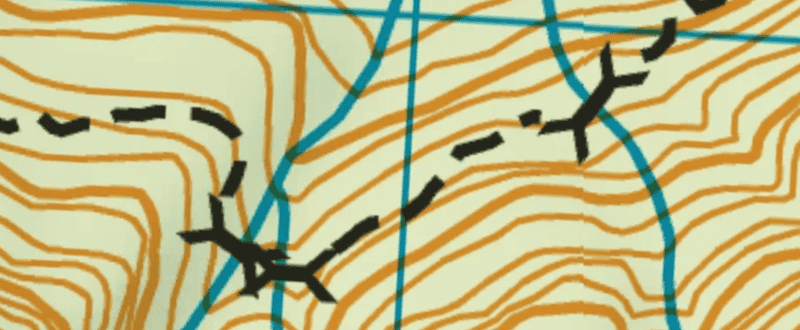
After some faffing about trying to get down from the bridge into the creek, what worked easiest was to go down to the right from the bridge as per the arrow in the photo above above.
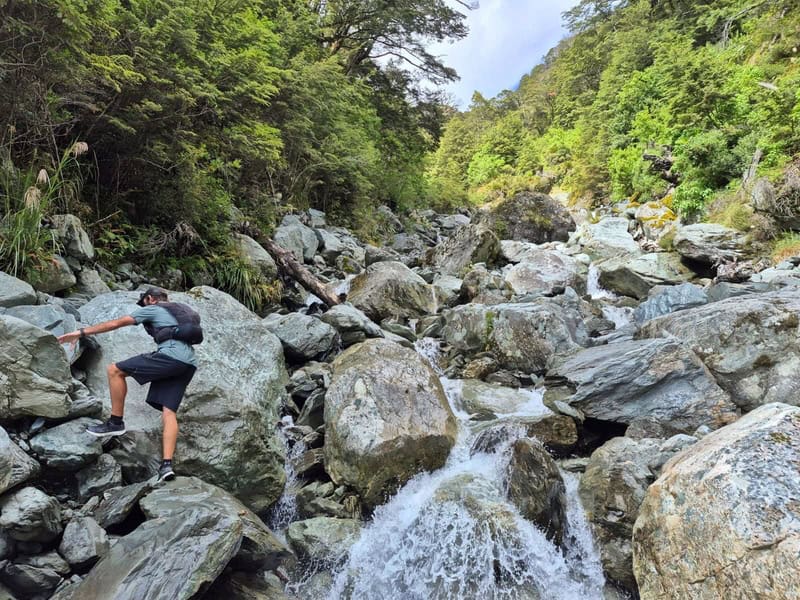
Once in the creek, you’re rock/boulder hopping your way up in whatever style works for you think. I found myself going criss crossing the (mostly) dry riverbed. There’s a couple of sections where I had to use what little strength I have to pull myself up, but I managed to keep my feet dry at all times.

The next key turn to make is at the point circled below, the fork in the creek. You want to stick to the true left, or if you’re looking up while you’re in there…the right fork. In real life the fork isn’t super obvious, but we luckily picked it.
After the fork, it was just a continuation of rocking hopping, scrambling and the like. The majority of the rock was super solid, but try and avoid being below others in your group as the odd rock will break free.
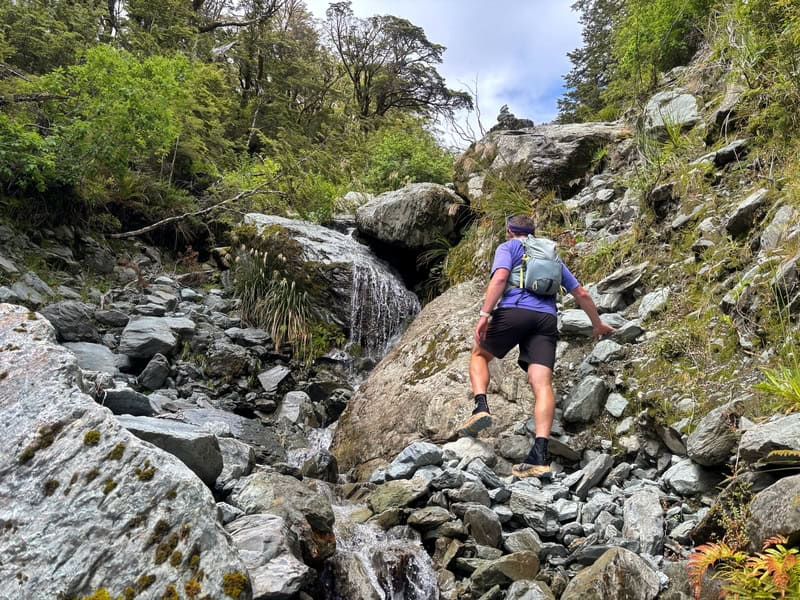
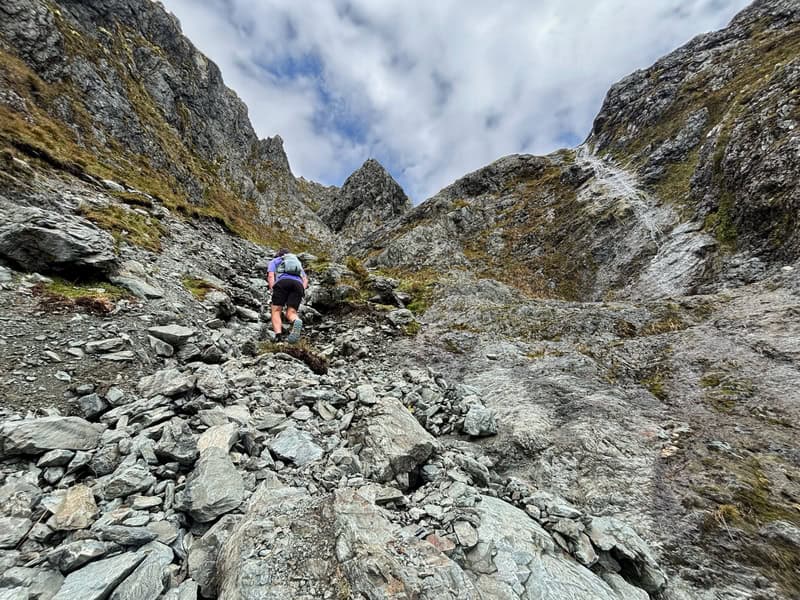
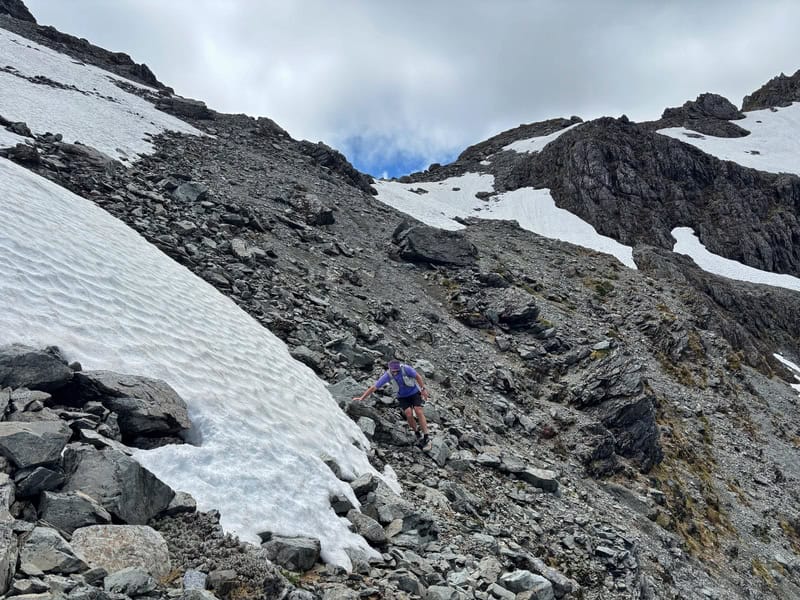
The creek gets steeper as it gets narrower, but you’ll eventually start to figure out the exit point is further ahead, where it looks like scree is coming down the true right hand side. Some people like to get out of the creek bed earlier, but I wanted to stay in it until the slip kind of section you can see in the photo below.
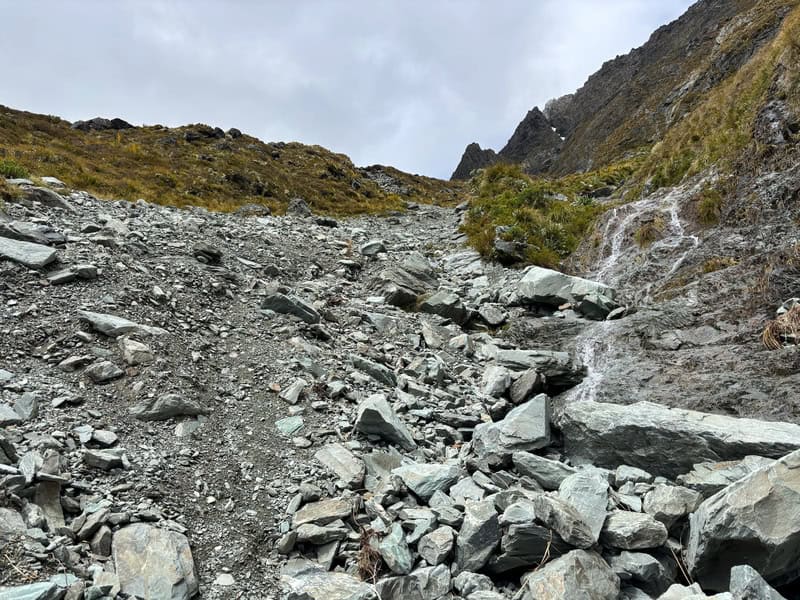
It got steep here, but there was enough hand and footholds to scramble up. Just make sure if you’ve got someone below you, to not dislodge rocks.
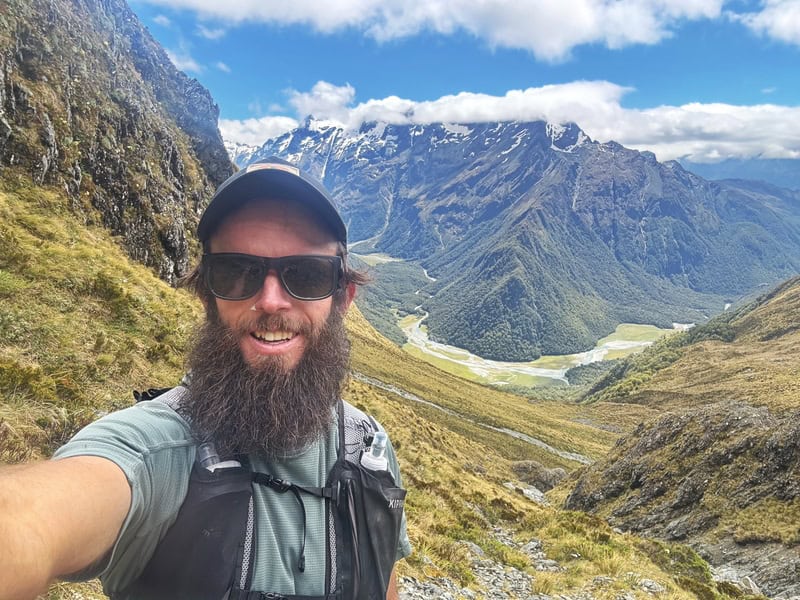
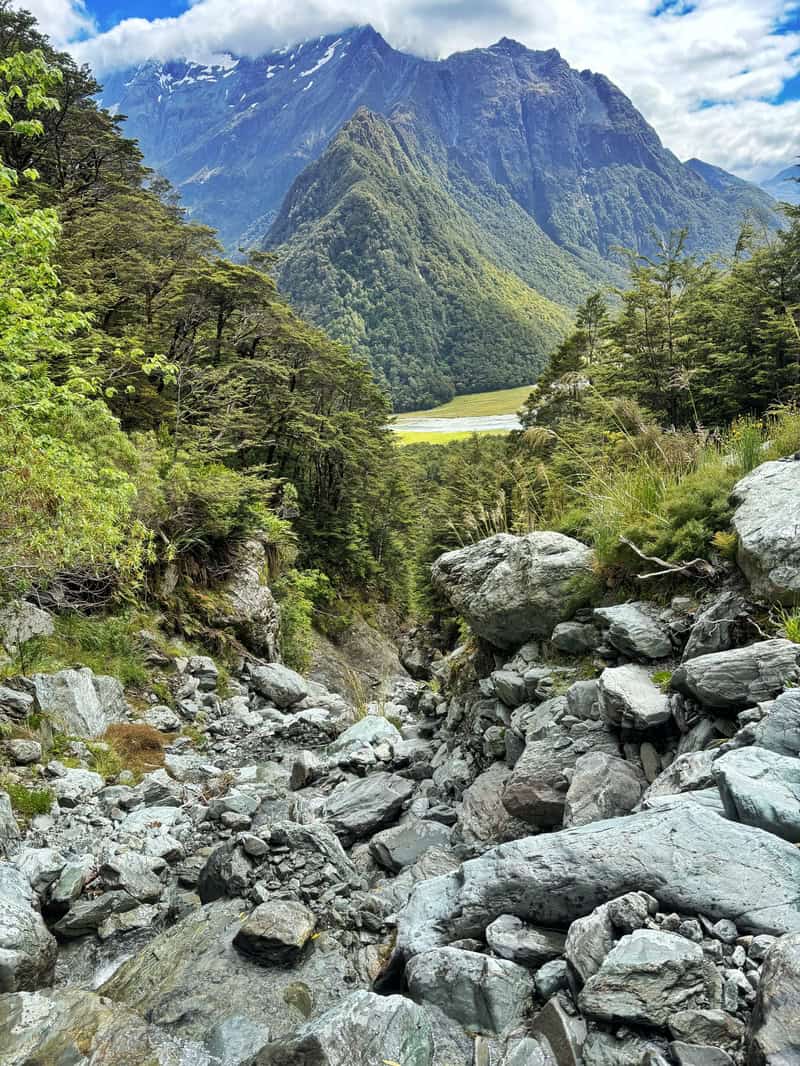
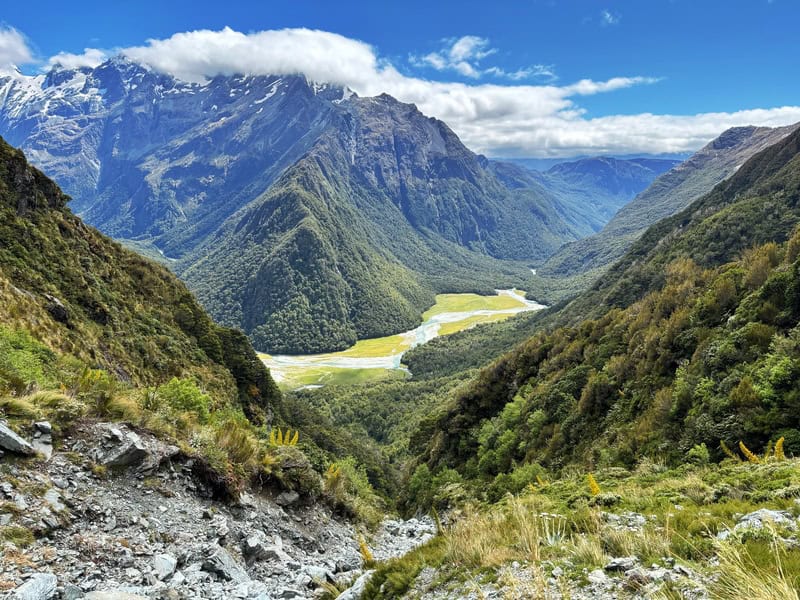
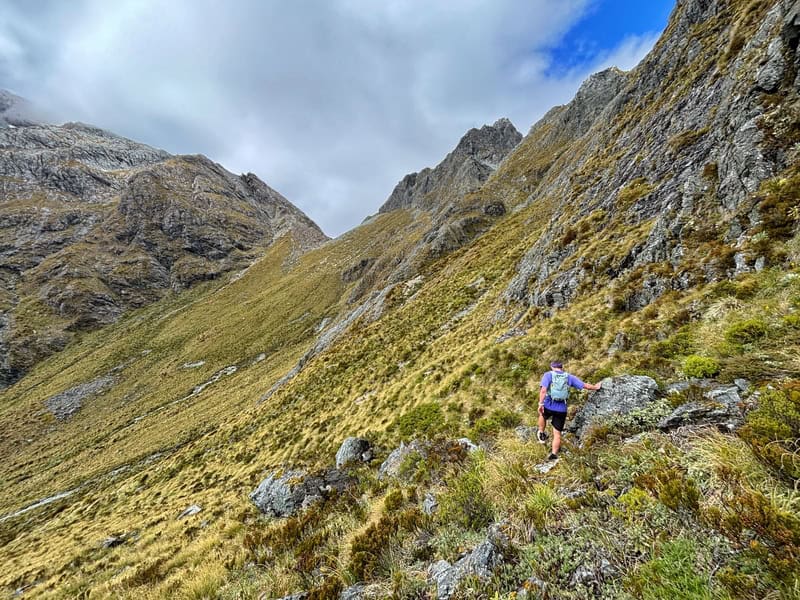
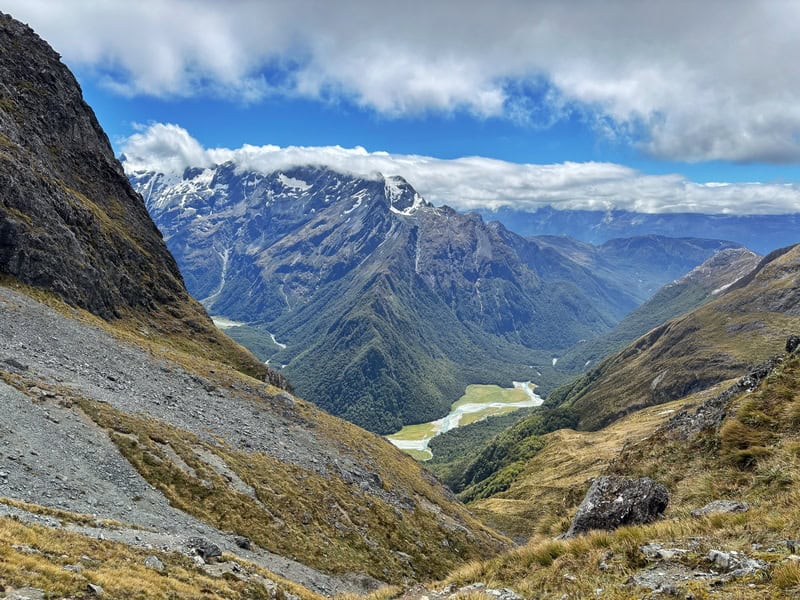
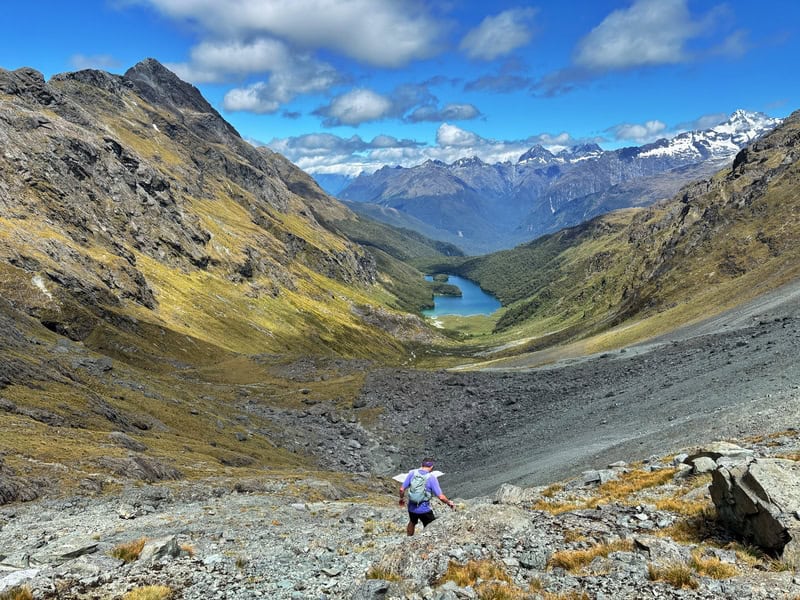
What a reward looking back behind…I’d looked back on the way up, but now on the firm ground littered with tussock it was easier to appreciate.
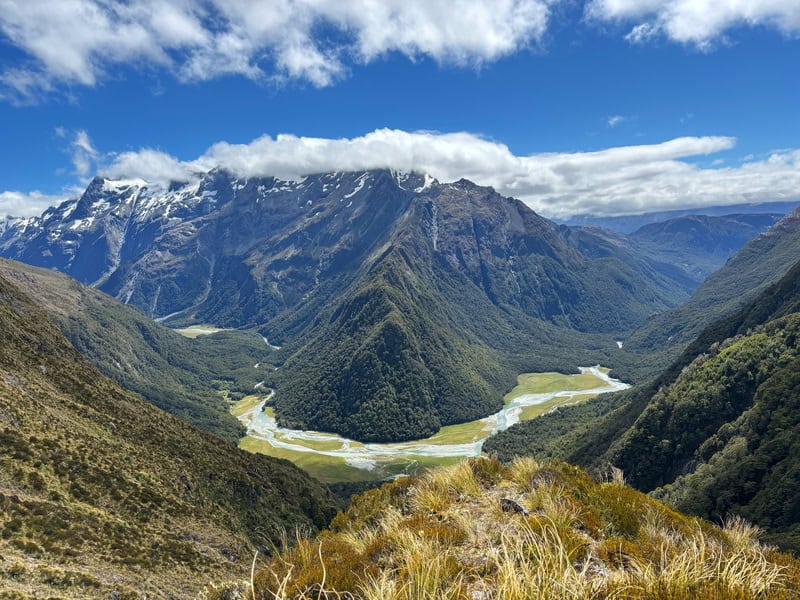
Looking out over the tussock filled basin, I quickly saw where the pass was. Well so I thought, turns out I was looking at Fraser Col (point 1544 on topo) which looks rather gentle. Whoops. You can see Fraser Col in the photo above.
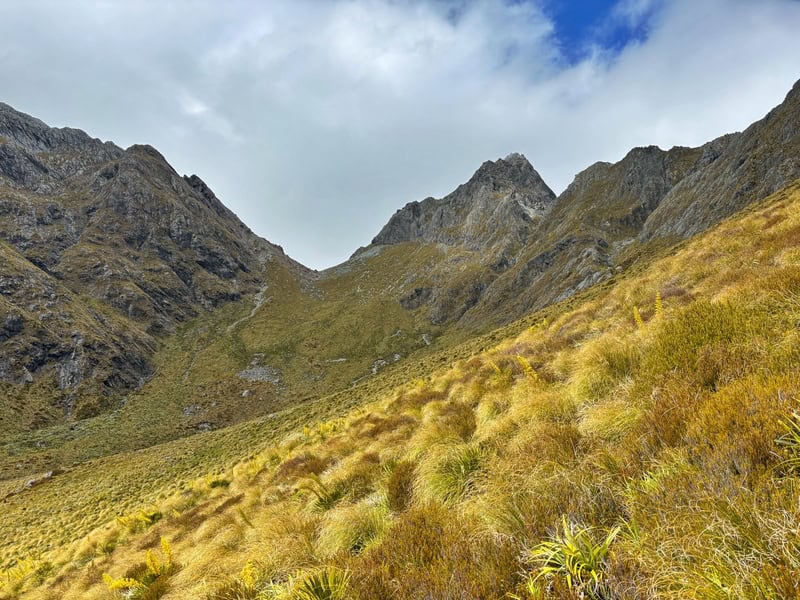
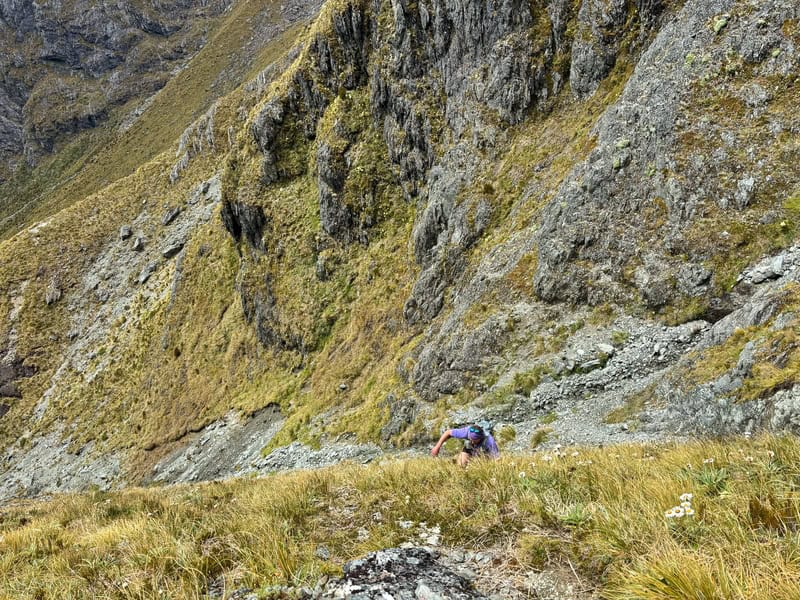
You can’t see Emily Pass from where we were, but I did figure out our rough direction thanks to my mate. The game plan was to try and not drop too much elevation as we siddled along the tussock filled slopes.
I feel like we picked a good line, with the bluffs on our right hand side. Eventually you can piece together where the waterfall flows down (the waterfall isn’t on the map)…which we’d soon enough be going up. But, it was as bad as either of us expected. It was dry which was nice for when in the tussocks and it also made the rock super grippy.
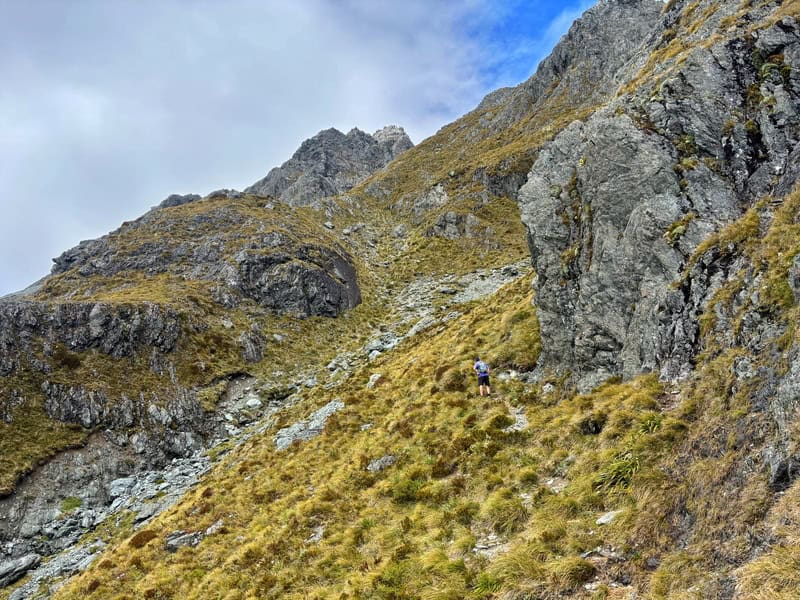
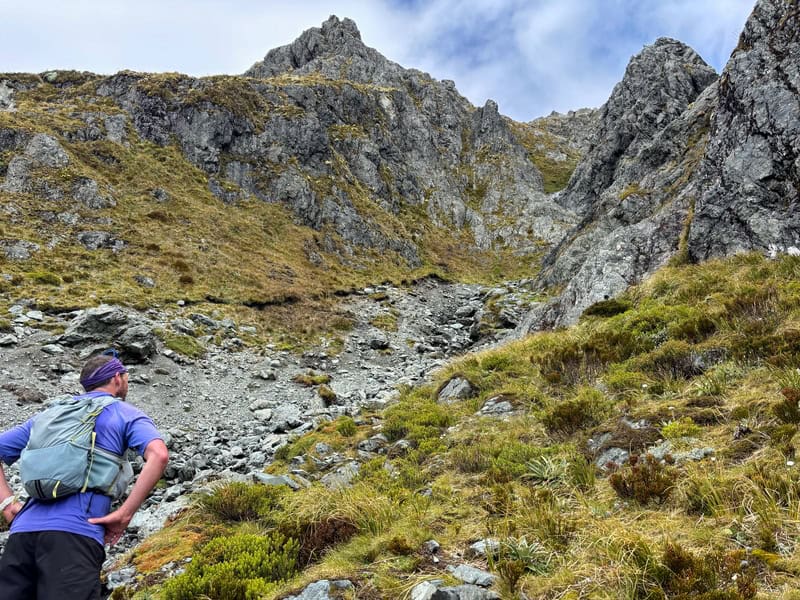
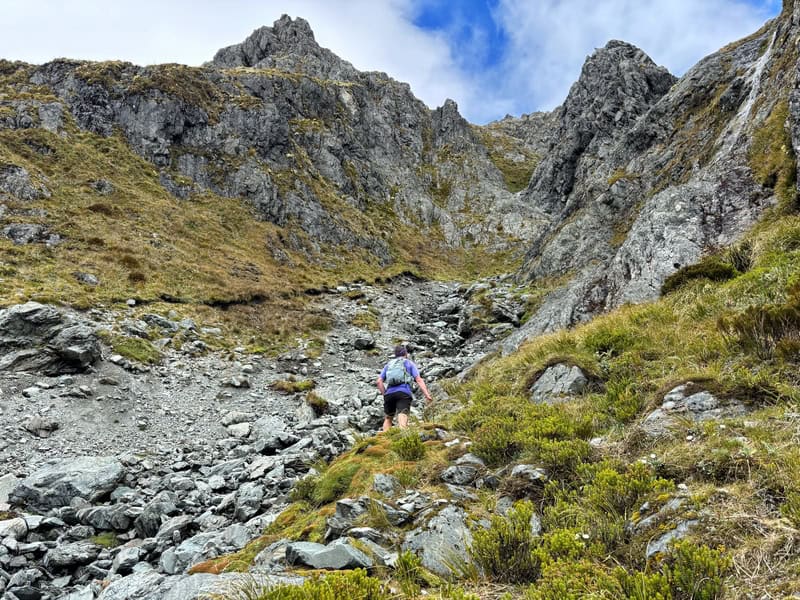
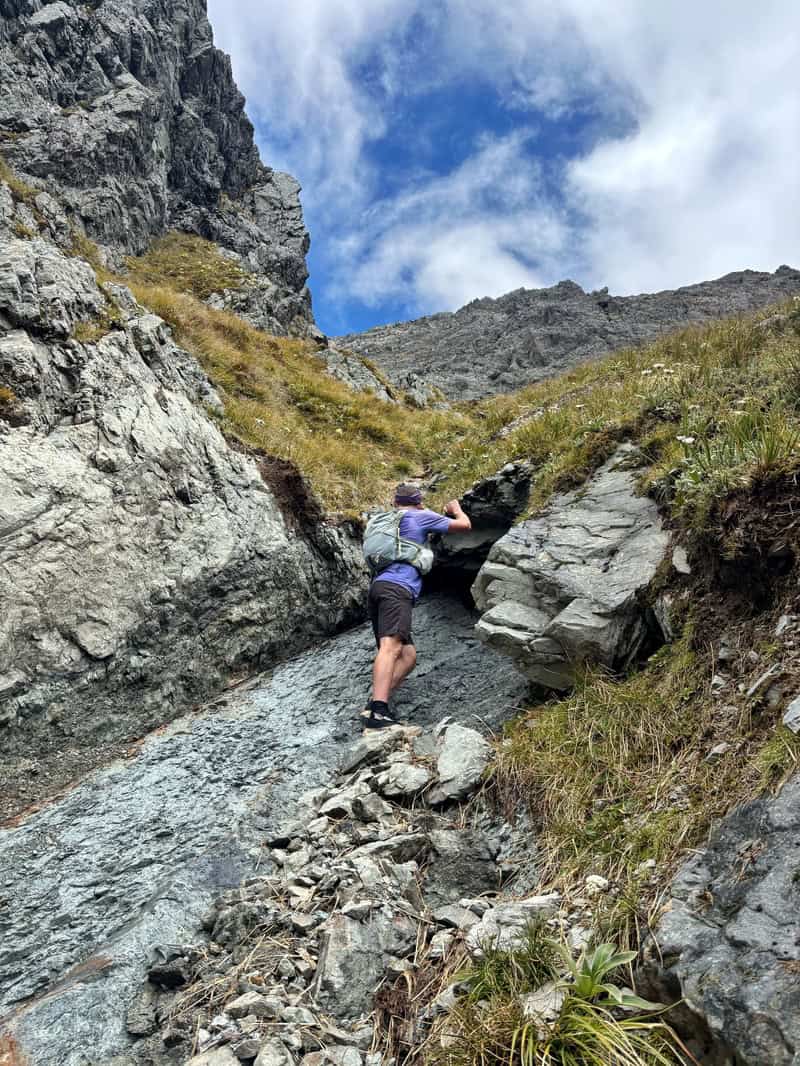
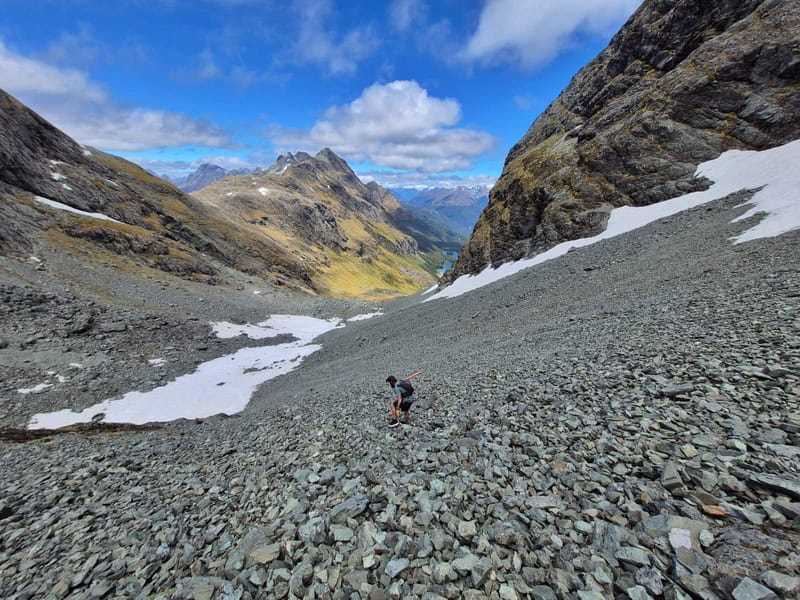
After a quick chat, we determined we’d follow the waterfall as much as possible before heading up the tussock bank on the true left to the top. It is steep, but we are both fit when it comes to being on a steep climb so were fine. Though we noted if we had heavier packs, it gets a lot harder faster. You can see where we veered right off the waterfall and into the tussock before heading up to the pass.
In the third photo below, we couldn’t get up this spot…so we dropped back a few metres to get up onto the tussock.
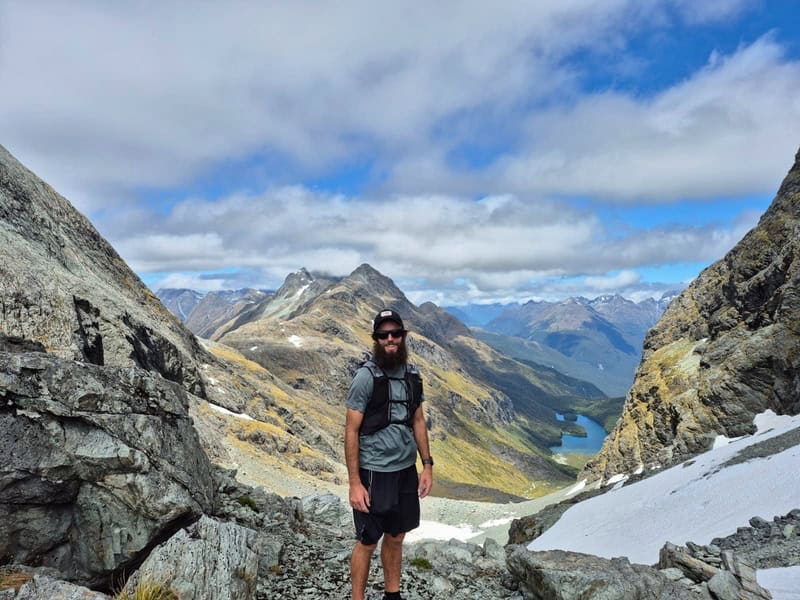
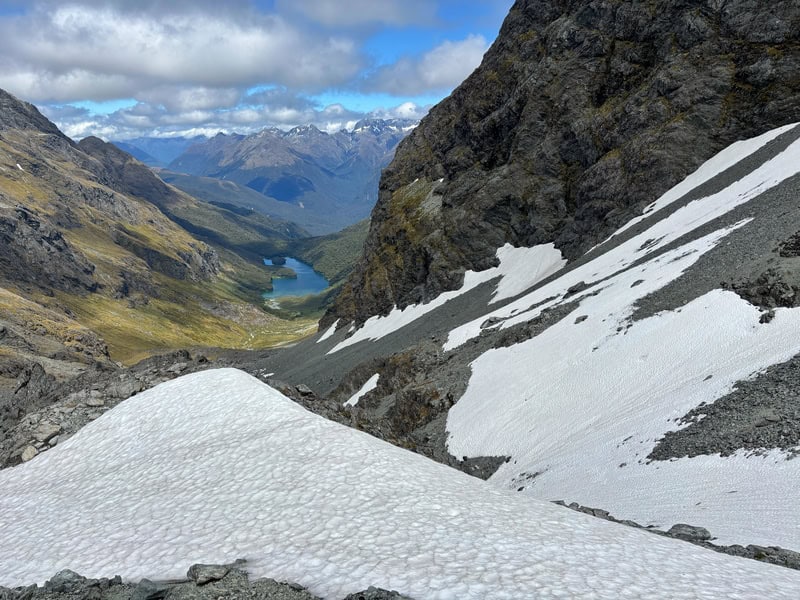
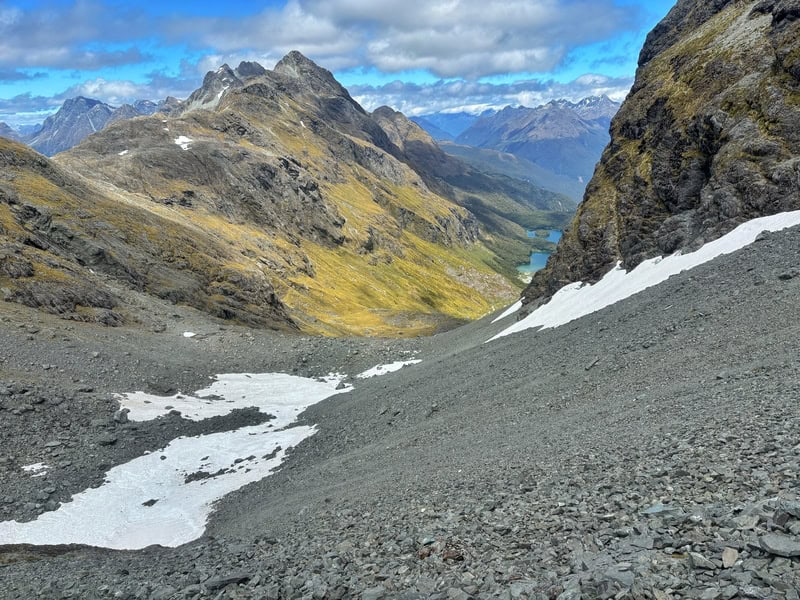
As the tussock slope began to flatten out we made it to the summit, Chur. What a view looking down towards Lake McKenzie wiht the tower bluffs nearby.
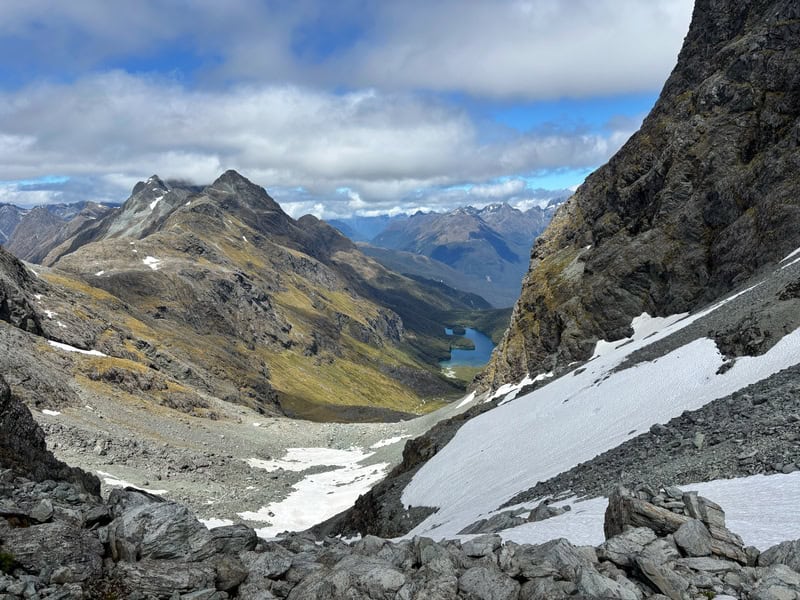
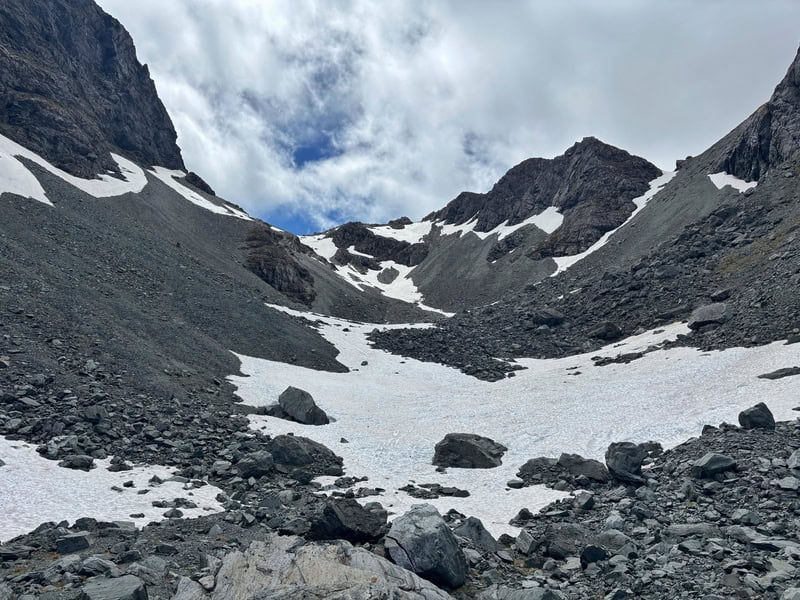
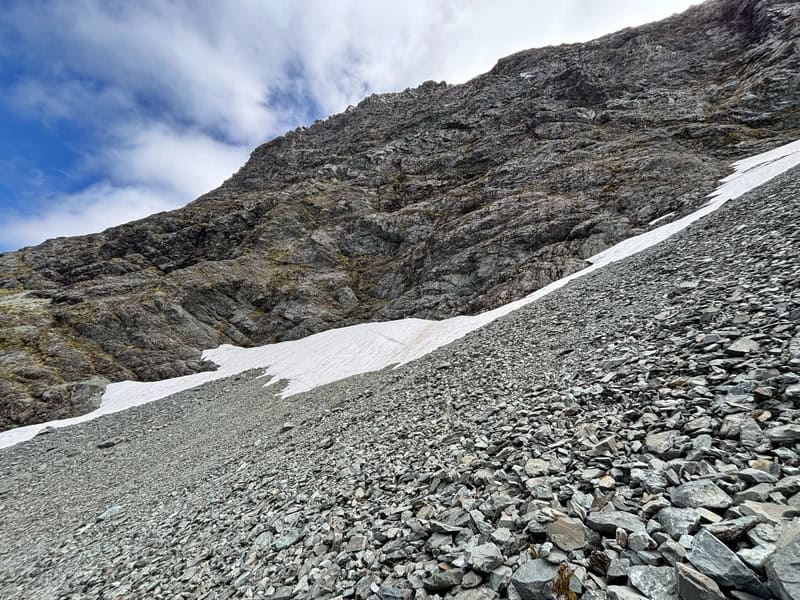
We enjoyed the views, then started thinking about the next obstacle, how to navigate the snow that was still hanging around. We’d been sent a photo of the snow near the pass from Lake Mackenzie earlier in the week and it was more than we’d expected. But after scouting around a bit, we found a line that didn’t seem overly missed all the snow, except for about 10 metres worth…which was soft and didn’t give us any issues.
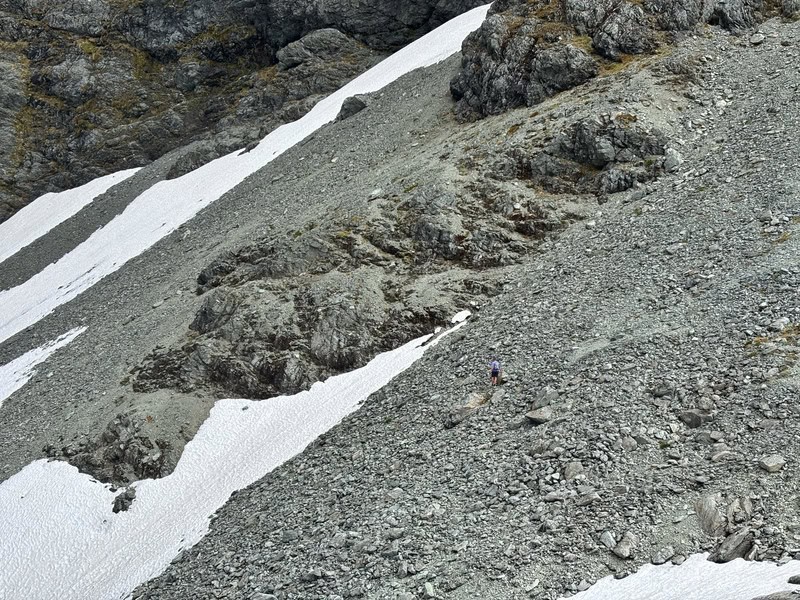
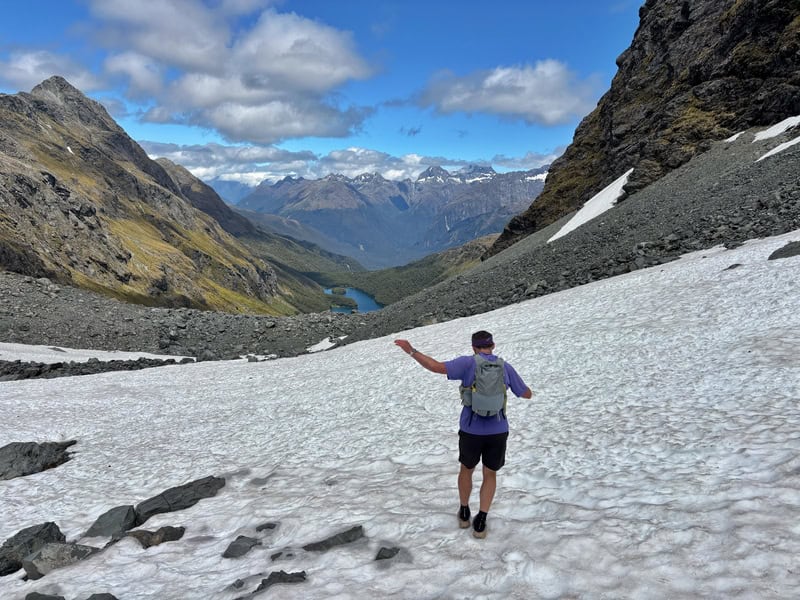
The descent to the valley floor was awkward with scree like rocks ready to knock ankles senseless. Once we go to the bottom of the steep descent, we were back on snow which was cruisey to walk along…and easier than the rocks.
Leaving the snow, we plodded away for a while and eventually found ourselves in the dry creek bed (visible on the GPX) after deciding it was the easier than trying to manage through the tussocks and rocks. The creek bed wasn’t straightfoward with some little parkour moves required, but we enjoyed that for the msot part.
Once we were within a couple hundred metres of Lake Mackenzie, we finally found some water in the creek…a great chance to refill our bottles. We stayed in the stream as the trail was tree lined, and the creek was only ankle deep most of the time. Until we made it to the lake. Don’t forget to look back to where you came from!

Now after a wet summer, Lake Mackenzie was high. And that’s when we struggled to find the track that you see on the topo maps. The track was well under water…like way above waist deep at points, and we could see a marker submerged. So we bashed up into the bush where there were remnants of a track (if you squint eyes you could make it out). Eventually we were on the actual trail which was quite nice and other than being overgrown in a couple spots was easy to follow (there are some orange markers).
That spat us out at Lake Mackenzie Hut which is on the Routeburn Track, and in our minds, we had completed the Emily Pass trail! What a route.
This was such a cool side trip off the Routeburn, I highly recommend. But it’s not easy, and one I wouldn’t attempt solo first time. I was glad to have a mate who has plenty of off route experience along with me.
Got any questions or comments about the trip over Emily Pass? Leave a message below or email jub@churnewzealand.com.
Chur.
p.s. Here’s a map of all the hikes documented on Chur New Zealand. You can click the icon to see brief details, as well as a link to read more about the hike (like this post).
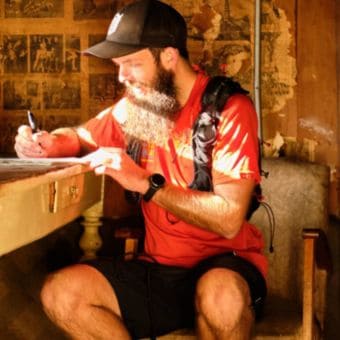
Hey, it’s Jub here. I’m the guy behind Chur New Zealand, helping you have the best time hiking, trekking, walking…whatever you want to call it…in NZ. I’m based in Queenstown and am always out and about exploring trails, old & new. If you have any questions, reach out.