Put the Brewster Hut Track on your must-do list.
It’s an amazing, short, and sharp hike (less than 3km one way) to Brewster Hut, but the views when you get there are amazing.
Beyond Brewster Hut, there are a couple of locations you can visit to make this an awesome day hike, or a truly memorable overnight hike.
This post will give you all the information you need to know about:
- Getting to Brewster Hut
- Going up to Mount Armstrong
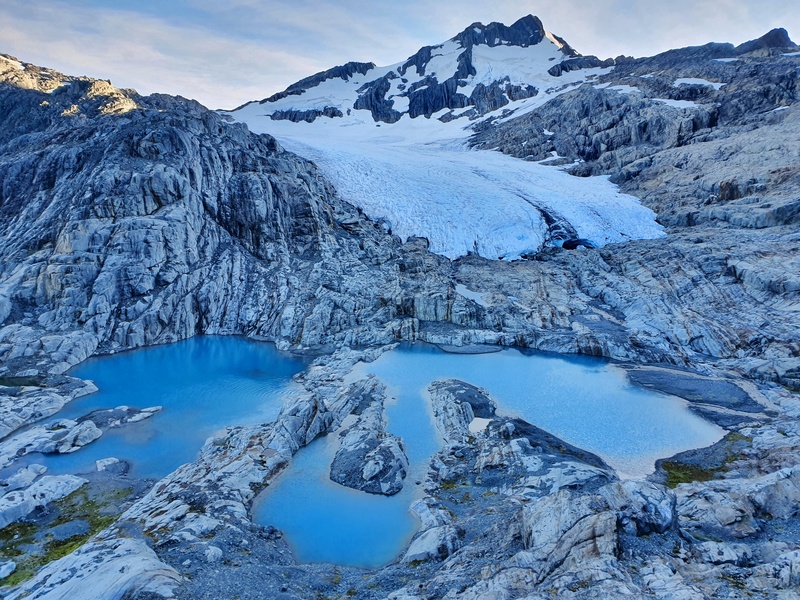
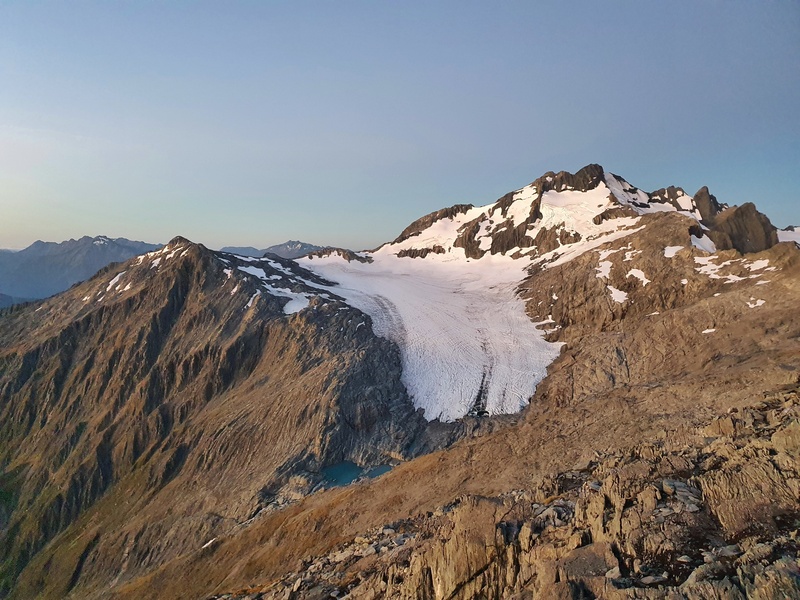
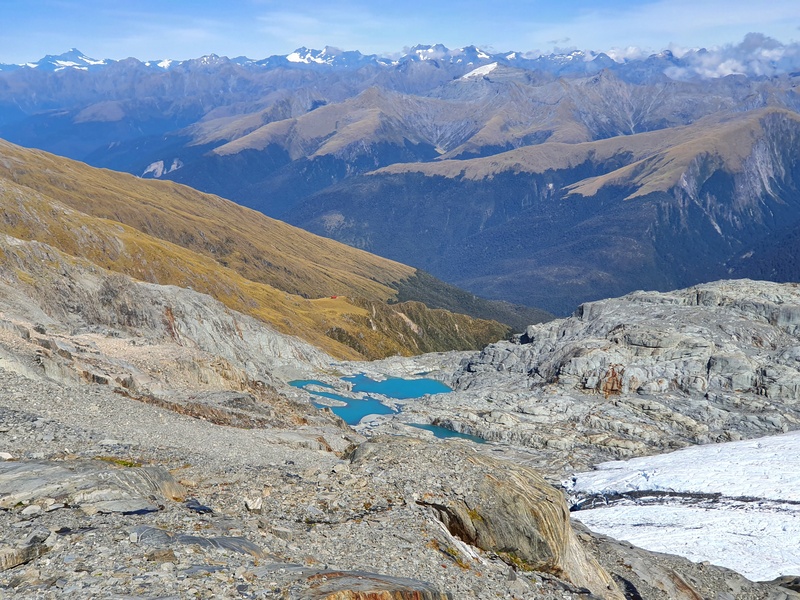
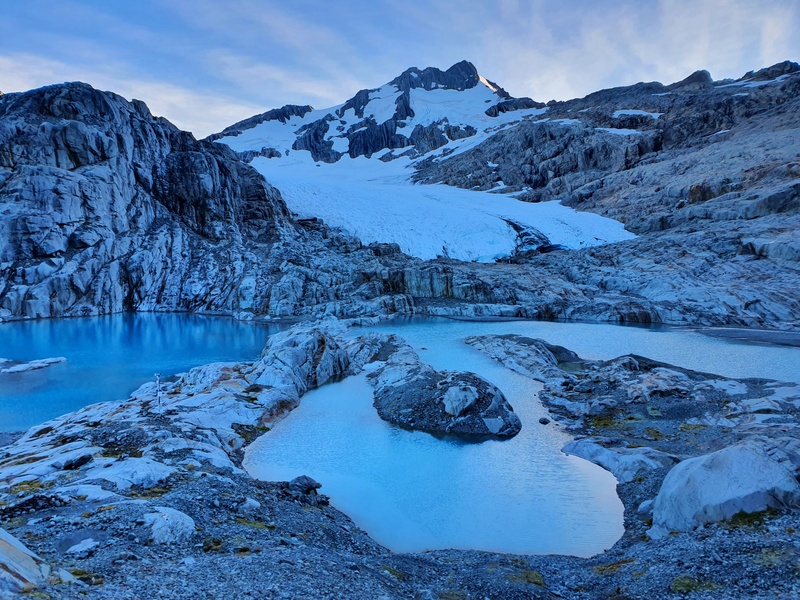
- Hiking to the Brewster Glacier and Terminal Lakes (as seen in the photo above)
- …and a whole bunch more (and photos).
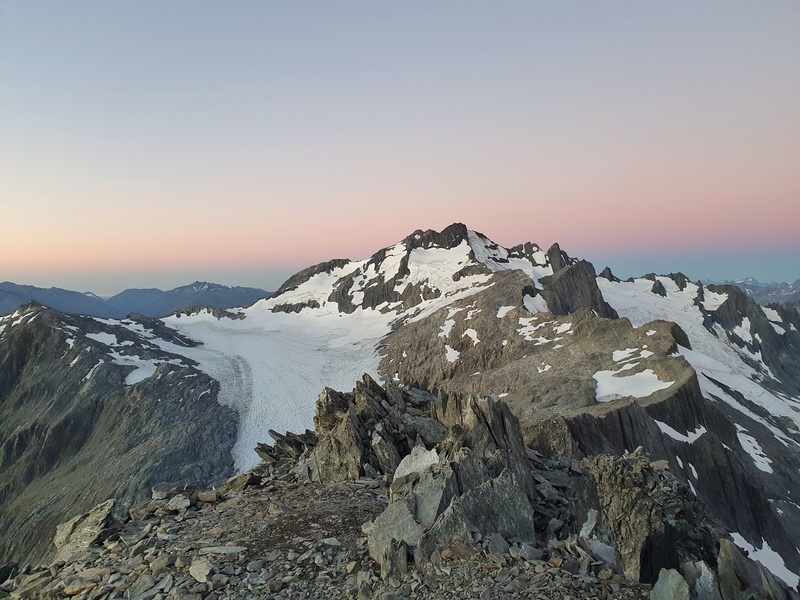
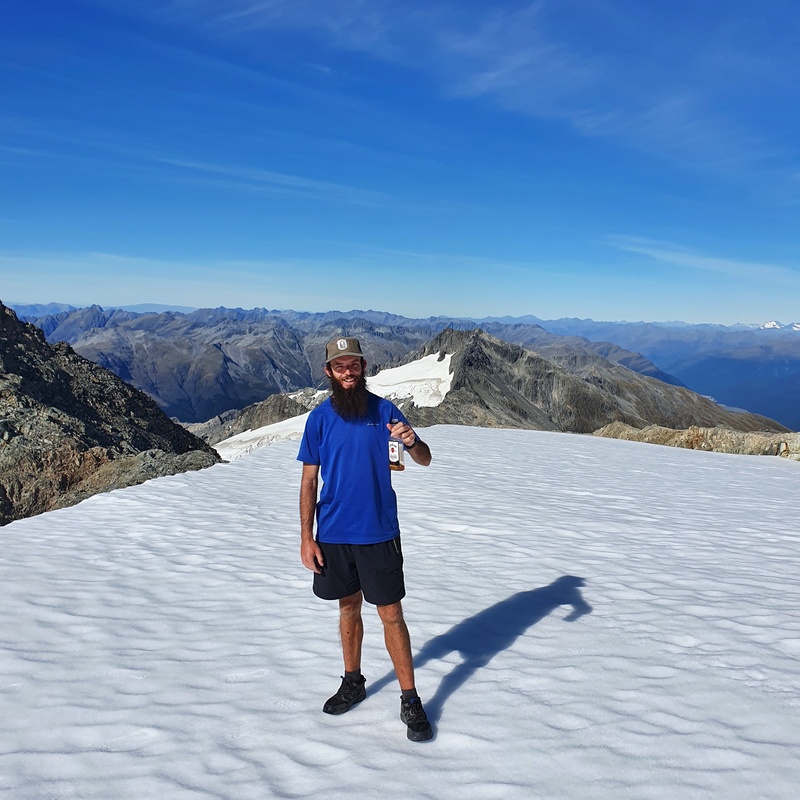
At the top of Mount Armstrong with Mount Brewster in the background.
TABLE OF CONTENTS
1. Details/FAQ About The Brewster Hut Track (& Beyond)
2. Brewster Hut Track Map
3. How To Get To The Trailhead
4. My Brewster Hut/Armstrong/Glacier Experience
5. Quick Tips
6. More photos
1. DETAILS/FAQ ABOUT THE BREWSTER HUT TRACK (& BEYOND)
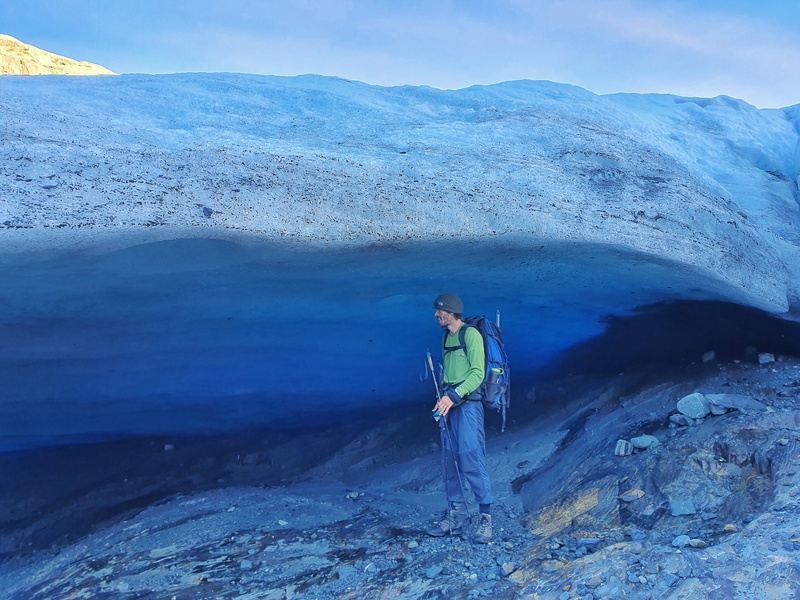
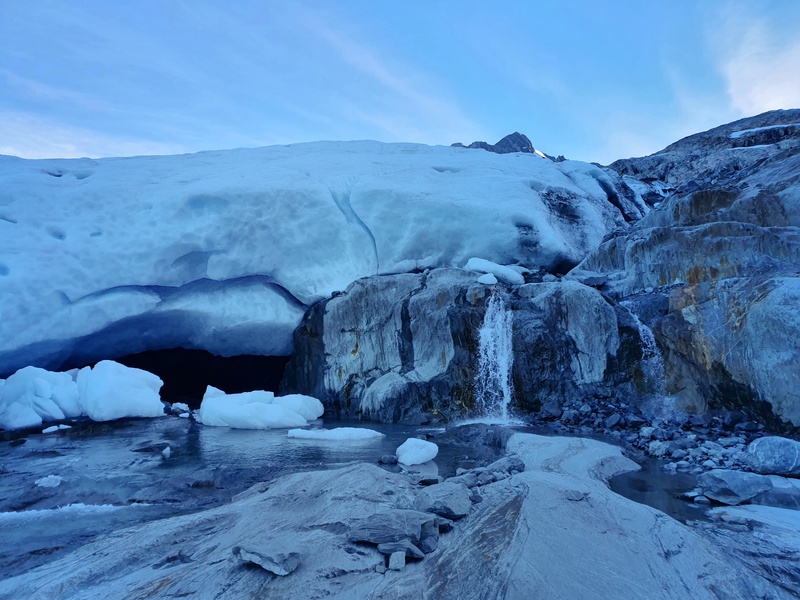
A nifty ice cave like thing.
How hard is it to get to Brewster Hut?1:
Medium to Hard. Given the distance, I won’t rate this hike as hard…despite the gnarly terrain. You’ll just need to chip away at it and you’ll get there. The views from the hut are awesome, and there’s zero obligation to go beyond the hut if you’re not feeling up to it.
How far is the Brewster Hut hike?
Based on my Strava data, I have the following:
- Car park to Brewster Hut: 2.80km one way
- Brewster Hut to Mount Armstrong summit: ~3.80km return
- Brewster Hut to the Brewster Glacier lakes: ~6km return
I’ve looked at other websites, and this is in the ballpark of the figures they have too.
What is the elevation gain like?
- Car park to Brewster Hut: 965 metres
- Brewster Hut to Mount Armstrong summit: ~715 metres
- Brewster Hut to the Glacier Lake: ~600 metres (400 metres of that on the way there).
You can check out the Brewster Hut elevation profiles here:
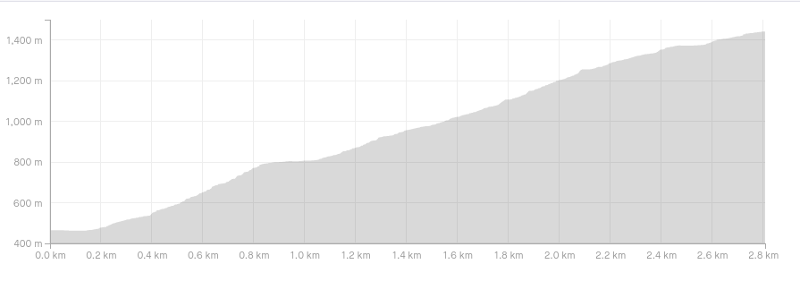
The elevation profile from the trail head to Brewster Hut.
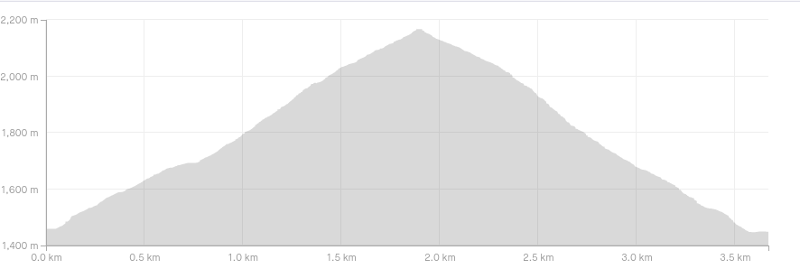
The elevation profile from Brewster Hut to Mount Armstrong summit, return
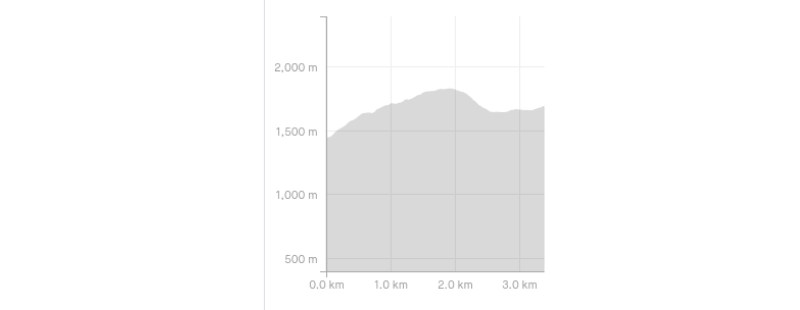
The elevation profile from Brewster Hut to the bottom of the Brewster Glacier (one way).
How high is Brewster Hut?
Brewster Hut is ~1450 metres above sea level.
If you’re interested, Mount Armstrong is 2174 metres above sea level and Mount Brewster is 2516 metres (the bottom of the glacier you can get to is at about 1650 metres).
How long does the hike take?
A view of Brewster Glacier from Mount Armstrong summit
- Car park to Brewster Hut: DOC suggests 4 hours. That’s long given there’s less than 3km to cover. We completed the hike in 1 hour and 40 minutes. At the absolute most it’ll take 4 hours.
- Brewster Hut to Mount Armstrong: We made it to the summit in 55 minutes, but that was quick as we were battling sunset. I’d give it up to 2 hours to reach the summit.
- Brewster Hut to the Glacial Lakes: It took us about 75 minutes to reach the lakes, much longer than we expected. In saying that I talked to some people who took 2 hours getting to the lakes as the descent to the lakes is pretty steep. Don’t forget you then have that amount of time to return as well.
Should I stay overnight at Brewster Hut?
If possible, YES!
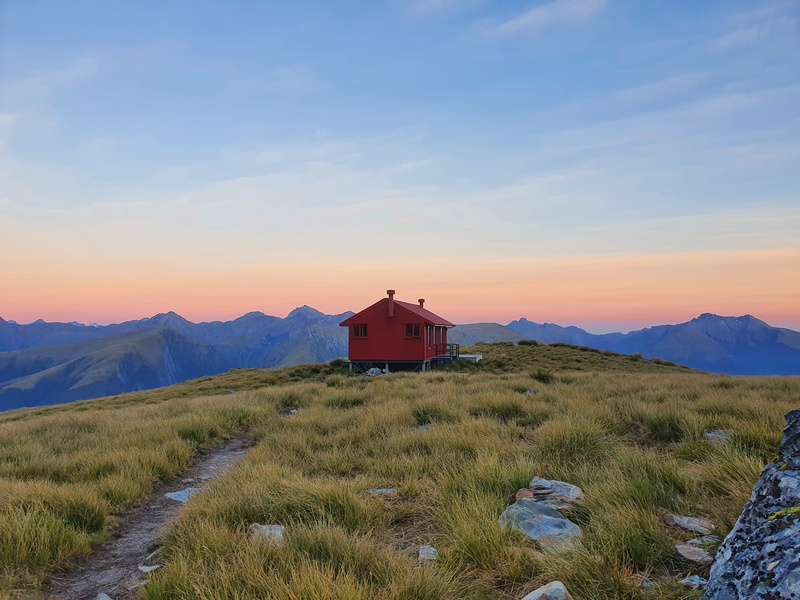
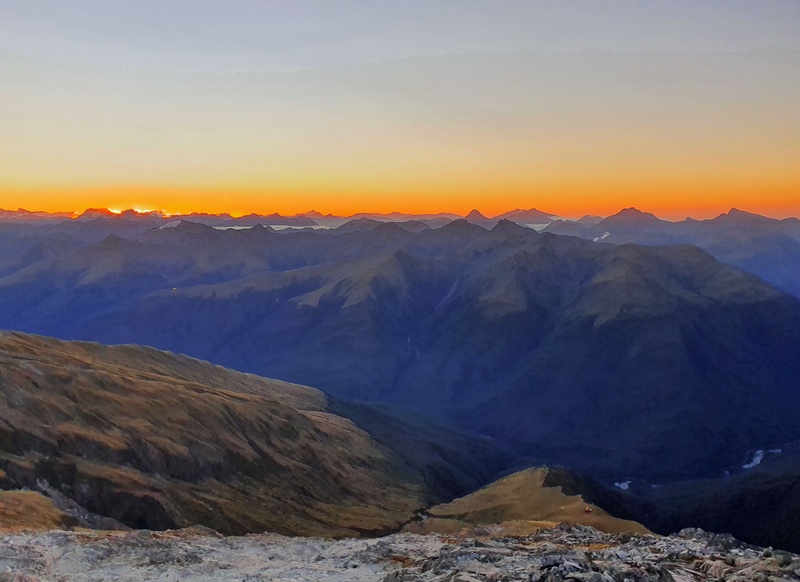
I had the opportunity to do this as a day trip at one point. I didn’t as I wanted to experience Brewster Hut overnight. I’m super glad I did as the sunset and sunrise from up the top of the mountain were truly amazing.
Stay overnight if possible, it’s one of the best overnight trips from Wanaka 😀
How much does Brewster Hut cost?
All-year-round the 12 bunk hut costs:
Adult (18+ years): $45 per night
Youth (5–17 years): $22.50 per night
Child/Infant: (0–4 years): free
- From May 1st to Labour Weekend – Lake October: pre-purchase standard DOC Hut tickets to put in the honesty box at the hut (4 blue for adults/4 yellow for youth).
If you have a Backcountry Hut Pass, you can use that at Brewster Hut from May 1st to late October (Labour Weekend).
The best way to check the conditions of the track/hut?
You’ve got two ways to get up-to-date weather information.
1. Pop into one of the DOC offices who should be able to tell you up to the date information. The Wanaka office will have the best intel.
2. If you’re just looking for a mostly reliable weather app, I find searching Brewster Hut on YR.no to be solid.
Can you do Brewster Hut in winter?
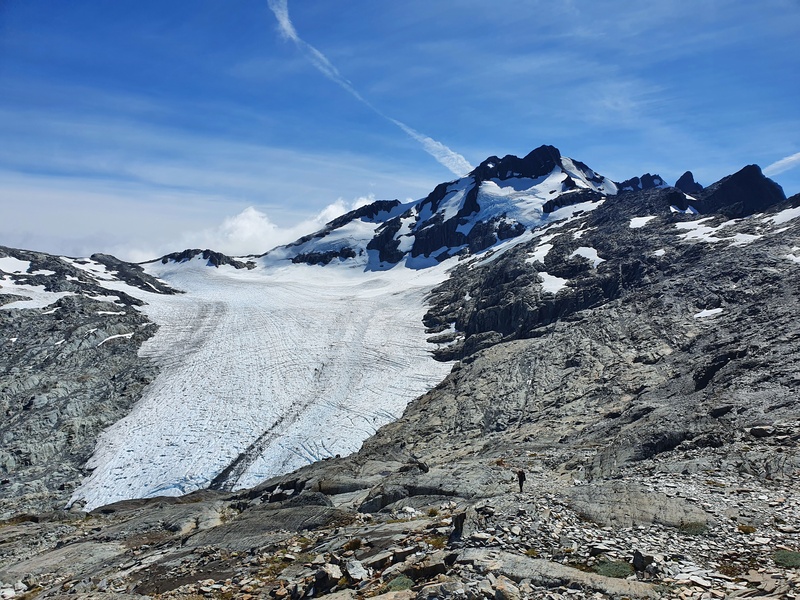
Brewster Glacier and Mount Brewster.
As the hut is at 1450 metres above sea level, the hut may be in the snow during parts of winter, but it’ll be below the snow line a lot of the time. If it’s been raining the roots in the treeline will be super slippery and that won’t be fun.
Going beyond Brewster Hut is going to be a bad idea for a lot of people in the winter. But it all depends on recent snow levels and the weather. Visiting Wanaka DOC information centre at times like these is going to be a great help to get the latest information before you start the hike.
Note: The hut doesn’t have a fireplace, but the windows are double glazed. You’ll want a decent sleeping bag in the winter!
What do you need to pack for Brewster Hut?
There’s nothing special I’d recommend for Brewster Hut. Just the normal overnight hiking gear list, like:
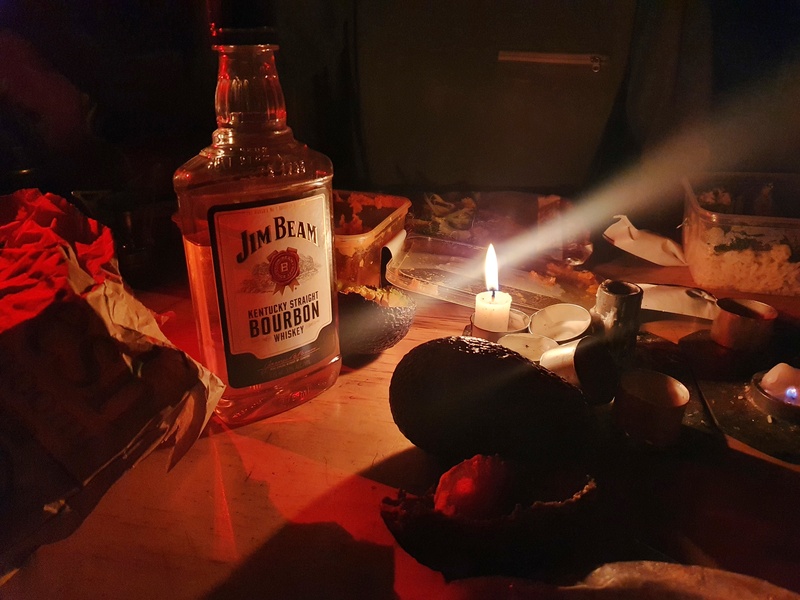
Hut nights are always lovely.
- Hiking clothes
- Food and water (there’s water at the hut too)
- Gas/cooker if required
- Sleeping bag
- Hiking poles (not compulsory but a lot of people used them on this hike)
- Waterproof gear (optional)
- Thermal and a jacket for the evenings
- PLB (recommended but optional)
2. BREWSTER HUT TRACK MAP
The map below is a GPX file on top of a topo map showing the route. The route to the hut is super easy to follow with a well-worn track, and plenty of orange triangles so unless the cloud is really low, you won’t get lost.
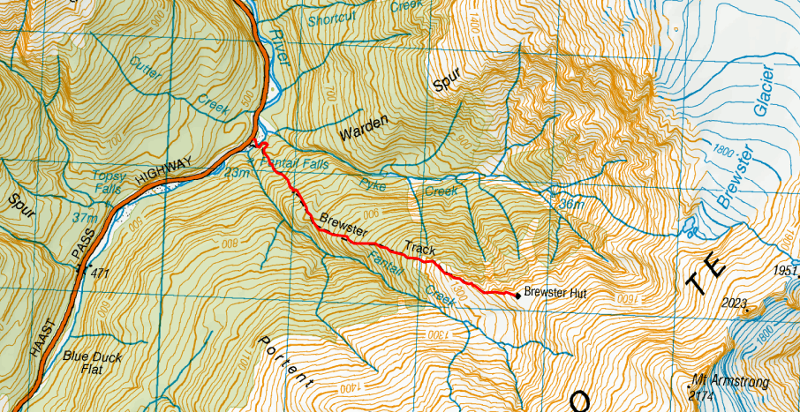
I’ll detail more about the details to getting to the glacier and Mount Armstrong later in the post, but if you’re looking for a GPX file for Mount Armstrong, here you go.
You can see the route we took to the glacier/lakes/toward Mt Brewster summit here.
3. HOW TO GET TO THE TRAILHEAD

The Brewster Hut Track trailhead is located here, on SH6 between Haast and Makaroa.
The signs nearby usually mention Fantail Falls rather than Mount Brewster, but the car park is the same for both activities. It can be busy in the high season, but there are lots of people coming and going from Fantail Falls so you’ll find a space to park easily.
Distance from nearby landmarks/towns to the trailhead:
- 85km from Wanaka
- 14km from the Blue Pools car park
- 4.4km from the Haast Pass Lookout
- 6km from Thunder Creek Falls
- 58km from Haast
Driving to the trailhead is how pretty much everyone is going to get here.
There’s the option of hitchhiking there which is what I did, but the traffic on the Haast Pass Road can be sparse. It took 2 hours to get a ride from Makaroa to the trail head.
4. MY BREWSTER HUT (AND BEYOND) EXPERIENCE
In this photo you can see Brewster Glacier, the terminal lakes, Brewster Hut and Mount Aspiring.
FROM FANTAIL FALLS TO BREWSTER HUT
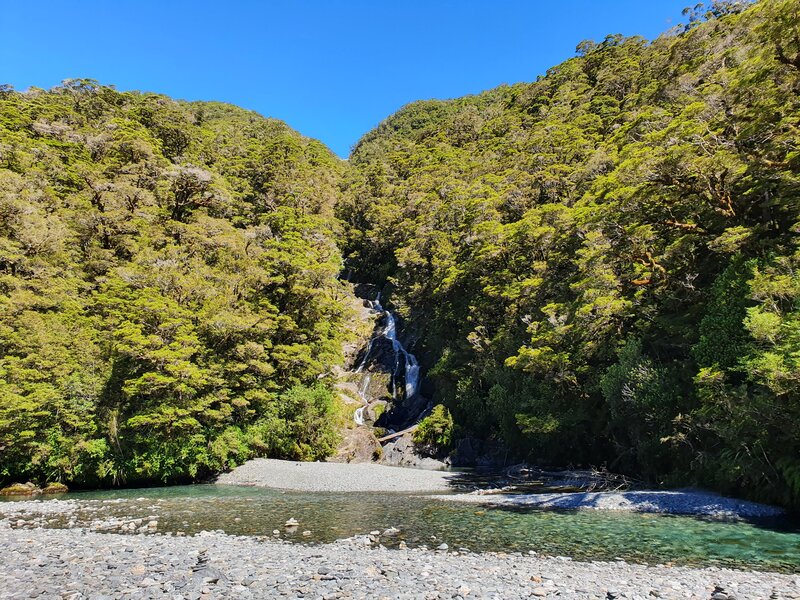
Fantail Falls
After a late arrival, we started the hiking at 5.43pm with a goal of getting up there in good time with minimal stops. I wasn’t expecting the river crossing, but plowed through it without taking the shoes off.
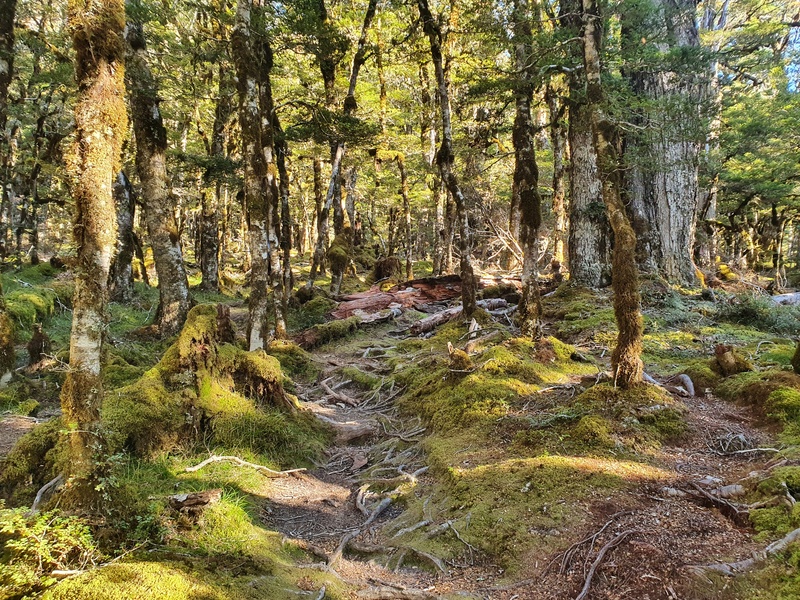
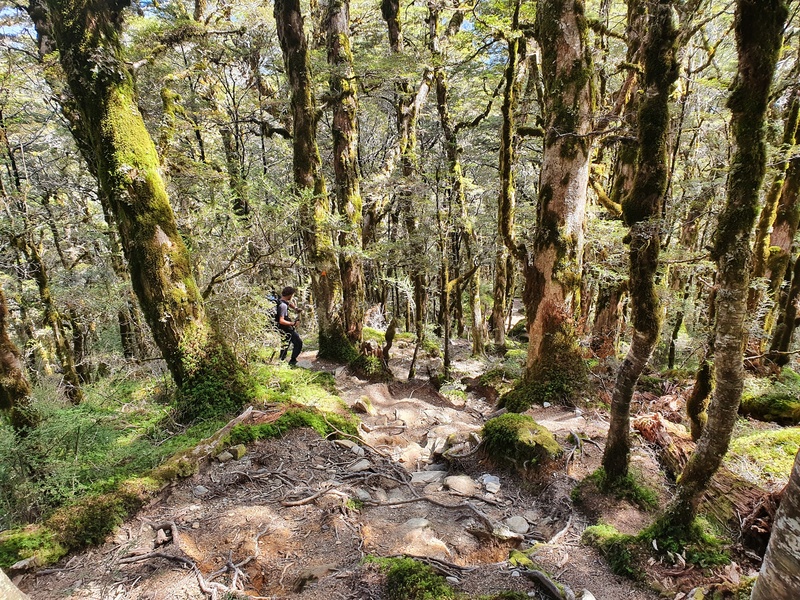
The beautiful beech forest
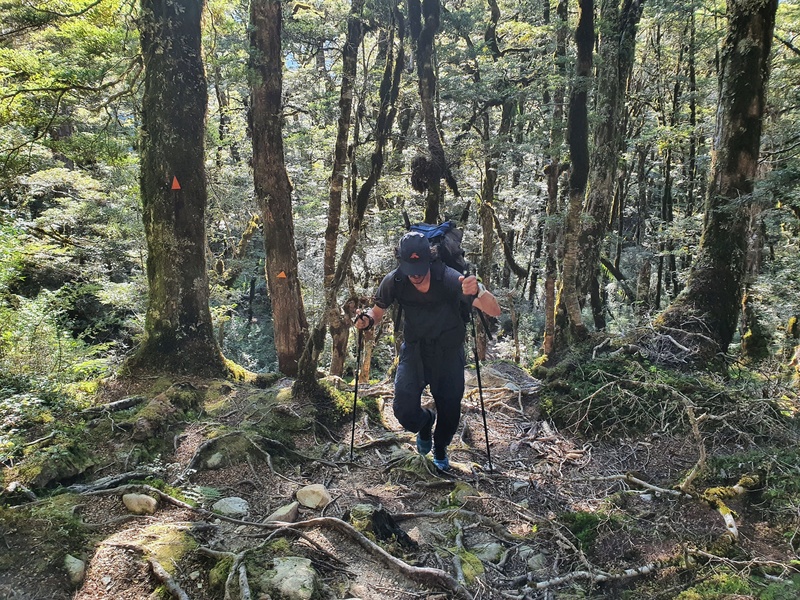
Going up the Brewster Track
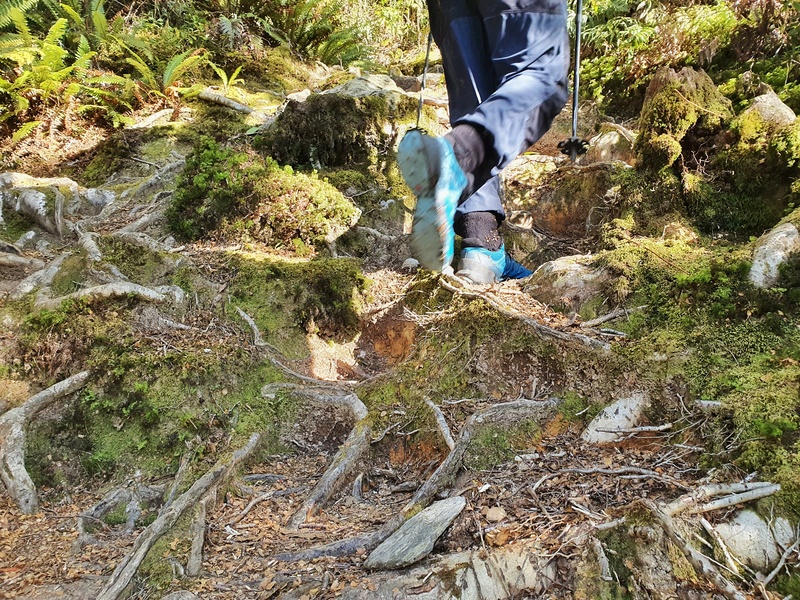
As soon as you enter the bush, the climb kicks in. And you might find yourself kicking a root or two soon enough as you make your way through the beech forest. It’s a steady climb, and don’t be surprised to find yourself out of breath early on if you push too hard. This is definitely a hike where you’ll be better off being the tortoise and not the hare (most of the time).
There’s no views on the way up but the forest is beautiful and in the middle of summer, the shade will be appreciated. Once you’re above the treeline, the only shade you’ll have left is when you’re at Brewster Hut.
We were making good time, and my friend and I both noticed the bush starting to thin out meaning we were close to exiting the treeline.
We did (this happens about 1.8km and 700 metres of elevation gain into the hike), and found the next couple of hundred metres a little niggly with a narrow track with some tricky foot placements/rocks…although the roots were gone. You win some, and lose some 😀

If you look closely you can see Pyke Creek/waterfall
You get some awesome views once you get above the Beech Forest
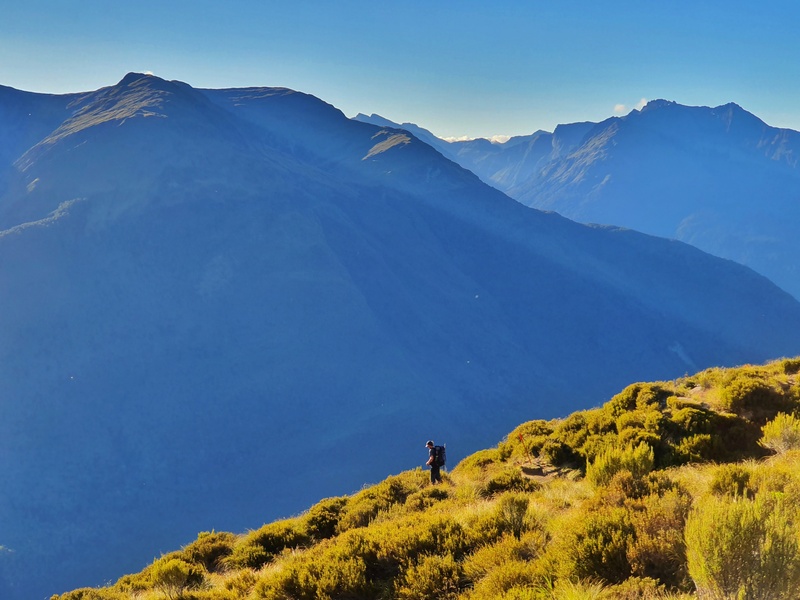
The last 800 metres or so you’re well and truly on a sweet ridgeline. You’ll see Mount Armstrong peaking out straight ahead, and too the left you’ll see Brewster Glacier and Mount Brewster along with Pyke Creek which looks more like a waterfall to me.
Don’t forget to look back for the amazing views over the valley and lots of Mount Aspiring National Park (there are lots of awesome hikes in Mount Aspiring NP).
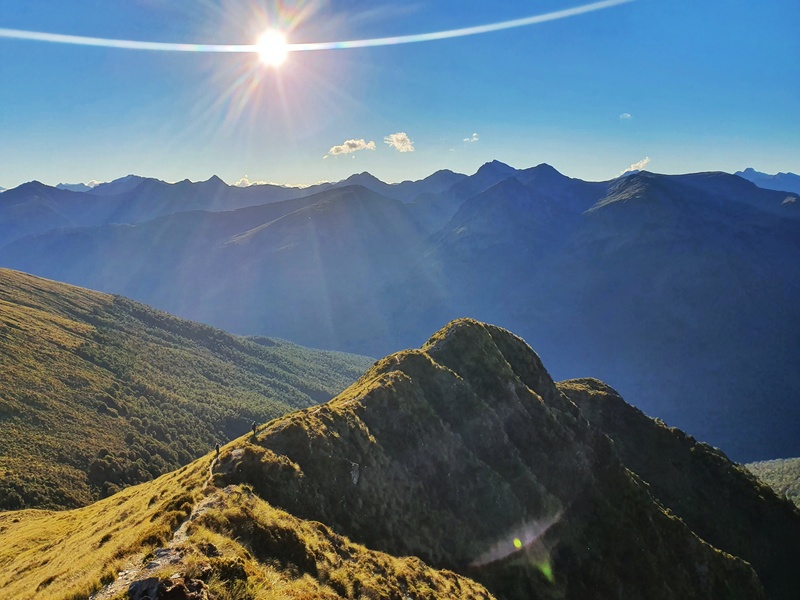
The ridgeline is fun! It’s not a super narrow ridgeline, but the tussocks do feel like they could tumble down the mountain at any moment.
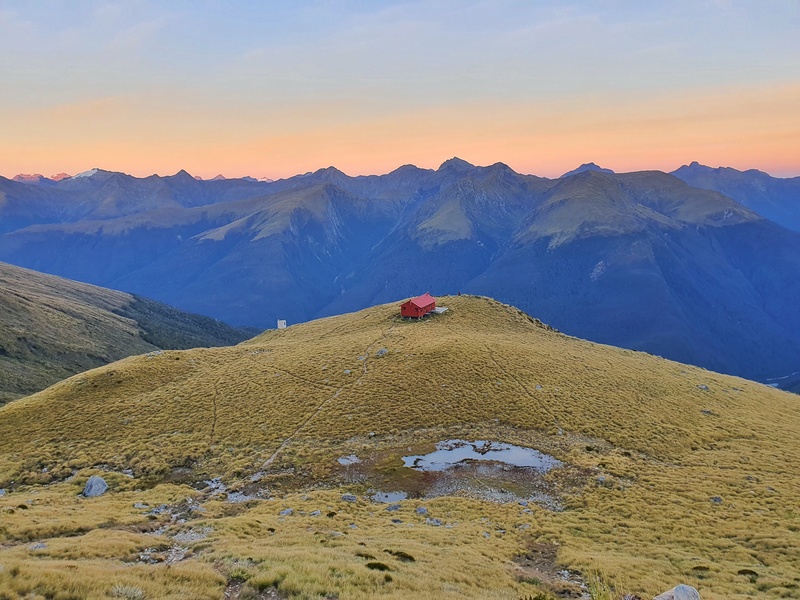
At some point I spotted the toileta but it wasn’t until we got really close that Brewster Hut popped into view. What a spot to put the hut!
On the descent down from the hut, you’ll likely be a bit quicker but it’s not an easy hike down the hill with all the roots to navigate once you hit the treeline.
But let’s get onto adventures that are possible beyond the hut.
BREWSTER HUT TO MOUNT ARMSTRONG (RETURN)
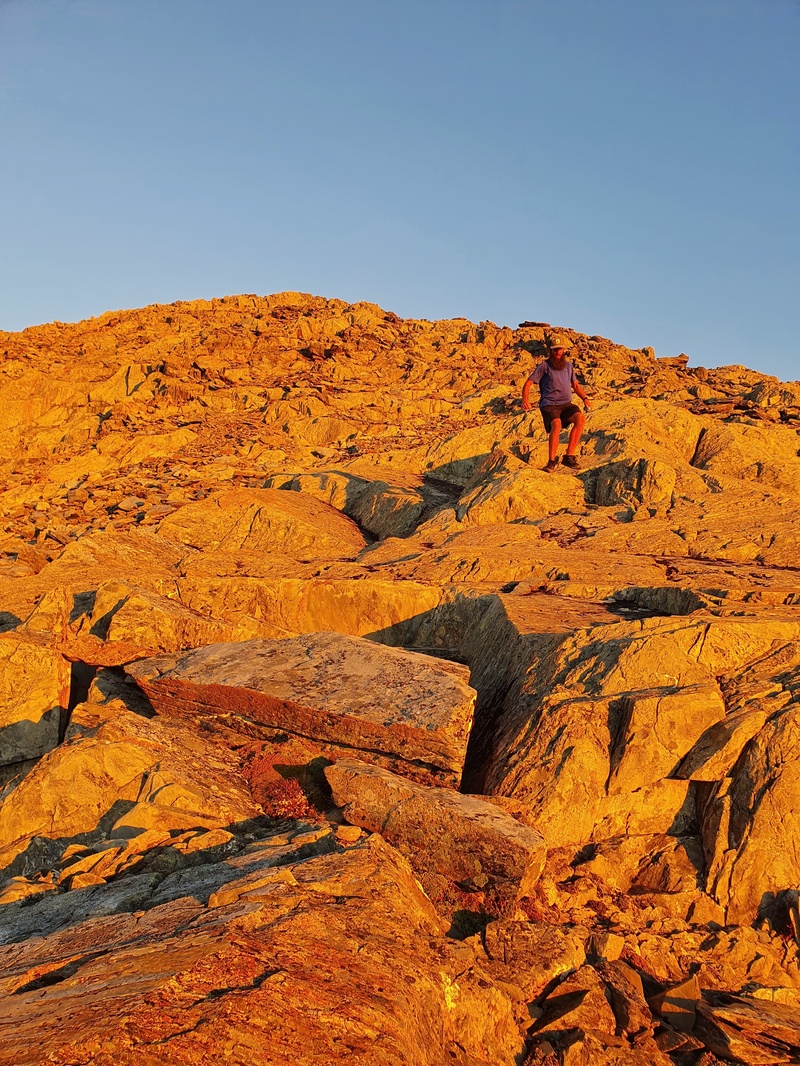
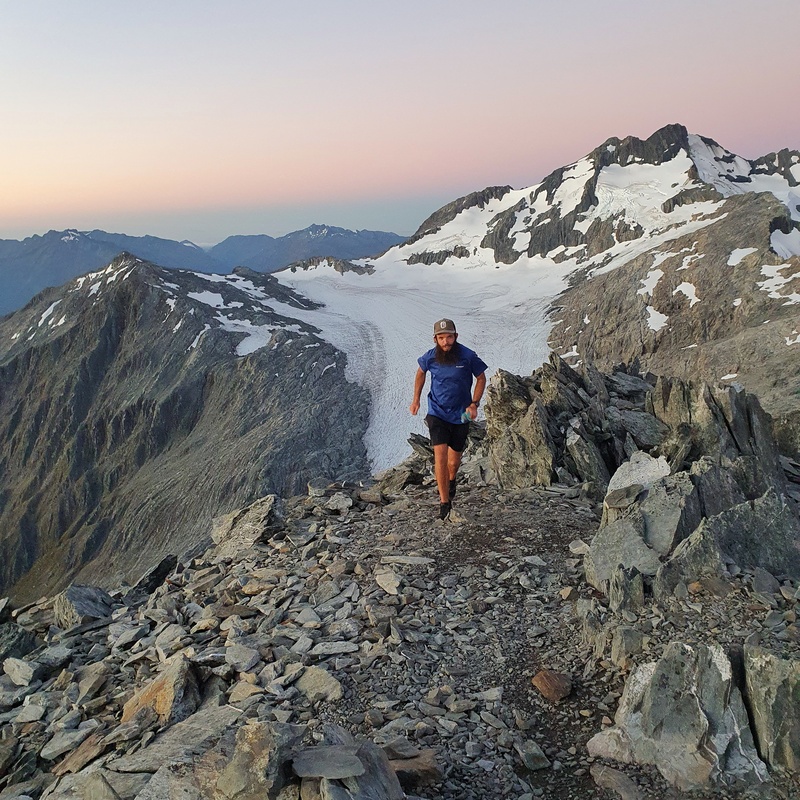
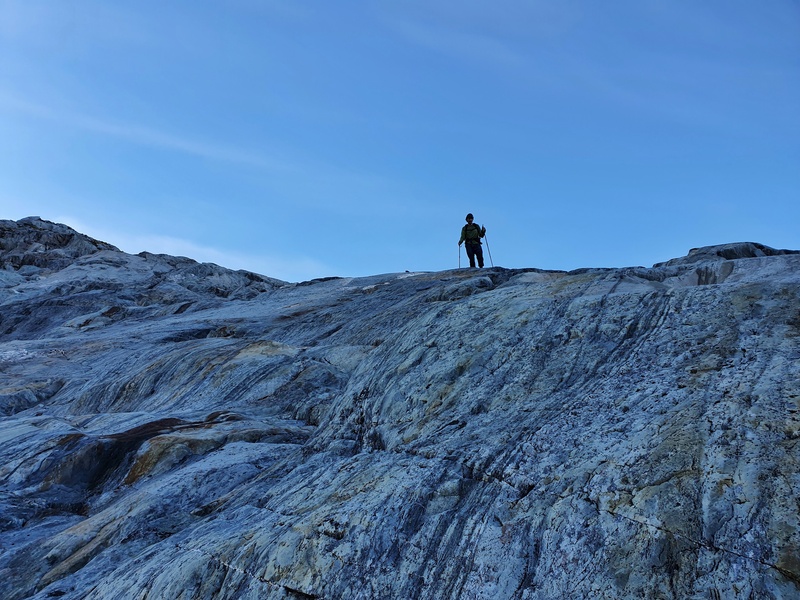
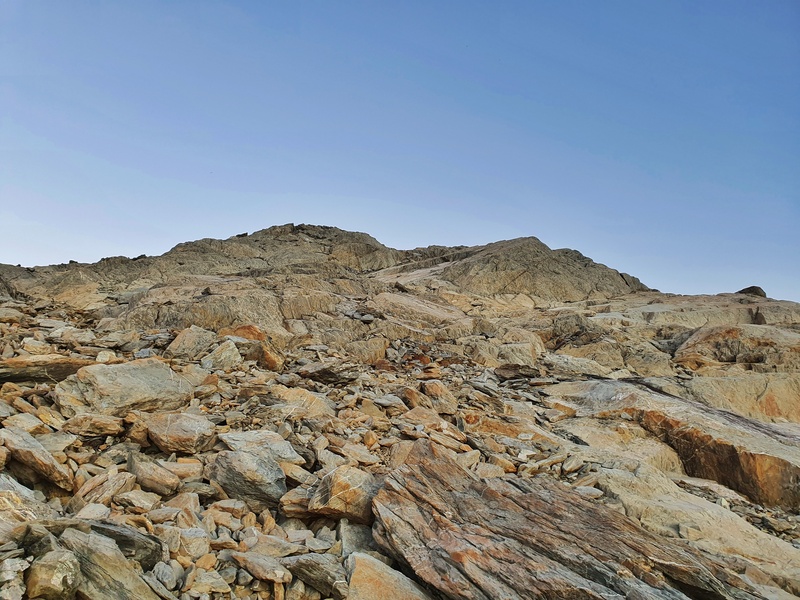
Scrambling on Mount Armstrong
After a food and water break (I drunk from tank and the water was fine without boiling) we headed up Mount Armstrong for sunset. We set a solid pace as we knew we were pushing daylight. We started off following the track leading to the glacier, but veered right at some point and essentially made our own way to the top. You’ll do the same, picking the line that looks the most comfortable to you.
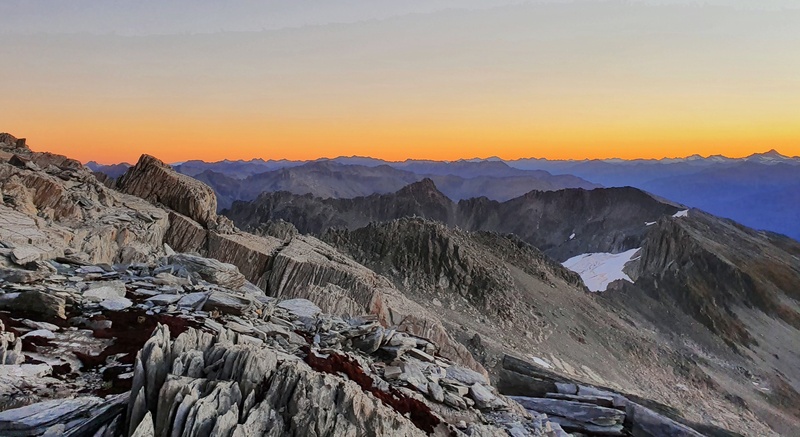
There’s a couple of false summits, but we made it right oat sunset…and as you can see from the photos. It was pretty awesome.
The descent in the dark took a little longer than the ascent, but on a dry calm evening we were never in danger.
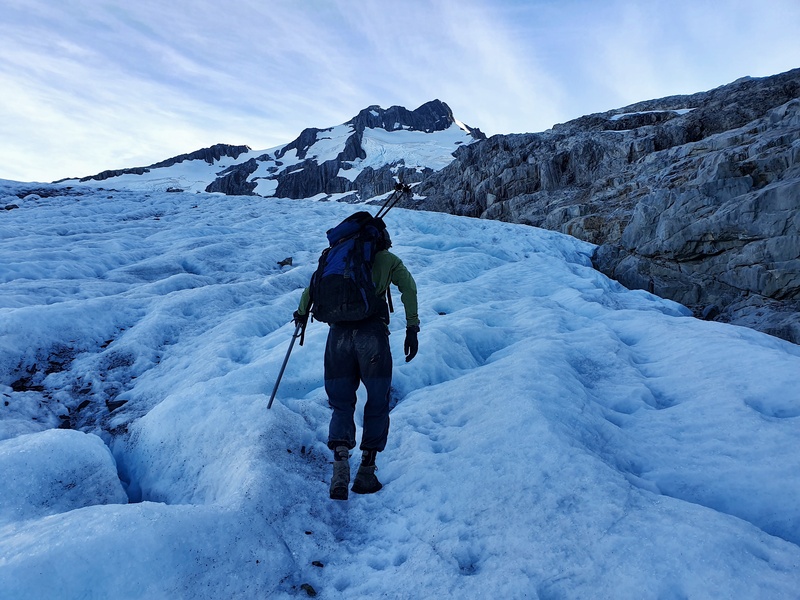
BREWSTER HUT TO BREWSTER GLACIER AND LAKES
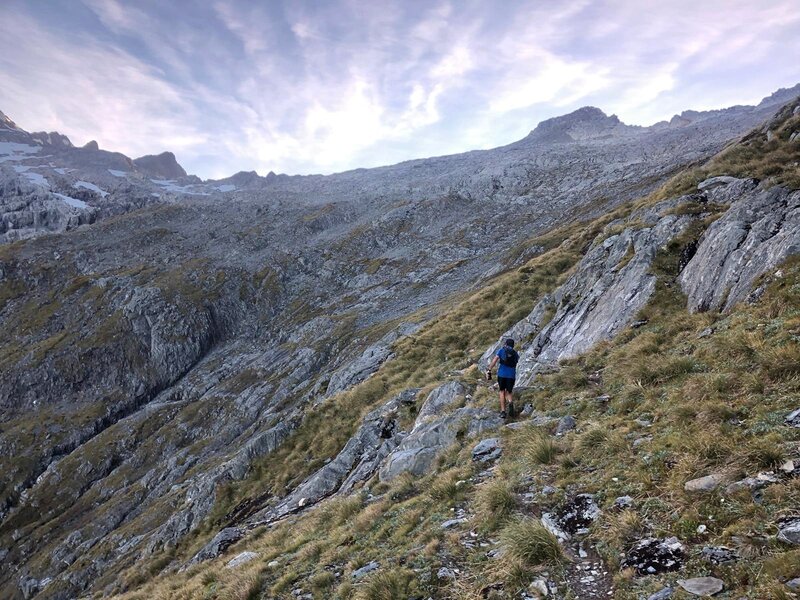
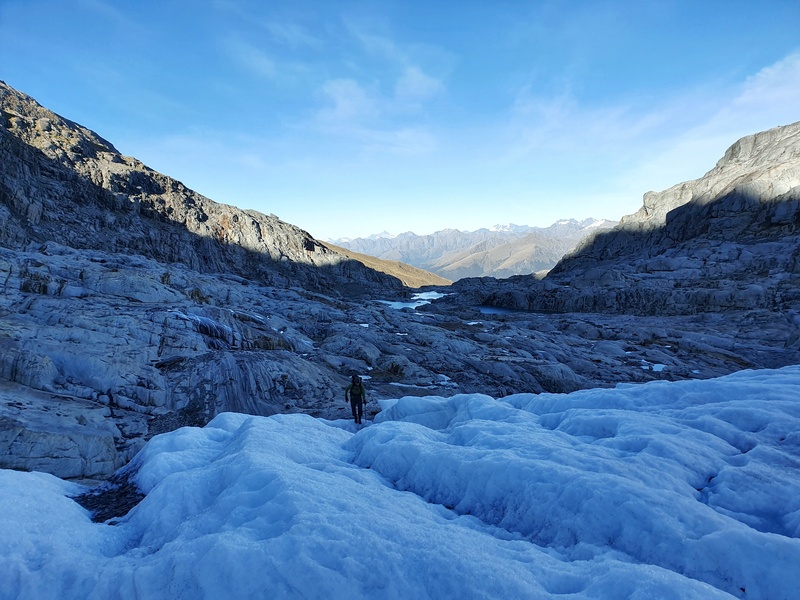
Getting up close to a glacier is an amazing experience. And getting to the Brewster Glacier is doable for most (in summer/good conditions). When you leave Brewster Hut, you’ll find a well worn track to start with.
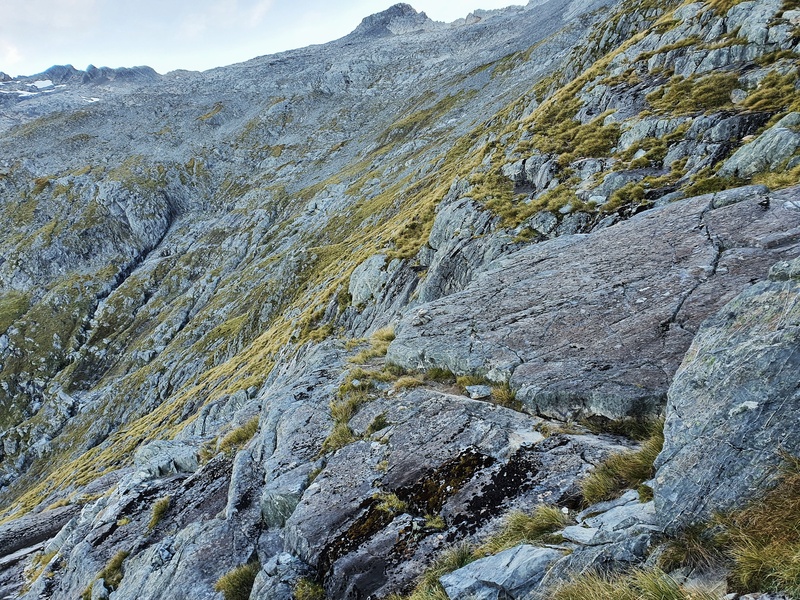
The climb isn’t as steep as steep as it was on the way up to Brewster Hut, but it’s a good couple of hundred metres before you start to sidle around the valley. The track does begin to fade away, but you can see cairns the majority of the way to the lakes.
From others I’ve talked too, like us they sort of made there own way across the valley and down to the lakes as the cairns weren’t always easy to spot. As long as you don’t push things, you’ll be good…the rocks are grippy when they’re dry (see the photo below).
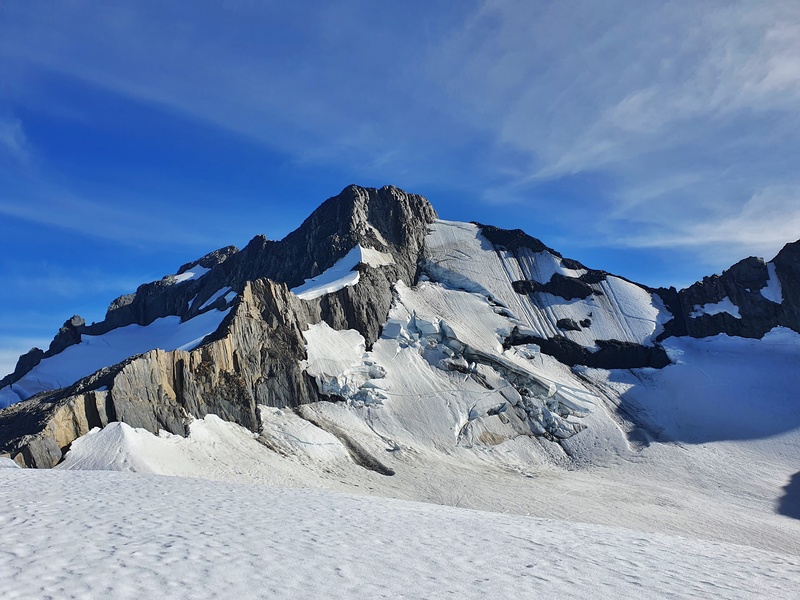
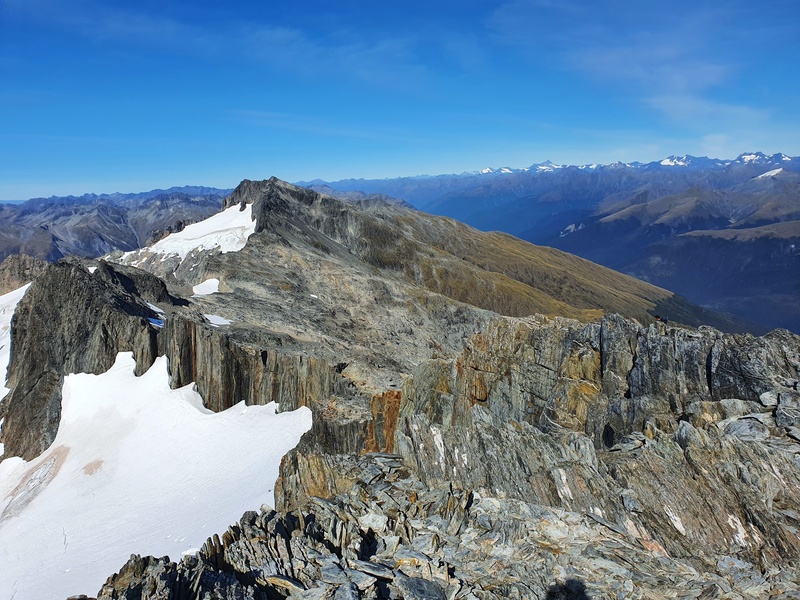
This is as close as we got to the summit of Mount Brewster.

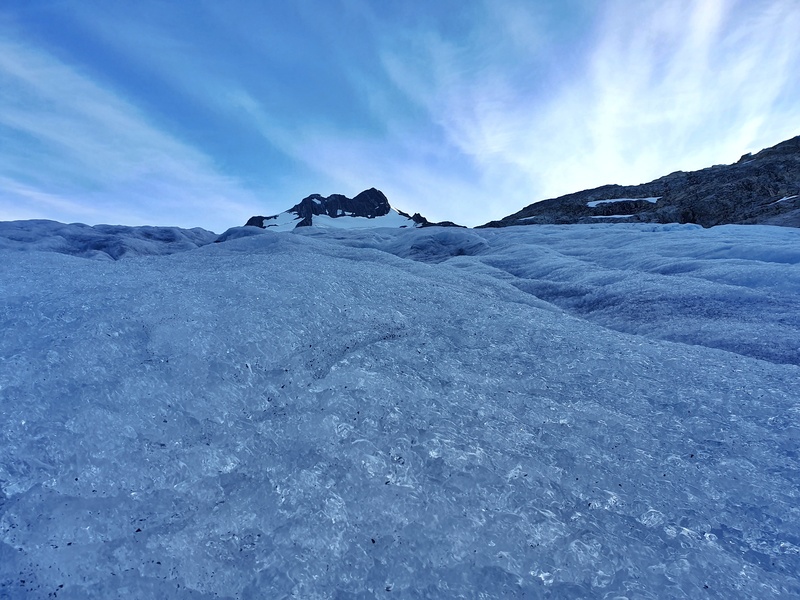
Brewster Glacier
The lakes are amazing. You can swim in them, but I decided against it. Then head over to the glacier, and have a blast. If you want, you can scoot up around the glacier towards the Mount Brewster summit…but only go as far as your experience/fitness allows.
RELATED READ: AWESOME HIKES THAT LEAD TO GLACIERS
5. QUICK TIPS ABOUT THE HIKE
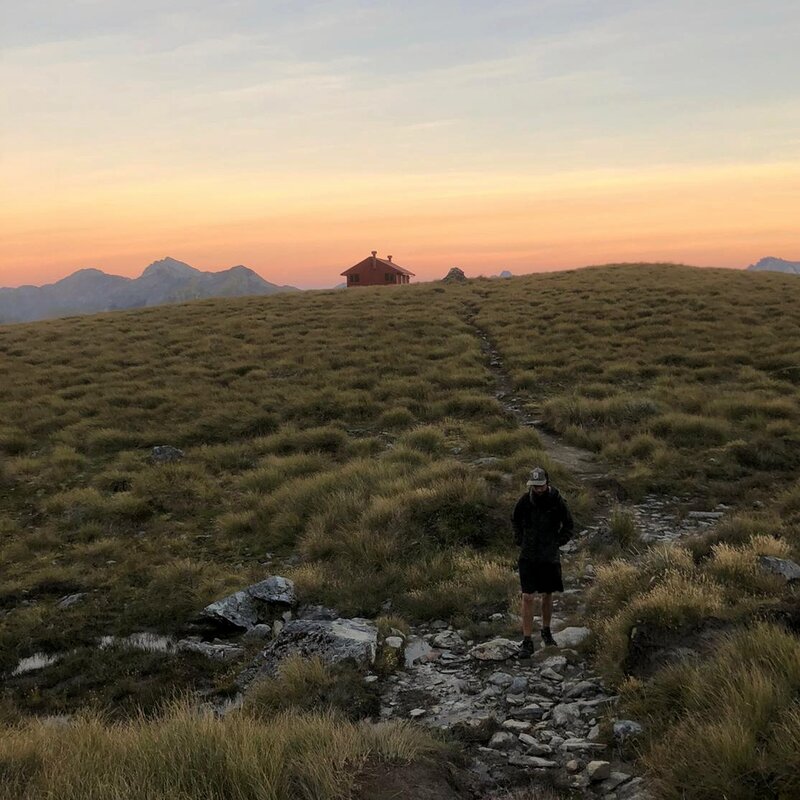
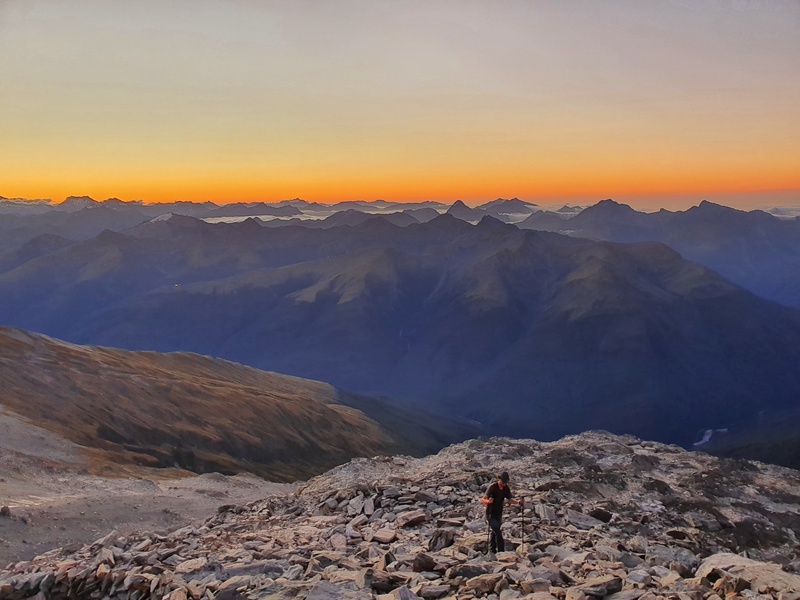
Taking a walk as the sun rises
- The only river crossing you’ll do is the one right at the start. If you really don’t like wet shoes, take them off while you cross. If there’s been heavy rain, this river can be too dangerous to cross.
- As you cross the river (Haast River), you’ll see an orange triangle on the other side. That’s a steep spot to get up onto the track, if you head left for about 10 metres, you’ll see a much more manageable section.
- The walk to the lake/glacier from the hut takes longer than you might think. Make sure you give yourself plenty of time.
- Spend the couple of minutes to go see Fantail Falls.
- Go up behind the hut and at least a little bit of the way to Mount Armtrong, if not the summit, for sunset.
- If you’ve got a clear summer night, consider bringing your sleeping mat outside and be mesmerised sleeping under the stars.
- Bring toilet paper in case there’s none at the toilet.
- Book the hut before you get near the track, as wifi/data is minimal between Haast and Lake Hawea.
- There’s no toilet at the car park 🙂
- If you do it as a day hike, you could then hike into the nearby Makarora Hut later in the afternoon

Sunset from Mount Armstrong.
The Brewster Hut hike is stunning! It’s in the same category of awesomeness as the Mueller Hut hike I reckon.
If you have any questions about hiking to Brewster Hut, leave a comment below or email jub@churnewzealand.com. Finally, here’s a bunch more photos for you to enjoy.
Chur,
Jub
p.s. you can find all the hikes I’ve documented in this map (clicking on the icons will provide more info):
6. MORE PHOTOS
You need to sidle around the valley to reach the lakes.

Rocky outcrops

An icy glacier.

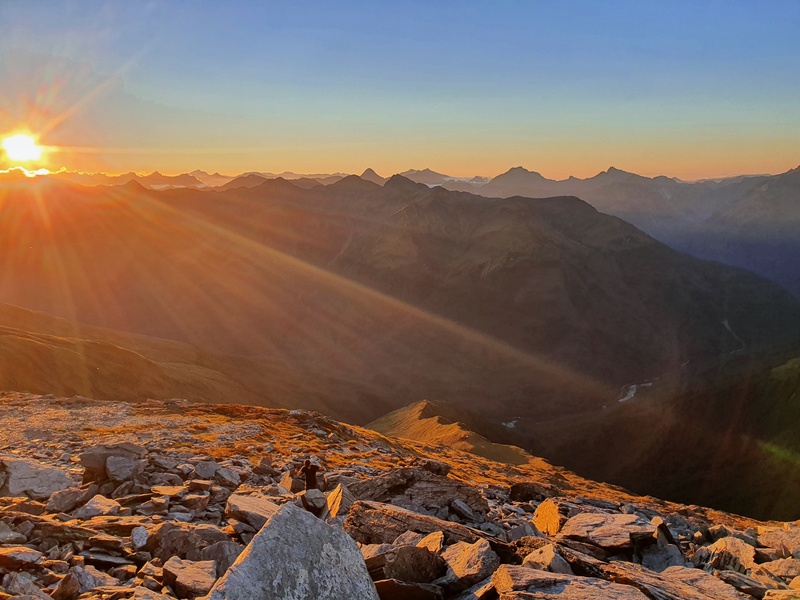
Sunset from Mount Armstrong
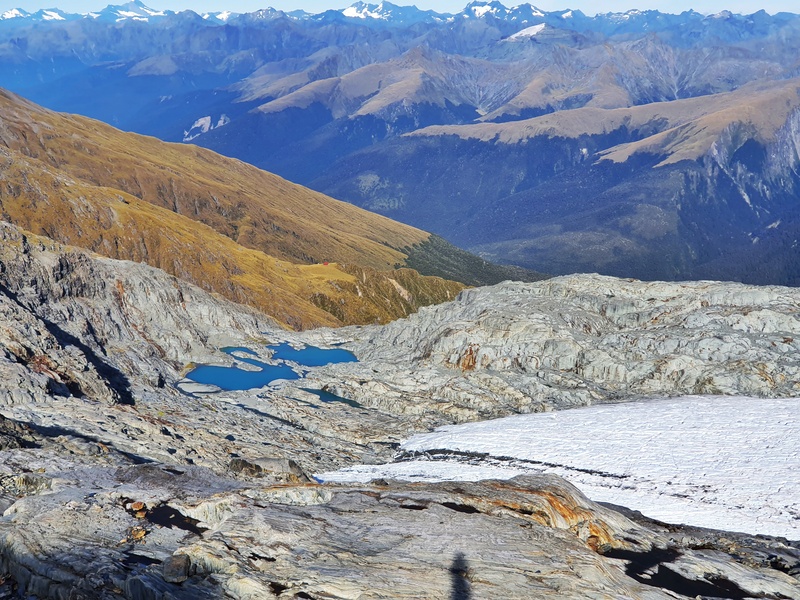
In this photo you can see Brewster Glacier, the terminal lakes, Brewster Hut and Mount Aspiring.
The beech forest
Brewster glacier…how good!
Taking a short walk on the glacier

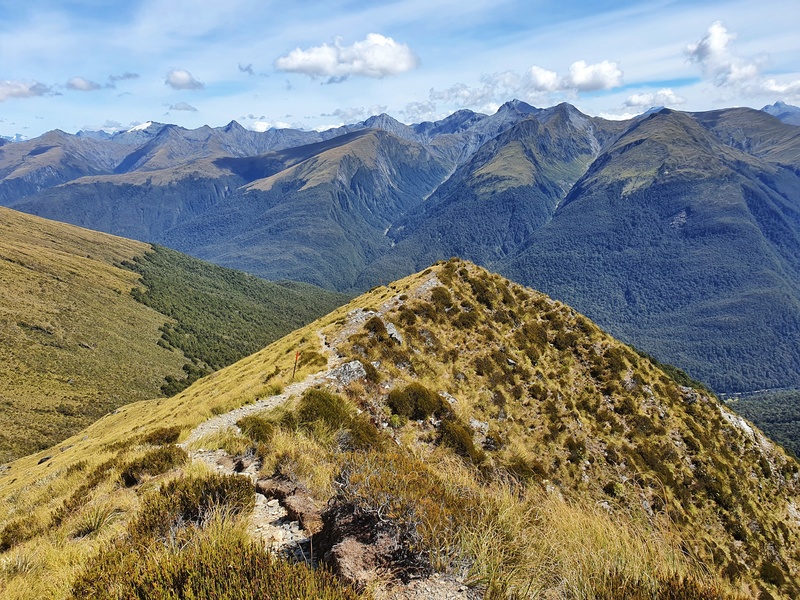
The ridgline between the treeline and Brewster Hut.
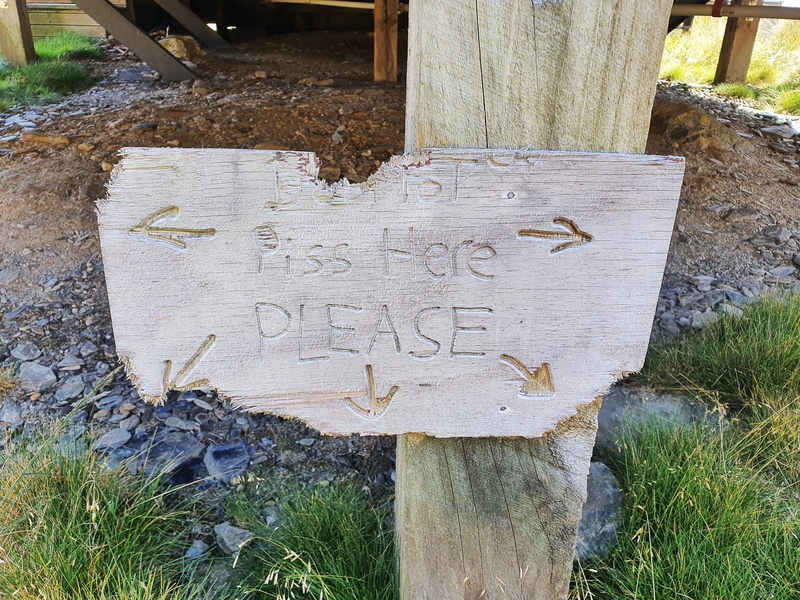
A fun sign at Brewster Hut
The ridgeline looking towards Mount Armstrong
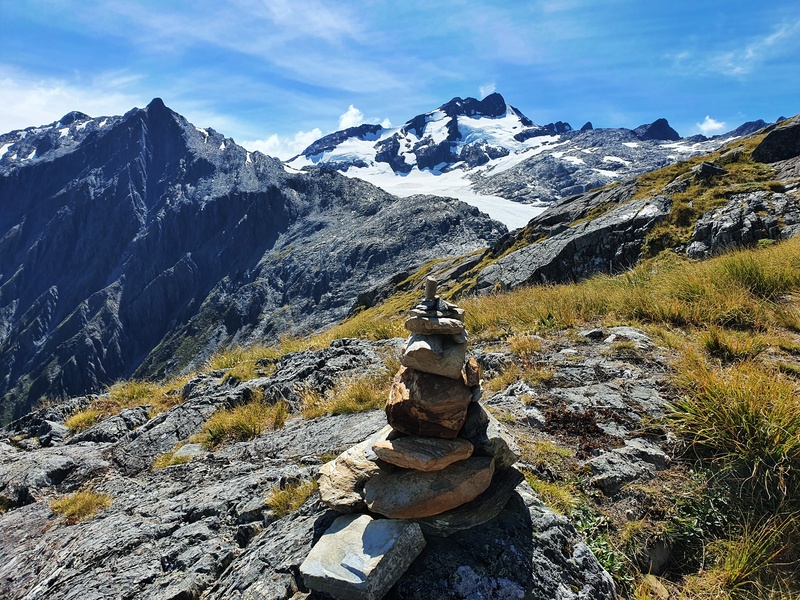
Cairns leading the way.
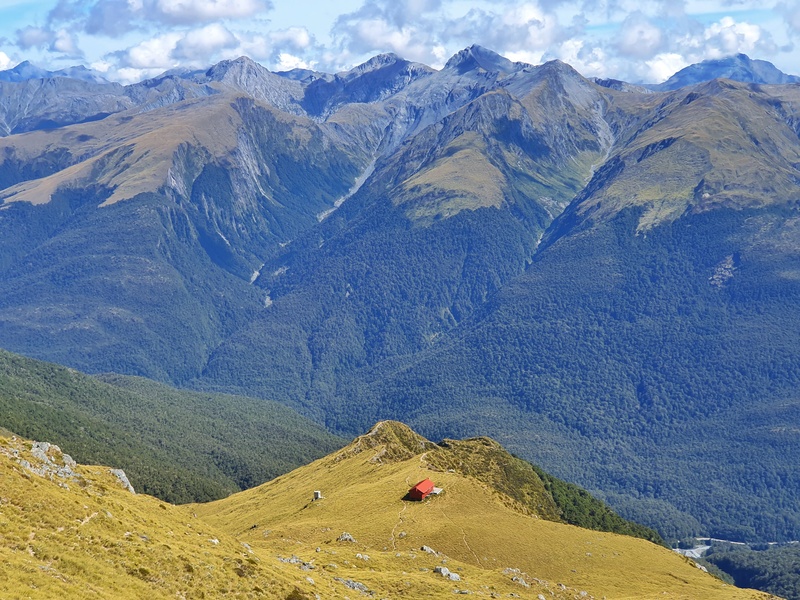
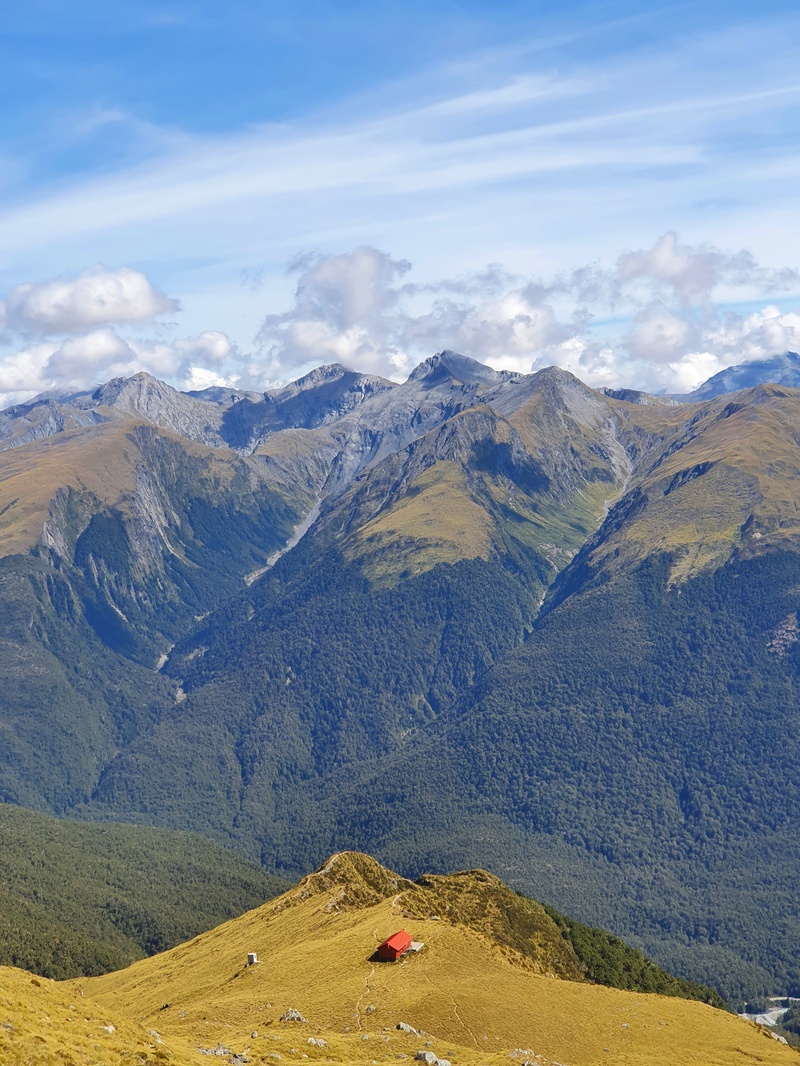
Brewster Hut!!!
Hey, it’s Jub here. I’m the guy behind Chur New Zealand, helping you have the best time hiking, trekking, walking…whatever you want to call it…in NZ. I’m based in Queenstown and am always out and about exploring trails, old & new. If you have any questions, reach out.
Incredible info … planning a trip to NZ in November this year. When did you hike it? Just wondering about accessibility to the hut and beyond (Armstrong) during this time of year. Thinking it may be a bit dangerous still in the spring, but just curious of your thoughts!
Hey Kyle,
Thanks for the kind words! I hiked it in early March.
In November it could still be some chances of avalanches…but I suspect you should be fine…unless it’s a really cold winter. Getting up to Armstrong should be fine though, as long as you’re sensible.
Definitely contact DOC before you go though 😀 The hut wardens will also have up to date info at Brewster Hut (assuming they’re there).
Enjoy ya trip!
Cheers,
Jub
Awesome! I love your article….
I’m a Kiwi too
From the Urewera national park
Thank you for your insight …
Off to do Brewster now!
Hiya Jub, thanks for the great info. One question though, do you think you can camp by the lake.? Planning on going end of March.
Cheers
Hey Carla,
I think you legally can (but check with Wanaka DOC), but I wouldn’t advise it. Definitely book a spot at the hut if you can, it’s an awesome spot with great views.
Cheers
Jub
Hi! Thanks so much for your notes and the gpx files. I did brewsters hut, glacier and Mt Armstrong on Monday and then Earnslaw Burn as a day trip Tuesday. There’s no way I would have done the Mt Armstrong section solo without your notes and map and it was great to be able to see so much before heading back to Australia the next morning 😊
Happy trails,
Jane
Hey Jane,
Thanks for making the epic comment. That’s a great effort backing up with Earnslaw Burn after that Monday effort, then the flight! Glad you had a great time!
Cheers,
Jub