After finally doing the Black Peak Wanaka hike, I have to agree with what my mate Dan said “…One of my favourite day hikes!!!”.
It’s a stunner. A hike suited for mid to late summer (early summer if conditions are favourable), for experienced hikers who can navigate tough terrain with a touch of exposure.
Note: This post is about Black Peak near Wanaka (starting at Treble Cone carpark). Not Black Peak near Glenorchy.
TABLE OF CONTENTS
1. Details About Black Peak Wanaka
2. Black Peak Map
3. How To Get There
4. My Experience Going To Black Peak Wanaka
1. DETAILS ABOUT BLACK PEAK WANAKA

QUICK DETAILS:
- 24 – 25km
- ~2,400 metres
- Advanced to expert
- Full day hike
- Download GPX File
How hard is the hike to the summit?
HARD. This is an advanced hike, it’s going to be the toughest day hike you may do done with 24km and over 2000 metres of elevation gain, most of which is off trail.
Given the terrain this is a hike that needs a great forecast. Early summer won’t be viable in most cases due to the snow.
What distance is the track?
~24km, starting from Treble Cone car park. This will vary +/- 1km depending on the exact route you take.
What is the total elevation gain of the hike to Black Peak Wanaka?
Based on my Strava file, and talking to others, there’s about 2,400 metres of elevation gain for the return trip. It’s about 1400 metres on the way to the summit, and 1000 metres on the way back.
Here’s the elevation profile:

How long does it take to hike?
This is really hard to predict given the terrain and distance, but I would suggest starting as early as you can. Consider it a full day hike.
Whats the code to the Treble Cone road gate?
2711.
Is there internet reception?
There is at the majority of Treble Cone ski area, and then a long the ridge you’ll often have reception on the higher spots, including the summit. But it’s not at all times. Details about PLB hire here.
2. BLACK PEAK MAP
The map below is my GPX route overlaid on the topo map. You should 100% have at minimum the GPX file (download here) on your phone, ideally on the best topo map app, NZ Topo50 South.
You can click on the map below to open it in a new window.

3. HOW TO GET THERE

The start of the trail for this hike is the main Treble Cone carpark (as seen above).
The code for the lock at the gate at the bottom is 2711 (as of October 2025). Check the Treble Cone website to ensure it’s the correct code, but it has been for a long time.
The easiest way to get there is by driving. You can get to the carpark in most cars, provided the roads in good condition. The journey from Wanaka is about 26km, and will take 30 to 40 minutes.
There’s a few hiking shuttle options that could potentially take you, but they’re not going to be cheap.
Hitchhiking to the base of the Treble Cone Road from Wanaka is easier enough, but getting to the Treble Cone carpark isn’t easy in summer (not a lot of traffic). If you’re willing to risk it, be prepared to add 14km total to your hike, with more elevation.
4. MY EXPERIENCE HIKING TO BLACK PEAK (WANAKA)


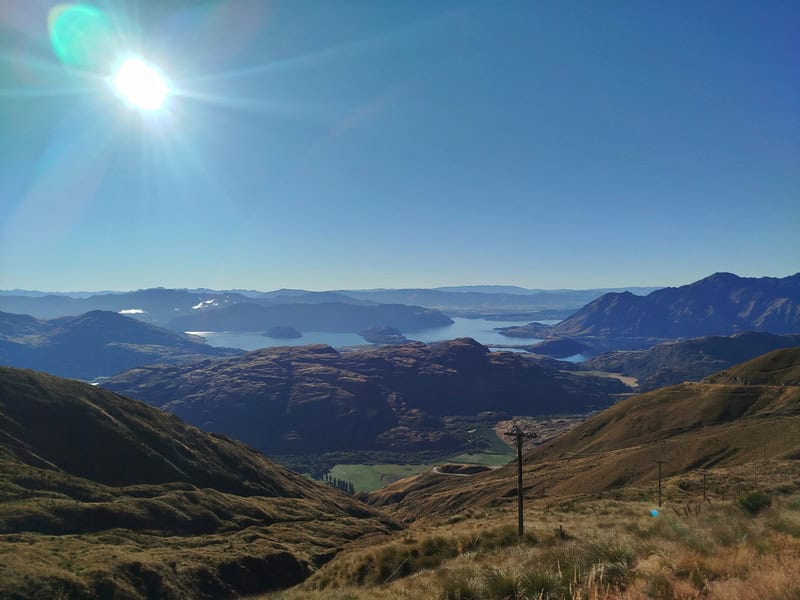
After a beautiful drive, there’s no easing into the Black Peak hike as you start climbing straight up past the base building following the 4WD track towards the top of Treble Cone. The road gets steep at some points, but it’s just a grind.
We kept an eye on the map as there’s a point where you’ll leave the 4WD track to go straight up towards Treble Cone Peak. This section isn’t super duper easy to follow, but keep an eye on the GPX and you’ll be sweet.

The track to the top will eventually become clear, and then you’ll see the Treble Cone Trig (what is a trig?) come into view. You could cut down the otherside before Treble Cone’s summit, but I’d suggest being nice to yourself an continue on past the trig a little as per the GPX to make the descent more gradual.
Once you pick you line down, it’s not easy with any semblance of a track coming and going. Take it easy, you’ve got some awesome trail to look forward to. Once you get onto the clear trail again, the next descent was one of the best on trail towards a wee saddle of sorts.

Back up the otherside is a short steep pinch before you get to what I found the most nerve wracking part of the trail. It’s a short section where you’re holding onto a wire (see above) while walking a long a narrow section of trail with a steep dropoff next to you. It’s not the worst dropoff, but it wouldn’t be pretty if you slipped and fell.
After this, it’s a relatively cruisey trail for a section as you make your way back up to the ridgeline which is fun. You’ll then start to see the ridgeline in a better way.
The most annoying part of the trail for mine was the next big descent descent. While I followed the ridge for as long as possible, eventually I found myself in the tussocks just trying to get down to the valley the best way possible. My mate took a different line, but we were both not loving life at that point.
From here it’s a steep climb back up…with a couple of spots where the trail fades away.
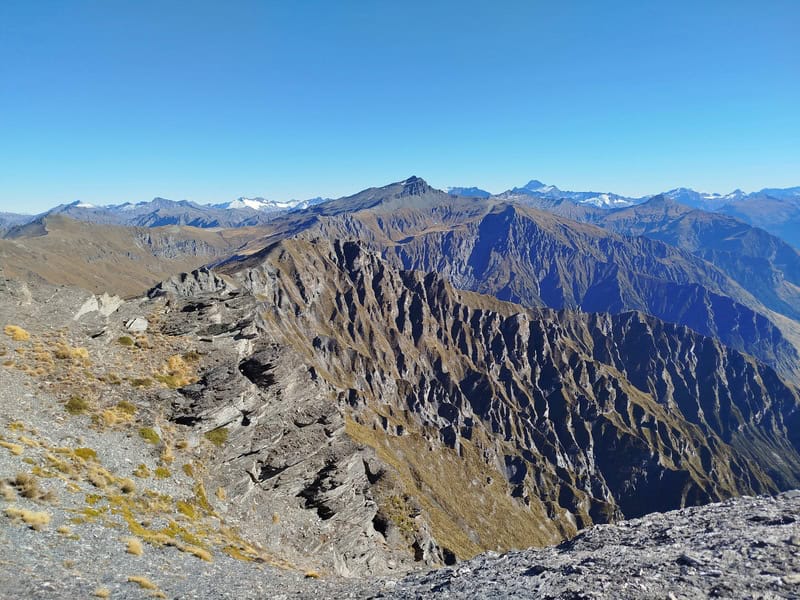
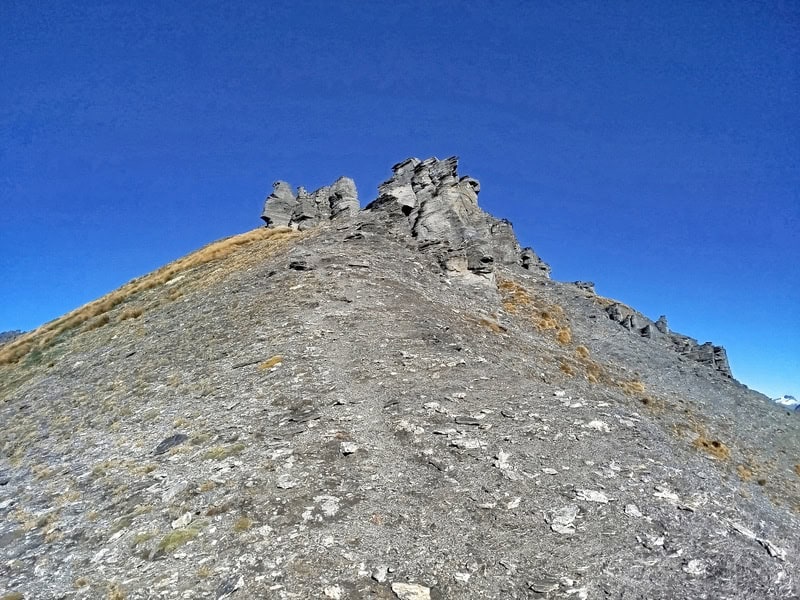
It’s not long until you’ll be on the ridge which feels like the final frontier with the peak in the distance. The track doesn’t get any easier really, with different surfaces always changing your flow.
Once you get close to the ridge, it’s a bit of a follow your nose towards the summit as there was some spots could take a different path depending on what suits your eye better.
Personally I always tried to stay on the high point as much as possible, though I dropped down in a couple of spots for ease. In general, you’ll always be erring on the southern side of the ridgeline.
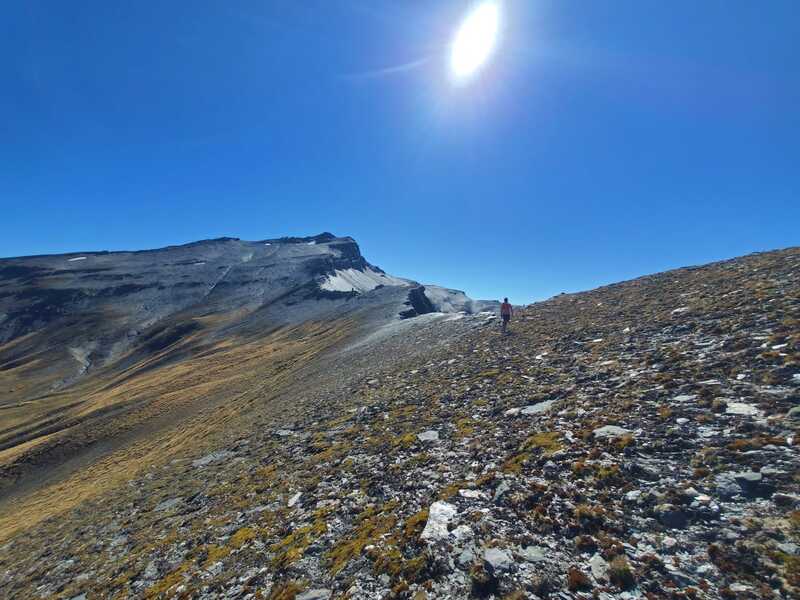
There’s a couple of trickier spots as you start approaching the final climb, there’s enough of a trail to figure out how to keep tracking. The final climb to the peak is steep, and you have two options available…the easier route coming from the left, or the short, steeper, and gnarlier route to the right.
We chose the right option to go up, and came down the other way. If you’re tired, go up and down the easier way…that’ll save you having to reroute back around if you find the short steep way a little bit intimidating. It’s a short climb to the peak from the right hand side, but it may freak you out if you’re not great with any exposure.
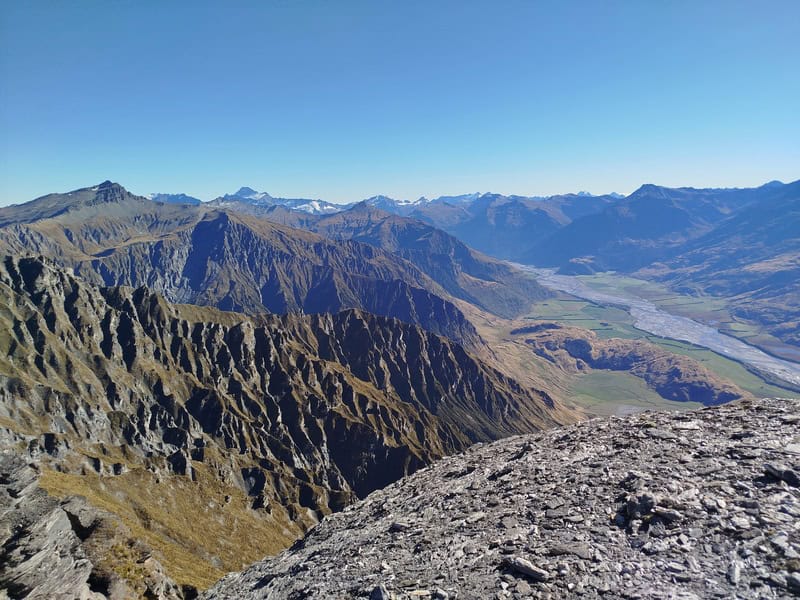
Then you’re at the summit! HOW GOOD.
I was stoked pointing out various places I’ve been before in Mount Aspiring National Park, and got stoked to get out more.
There’s enough room to find a spot for a good picnic at the summit. Enjoy your time here, then it’s time to head back. The return trip was a little bit quicker, but it wasn’t by much as I thought given the fatigue. It was handy knowing some of the lines we needed to take however.
Black Peak Wanaka was an epic blue bird day.
If you’ve got any questions or comments about hiking to Black Peak near Wanaka/Treble Cone, let me know below or email jub@churnewzealand.com.
p.s. Here’s a map of all the hikes documented on Chur New Zealand. You can click the icon to see brief details, as well as a link to read more about the hike (like this post).
p.p.s. Here are some more Black Peak photos.
Hey, it’s Jub here. I’m the guy behind Chur New Zealand, helping you have the best time hiking, trekking, walking…whatever you want to call it…in NZ. I’m based in Queenstown and am always out and about exploring trails, old & new. If you have any questions, reach out.