The Mount Shrimpton Track is a lesser-known track starting in Makarora.
The DOC website says the track is a 6km return trip, which takes you to the bush line where you get some great views. But if you’re looking for more adventure, you can continue up to the ridgeline and if possible, the summit of Mount Shrimpton.
This post will give you the details about my experience on the Mount Shrimpton Track.
Note: I did not summit, as we experienced high winds when we reached the ridgeline. I’ve got a GPX file to the summit you can download and will give you as much detail as possible.
Let’s get into it.
TABLE OF CONTENTS
1. Mount Shrimpton Details
2. Mount Shrimpton Map
3. How To Get To The Track
4. My Mt Shrimpton Track Experience
5. More Mount Shrimpton Photos
1. DETAILS ABOUT THE MOUNT SHRIMPTON TRACK
How hard is the Mount Shrimpton Track?
It’s not an impossible track, but given the steepness, it’s certainly going to be hard work for most. It’s easy enough to follow the track up to the viewpoint so navigation isn’t an issue for this part.
But beyond this, you’ll need to understand how to read a topo map app, and getting to the ridgeline isn’t easy. Once you’re on the ridgeline, there’s some good exposure.
How long is the Mount Shrimpton Track?
To the viewpoint is 6km return, which gets you just above the treeline.
If you’re looking to get to the Mount Shrimpton summit, you can expect about 13km trip depending on the route you take.
How much elevation gain is there on the Mount Shrimpton Track?
Based on a couple of Strava feeds I’ve looked at, you’re looking at about 1800 metres of elevation gain. Keep in mind:
- The Mount Shrimpton summit is 2002 metres above sea level
- The trail starts a little over 300 metres above sea level
How long does the Mount Shrimpton Track take?
This is going to vary, A LOT for both the hike to the viewpoint and the ridgeline. For the viewpoint, DOC says 5 hours return which gives you an idea of how tough going it is given it’s only a 6km return track.
But in theory I’d say 3 hours should be plenty of time to get there and back.
With that said, I’m not going to even suggest a timeframe for the Mount Shrimpton summit. Plan on the adventure being a full-day hike 🙂
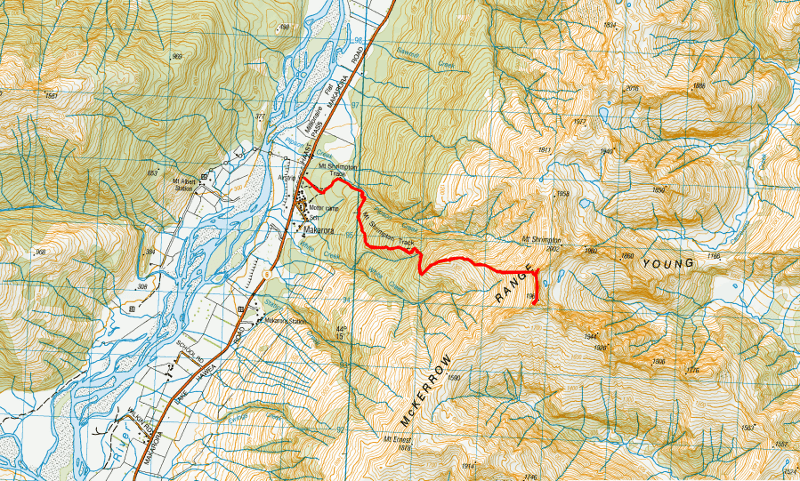
2. MOUNT SHRIMPTON TRACK MAP
I’ve included two maps here.
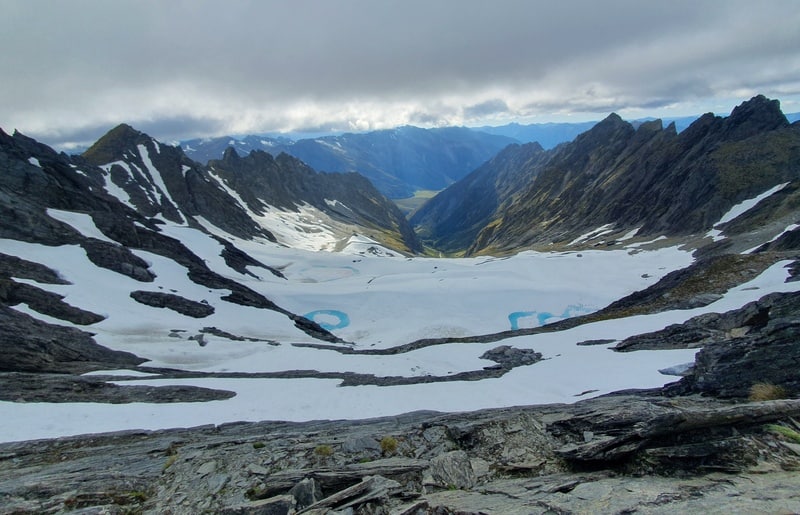
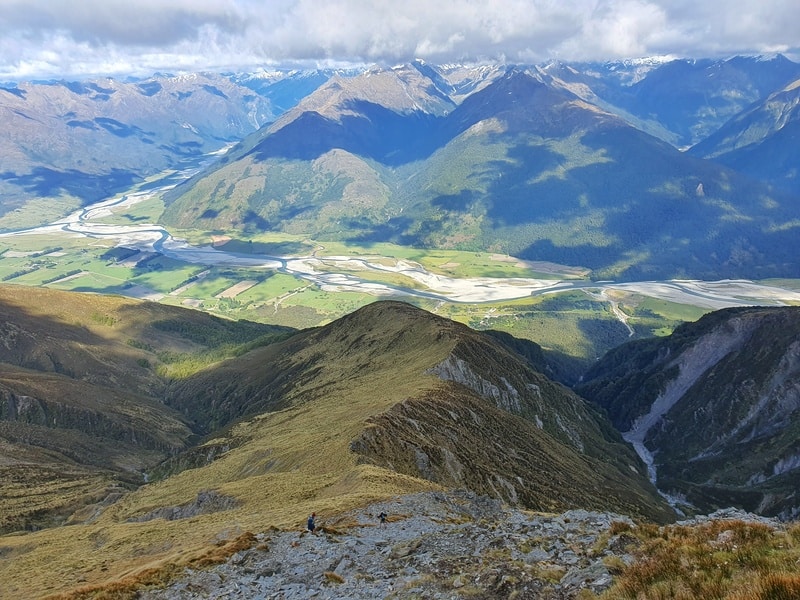
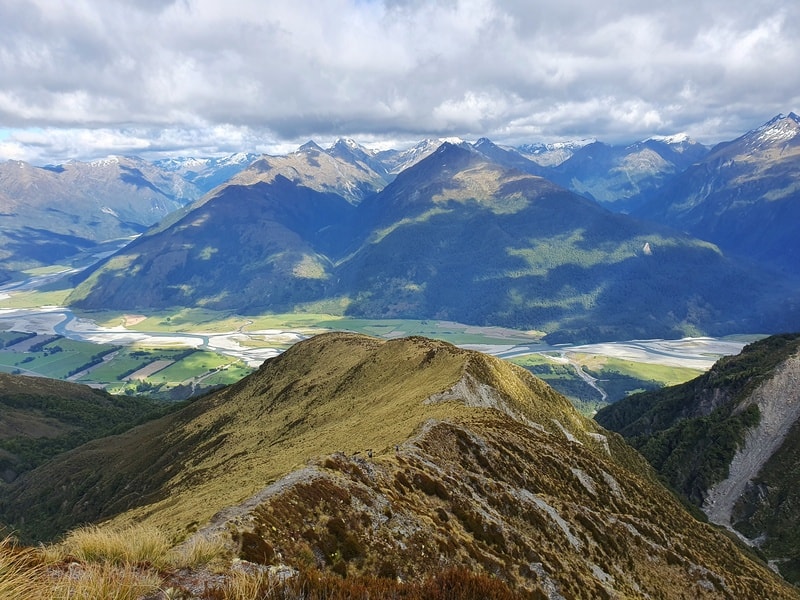
The map below is the route we took while exploring the Mount Shrimpton Track with a failed summit mission. You can see that we followed the McKerrow Range rigeline in the other direction for a bit. The best view was when we first hit the ridgeline.
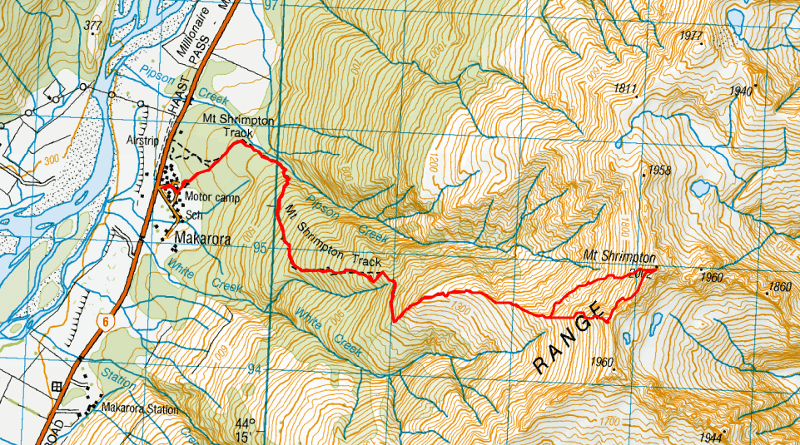
This second map shows a GPX file of a friends Mount Shrimpton adventure overlaid on the topo map.
You can download a Mount Shrimpton GPX file here.
3. HOW TO GET TO THE MOUNT SHRIMPTON CARPARK
Intercity Bus: There are services that will take you to Makarora seasonally (think, summer). You can catch the bus between Queenstown and Franz Josef four times a week (at the time of writing). From the bus stop in Makarora, it’s a short walk to the trailhead.
- Wanaka, it’s about 60km and an hours drive.
- Queenstown, 130km, and about 2 hours.
- From Franz Josef you’re looking at 220kms in a little under 3 hours.
Hitchhiking: If you’re coming from the Wanaka/Lake Hawea direction, it’s easy enough to get a ride out towards Makarora. Getting back can be trickier late in the day if there’s little traffic. If you’re unsure about it, I’ve written about hitching in NZ here.
Private Shuttle: If you’re based in Wanaka there are a few shuttle options you can try and book to get you to/from the trailhead. Yello!
4. MY EXPERIENCE ON THE MOUNT SHRIMPTON TRACK
Carpark to the viewpoint:
The Mount Shrimpton Track isn’t talked about much, but I’d heard it’s stunning from a couple of friends who had been. And they mentioned the views from above the treeline, and the ridgeline is fun to explore.
Getting to the summit of Mount Shrimpton itself wasn’t a guarantee due to some remaining snow, and the wind. There’s also a little bit of exposure involved.
On the morning of our attempt we started early!
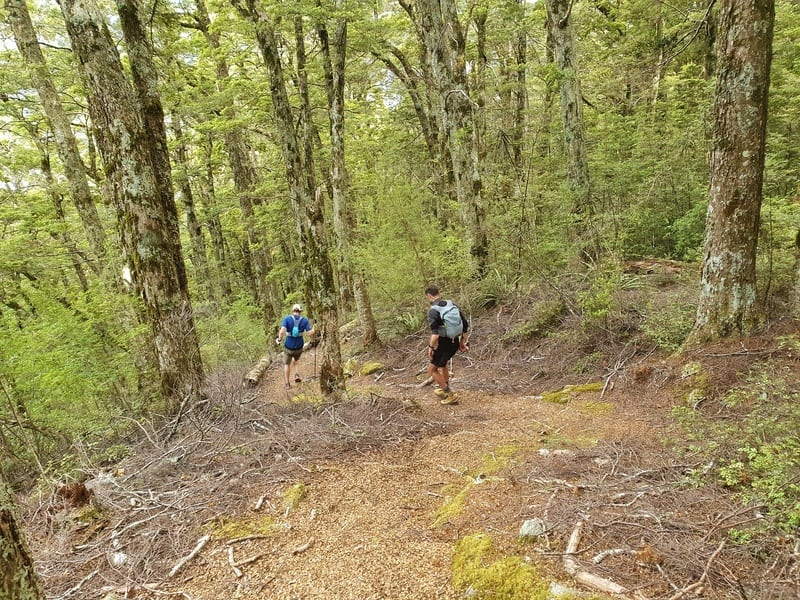
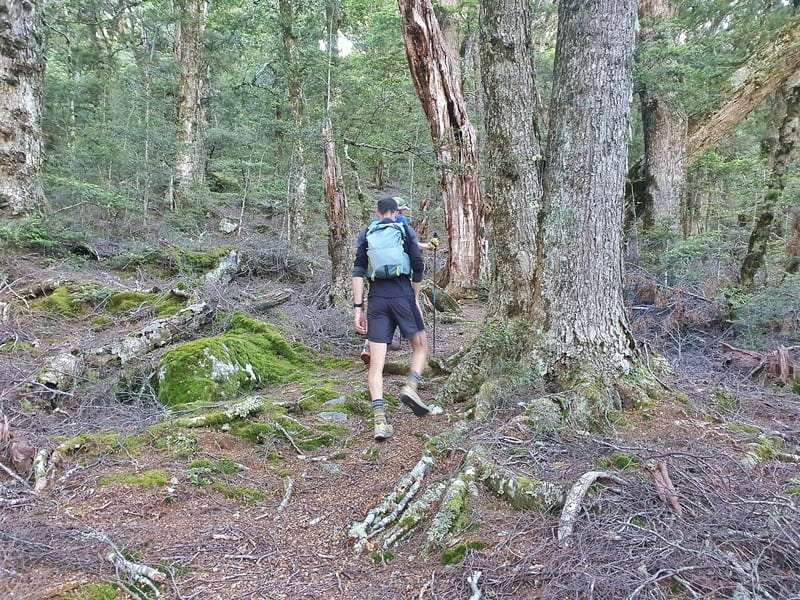
The trail dives straight into the bush and is going to the be the flattest terrain you walk on for a long time. The track is easy to follow from the start, with a detour for the nature walk if desired.
But it’s straight to the main track for most of us. The forest is super nice! And while the track was in good condition when we were there, I can imagine that’s not always the case if there has been some bad weather recently. The Brewster Hut Track up the road is going to get a lot more love from DOC staff given its popularity.
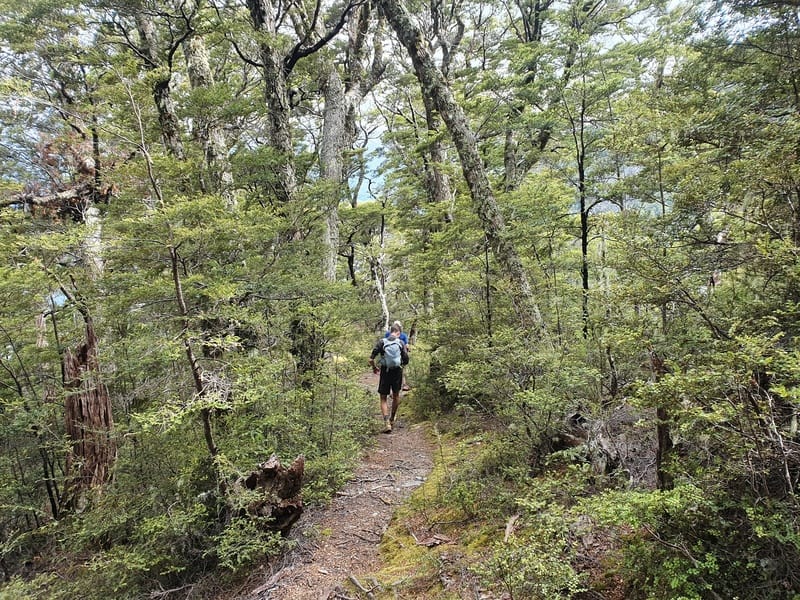
And then the climbing begins. Its a steady ascent that just keeps going up.
The track is obvious to follow, with the usual orange markers in the right spots. The track can be rutted in points, and there’s some roots to navigate but for a track that goes straight up a mountain. It’s in good condition.
You don’t really get any viewpoints on the way up, so its all just taking in the bush which is nice.
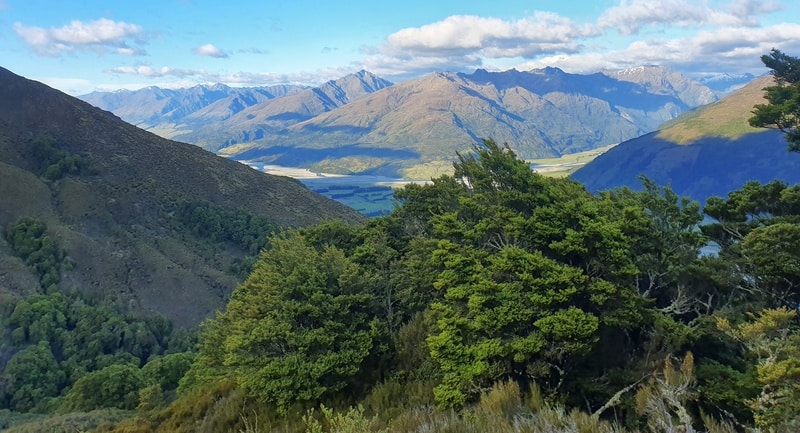
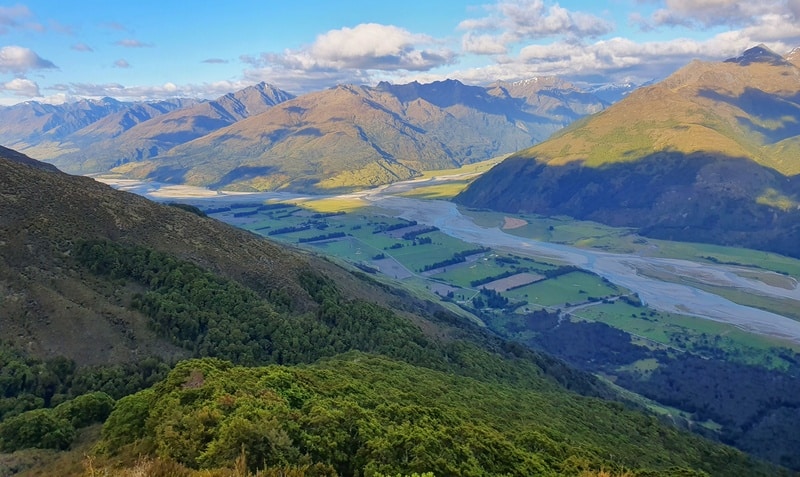
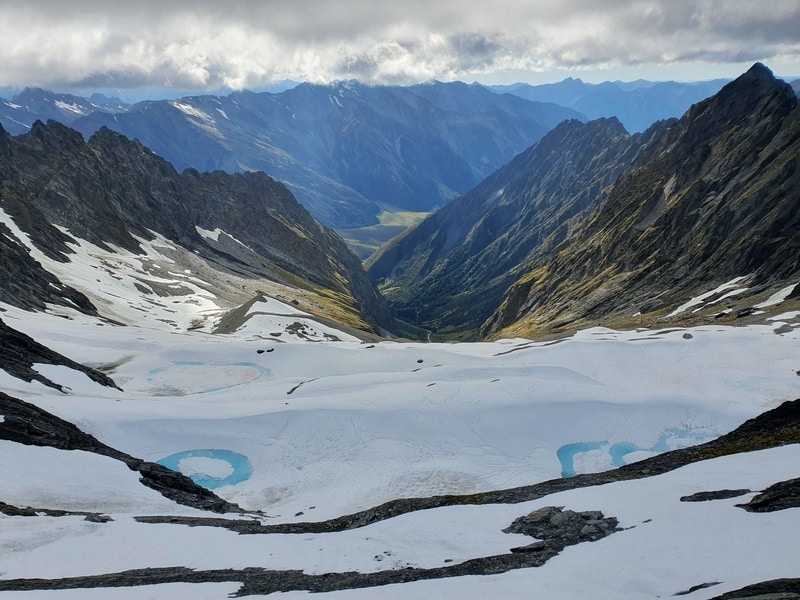
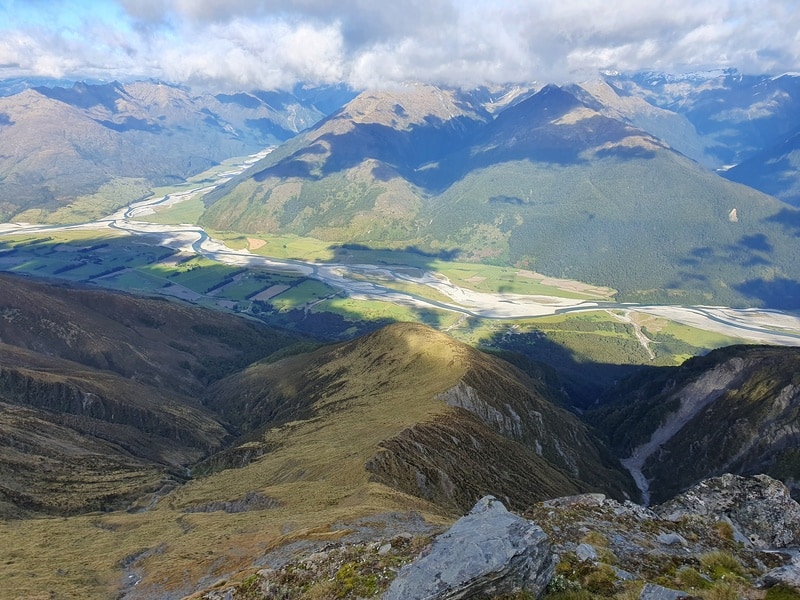
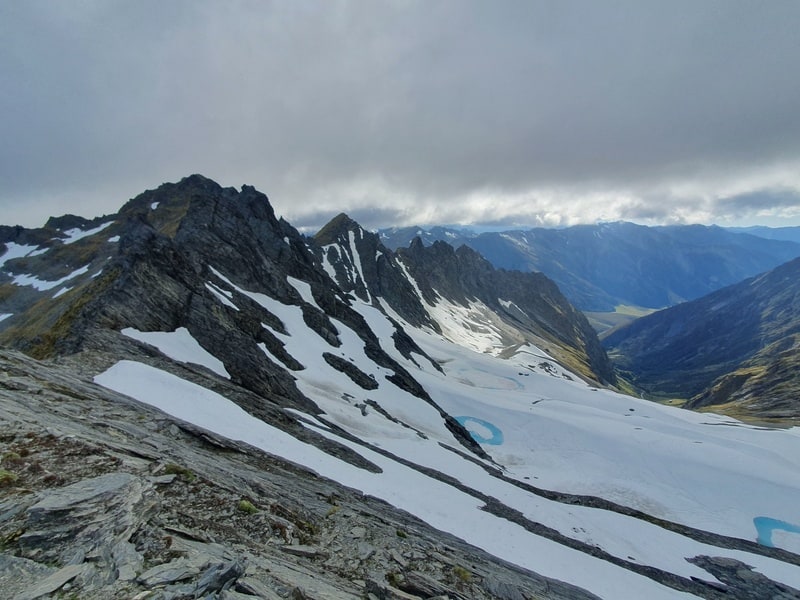
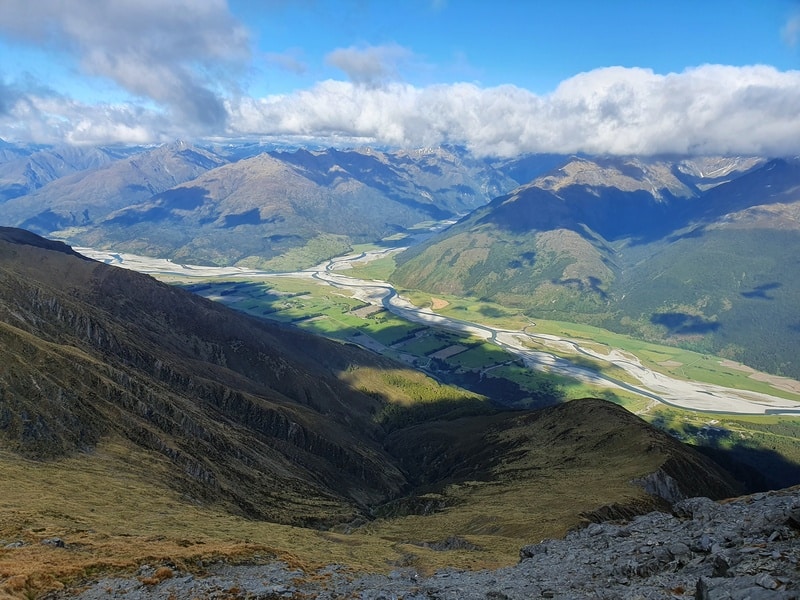
And after all the hardgraft you’ll be spat out of the treeline and you immediately get views through the valley. The first view you’ll see is of the ridgeline above, tempting you. But turn around and you’ll get epic views back towards the valley, and up another valley which people on the Gillespie Vircuit come to/from.
Definitely continue walking beyond the treeline a bit for the best views, even if you don’t plan to continue further.
Then if, you feel like you’re done for the day, the descent can be tough on those who have iffy knees. But it’s fun!
From the viewpoint to the summit:
If you’re continuing to the summit, you’ll follow the obvious route above the treeline heading north. You’re on animal tracks now for the most part, but there’s definitely a route to follow. There’s a bit of a break from the incline which is nice. Then you’ll veer right and start heading for the ridgline.
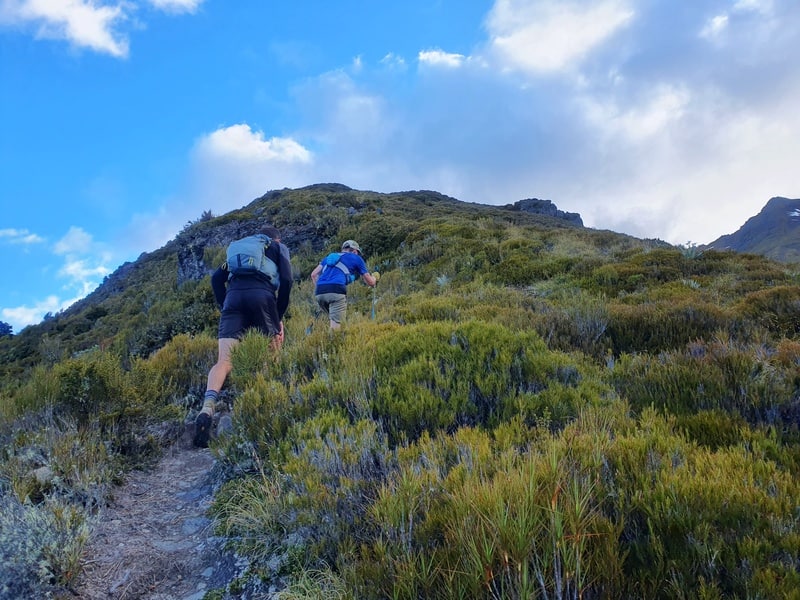

You can tackle the summit in a couple of ways, but the one that seems to involve the most success follows the GPX file above (download the top map app). You essentially siddle left across the face, then go straight to the summit for below. Or in the other direction works too which is what we did.
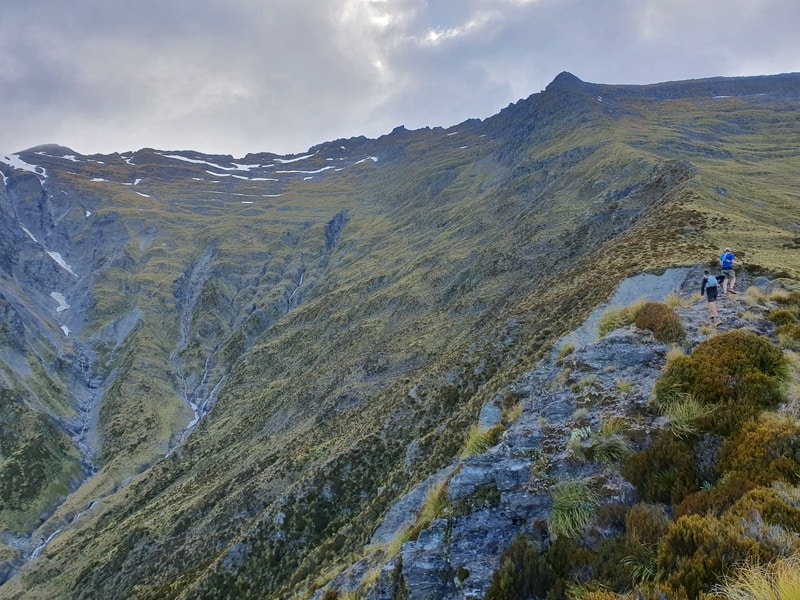
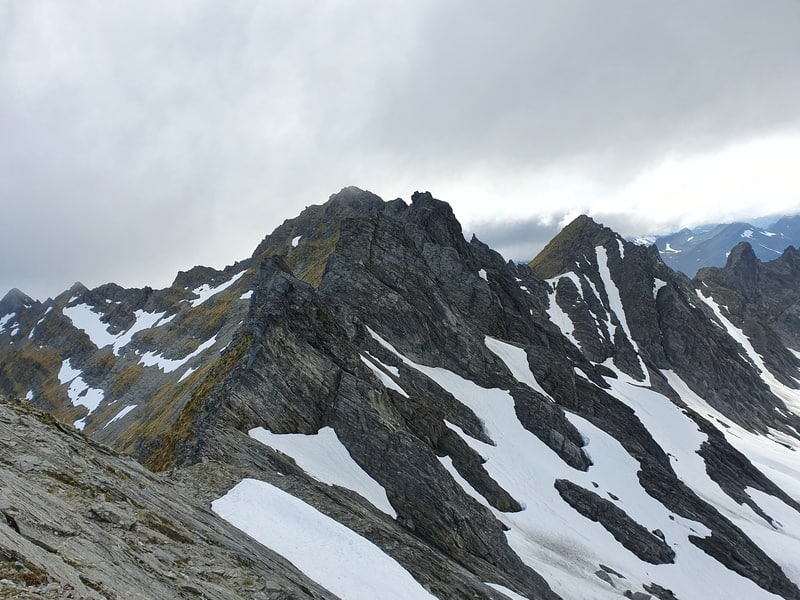
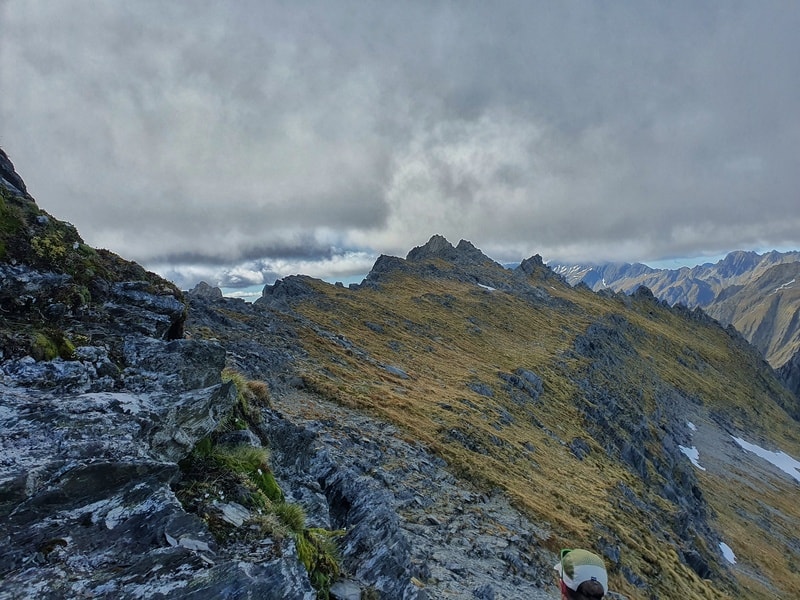
We continued up the ridge, which gets steeeeep. Then the ridgeline is pretty gnarly, but how good are the views! Annoyingly we had a super windy day and a friend with a little bit of vertigo didn’t feel comfortable so we turned back.
But, it looks like you can just continue following the ridge on the western side and you’ll get to the summit. If yu go this way, please confirm!
If you decide the summit isn’t a good idea from the ridgeline, at least follow it back in the other direction a bit for the funs.
5. MORE MOUNT SHRIMPTON PHOTOS

How good!
And that’s a wrap on my experience on the Mount Shrimpton Track, and the ridgeline above. Next time I might make it to the summit of Mount Shrimpton…or maybe not.
If you have any questions about the Mount Shrimpton Track, leave a comment below or email jub@churnewzealand.com.
Happy exploring!
Hey, it’s Jub here. I’m the guy behind Chur New Zealand, helping you have the best time hiking, trekking, walking…whatever you want to call it…in NZ. I’m based in Queenstown and am always out and about exploring trails, old & new. If you have any questions, reach out.
We chuckled at the “flat as you can get “ line, but the bush here was absolutely beautiful! We were treated to scores of delightful little mushrooms and fungi that lined the track, and even a few birds, thanks to those going some trapping!
Hey Ashley, glad you got a chuckle! I’ve been loving the mushrooms and fungi on the trails over the last few weeks too.
Chur, Jub