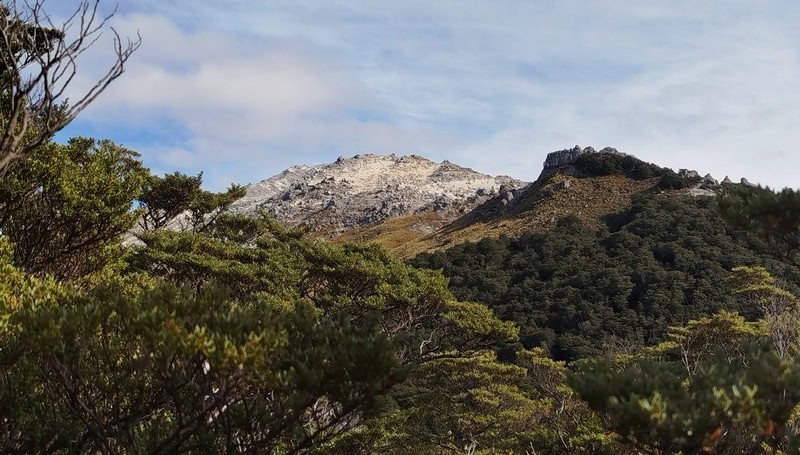
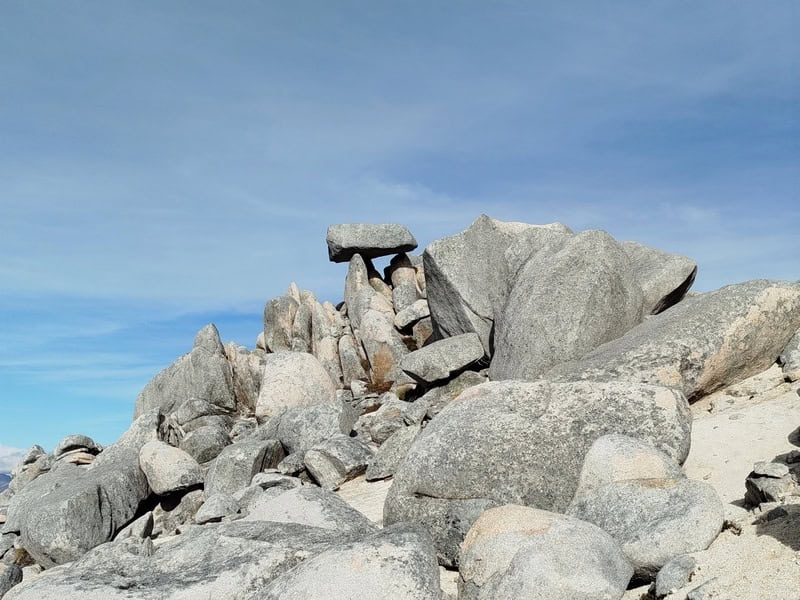
The first time I came across Mount Titiroa was when it was part of the 2023 GODZone Adventure Race. Social media photos of the ridgeline and summit looking like it was covered in snow got many talking. I finally got to see it for myself in April 2025.

Trying to fully wake up before arriving at the summit
After reading this post, you’ll know all about one of the best Fiordland National Park hikes…and if it wasn’t on your bucket list yet…it will be soon.
Note: I did this as a traverse, starting at Manapouri and finishing at Borland Lodge. Most people tend to do this as an out and back. I’ll write about the traverse primarily, but will add in details about the return trip where I see fit.
TABLE OF CONTENTS
1. Details About Hiking Mount Titiroa
2. Mount Titiroa Map
3. How To Get There
4. My Mount Titiroa Traverse Experience
5. More Photos
1. DETAILS ABOUT HIKING MOUNT TITIROA
- QUICK DETAILS:
- ~40km (2 – 3 days)
- ~2500 metres elevation gain
- For experienced hikers
- Download GPX File here, I install it on the best topo map app, NZTopo50
How hard is the Mount Titiroa Traverse?
This is a hike for advanced trampers. After the Snow White Clearing Track you’ll be off route with some bush bashing. Once you’re on the ridgeline it’s easier to navigate (you’ll still want to follow the GPX from time to time). The same goes with the decent, which takes more confidence with at least following a GPX file roughly, a long with some bushing bashing.
What distance is the hike to Mount Titiroa?
My GPS files were just under 20km for both days, making the total traverse a little under 40km. I’d add ~3km as my watch died just before the finish (as seen in the map below), and add in some wee detours and what not.
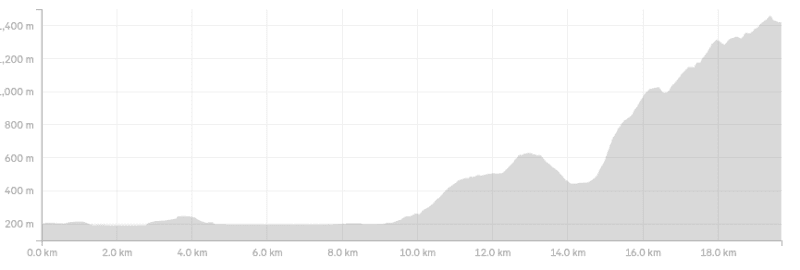
What is the elevation gain of the hike?
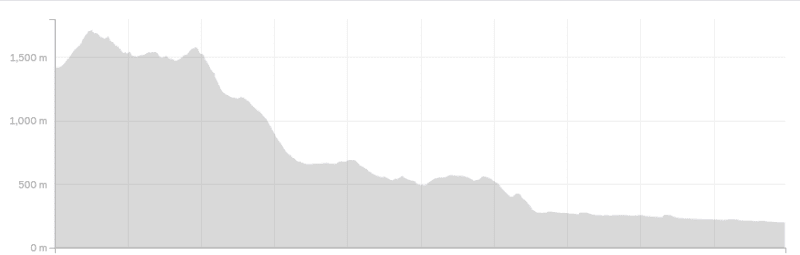
The combined total from my files was ~2,500 metres of elevation, with ~1,660 of that on Day one and ~840 metres of day two. Here’s the elevation profiles from each day.
Day 1:
Day 2:
How long does it take to hike Mount Titiroa?
That’s a very hard thing to answer. Most people do both the out and back and traverse as an overnight trip. You could make it three days, with various camp sites and hut options available.
Where can you stay on the hike?
Huts
- Hope Arm Hut
- North Borland Hut
Potentially Good Camp Sites
- Near Gannock Burn
- Point 1017
- Tarns at 1412, 1505 and near 1184
- By North Borland Hut
- You could bivvy up by the summit
There’s of course accommodation in Manapouri and Borland Lodge.
Are there many water sources?
This is something you will want to keep in mind (some may run dry later in the summer).
- Hope Arm Hut
- Garnock Burn
- Just after 1017 there’s a trickle
- There’s a small flow near the tarn at 1412
- Various tarns
- Borland Burn North Branch
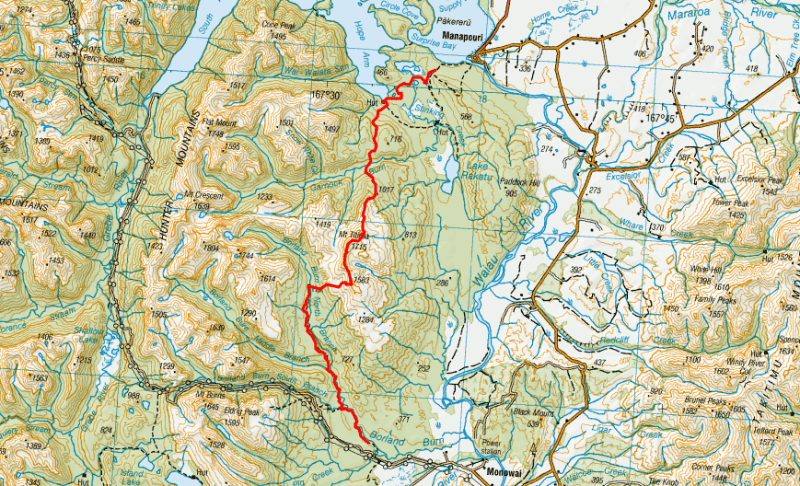
2. MOUNT TITIROA MAP
The map below is my GPX files overlaid on topo map.co.nz (I’m not sure why the first and last parts of the GPX files were cut off). Clicking the image below will open the map in a new window.
You can download the GPX file, and I highly recommend you
3. HOW TO GET THERE
Getting to Manapouri
Manapouri is a 20 minute drive from Te Anau, or 2 – 2.5 hour drive from Queenstown. The easiest way to get there is by car, but you can also get a shuttle from Te Anau with TrackNet.
We parked at the Waiau Street carpark with no issues. Make sure you park where it’s okay to park overnight!
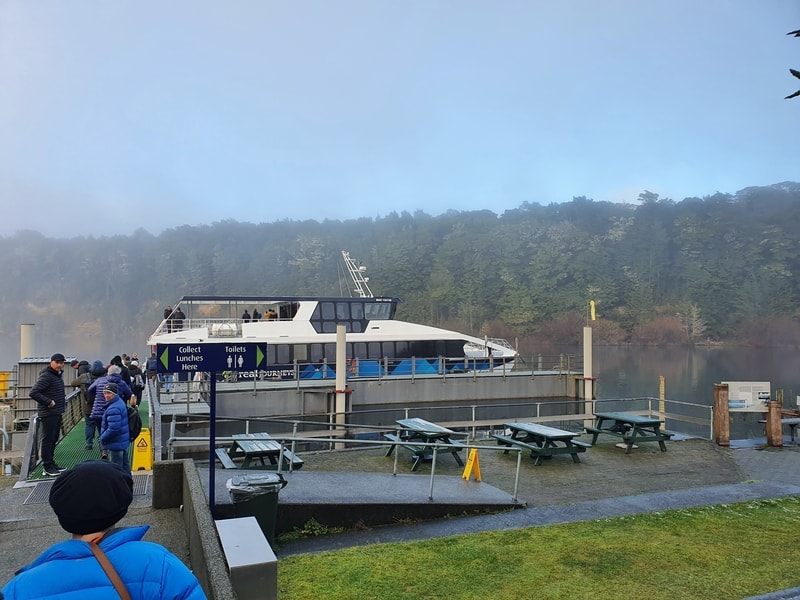
Getting across Waiau River
To get to the trailhead across the Waiau River, we used the Manapouri Tracks Water Taxi located next to the Doubtful Sound Ferry terminal. Check the website for departure times, and if need be, call ahead on 03 249 7777. It’s a very relaxed operation, and we were happy with the service ($15 per person one way – we paid cash).
Note: If you’re doing an out and back, you could take a kayak over and leave it in the bushes for the return.
Traverse Planning
As we were doing the traverse, finishing at Borland Road…we decided to leave bikes at Borland Road and ride back the ~47km to Manapouri. We left the bikes chained to the wooden fence near the parking area, with no issues. If you’ve got nice bikes, you might want to stash them in the bushes. Alternatively, take two cars to save you having to bike back.
4. MY MOUNT TITIROA EXPERIENCE
- DAY 1
TRAILHEAD TO SNOW WHITE CLEARING
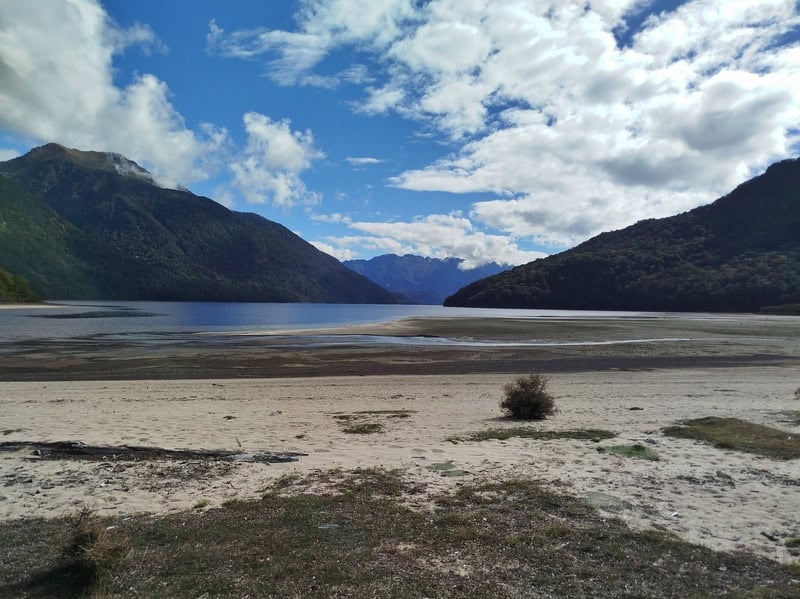
After getting the boat across, it was time for a quick rearrangement of our gear before we set off on the Circle Track. The Circle Track is really nice and if you’re after a 7km hike…this is an awesome off the beaten track option.
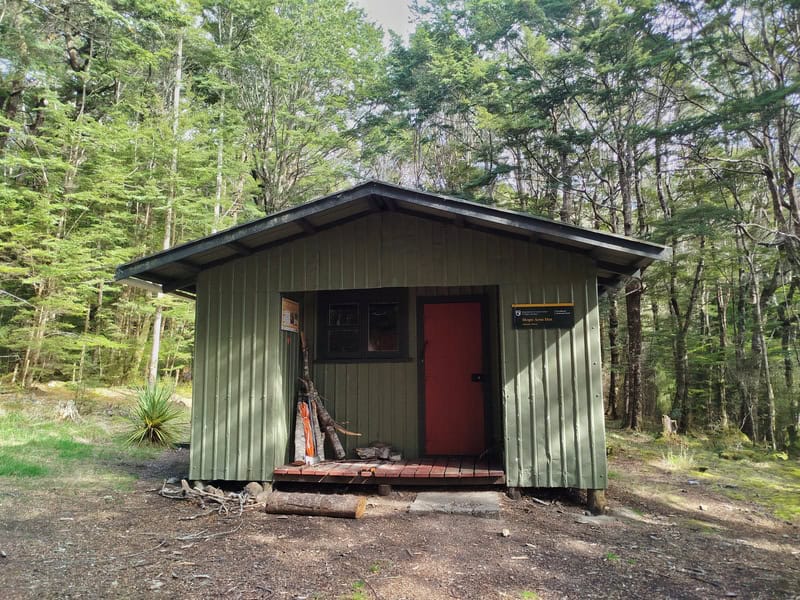
We wanted to move efficiently over the section of the trail as we knew the harder, slower terrain was to come. I was caught off guard when we arrived at Hope Arm Hut, in a daydream of some sorts. It’s a nice hut, and if you get into Manapouri late…it’d be a good place to stay the night to make your trip to the summit easier.
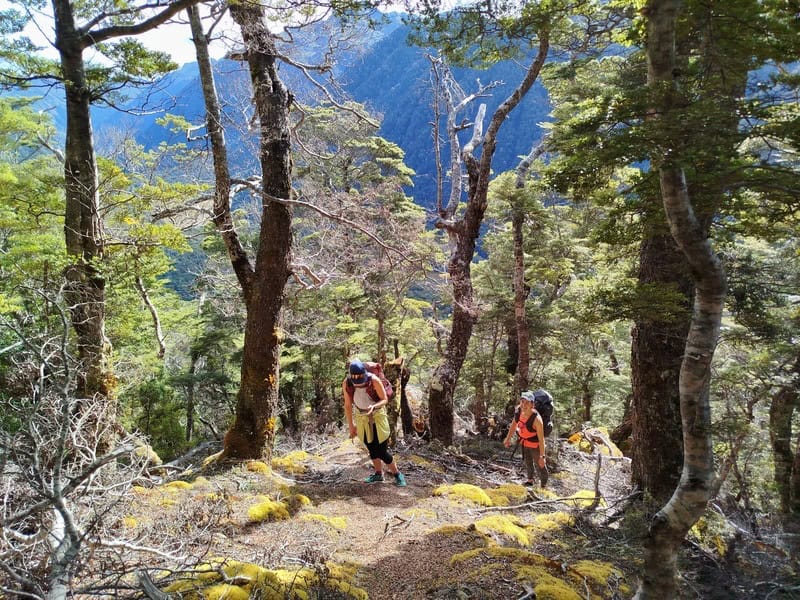
After leaving Hope Arm Hut, the trail started to be less worn and with some vert the going got slower. In general the Snow White Clearing Trail is still easy to follow, but we were stoked that we’d moved quickly to start.
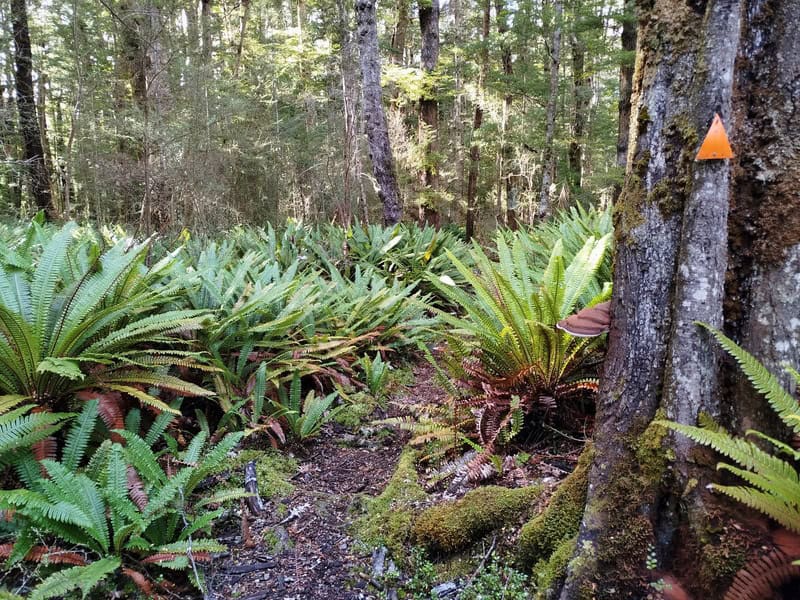
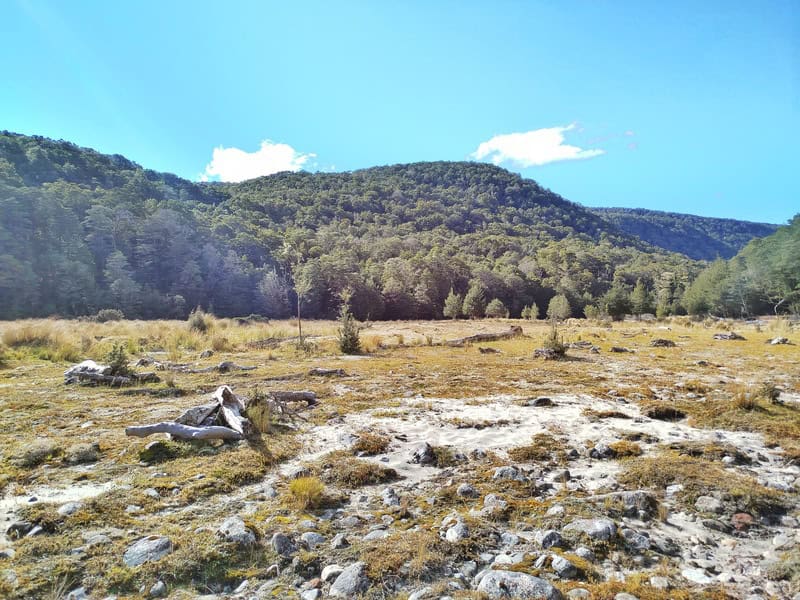
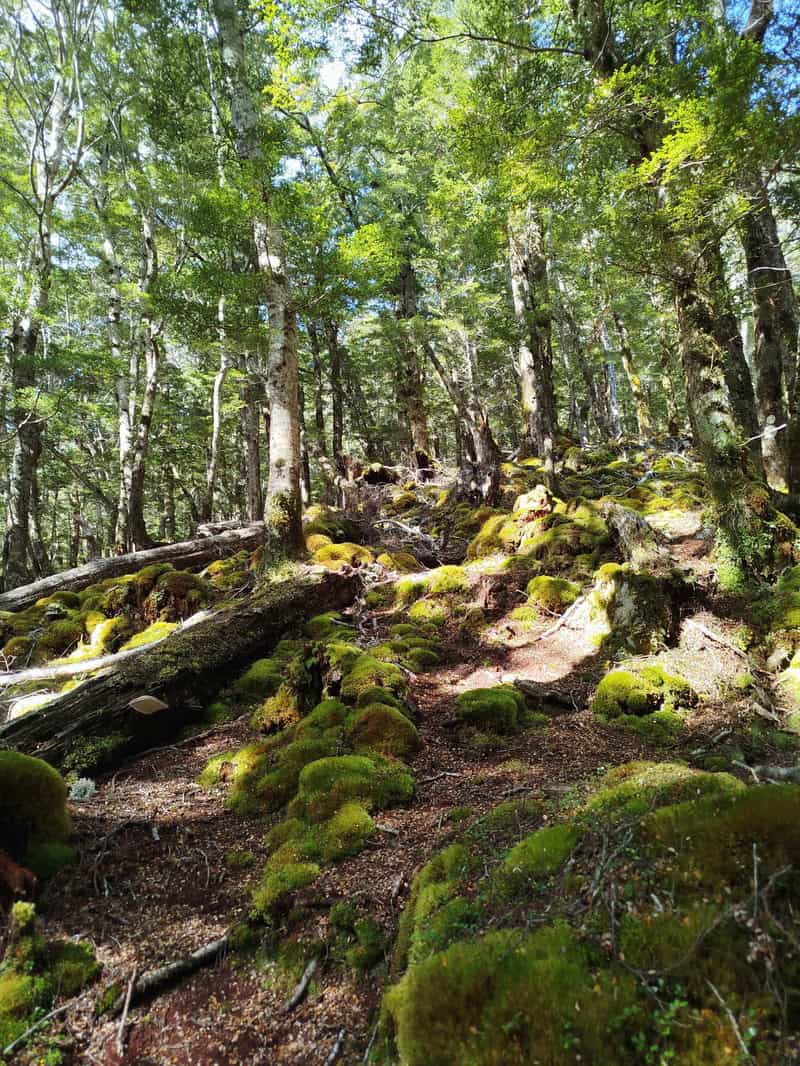
The ferns through here are my favourite. After ~13km, we popped out into the clearing that is Snow White. Though it didn’t feel like Snow White? I’m definitely dopey.
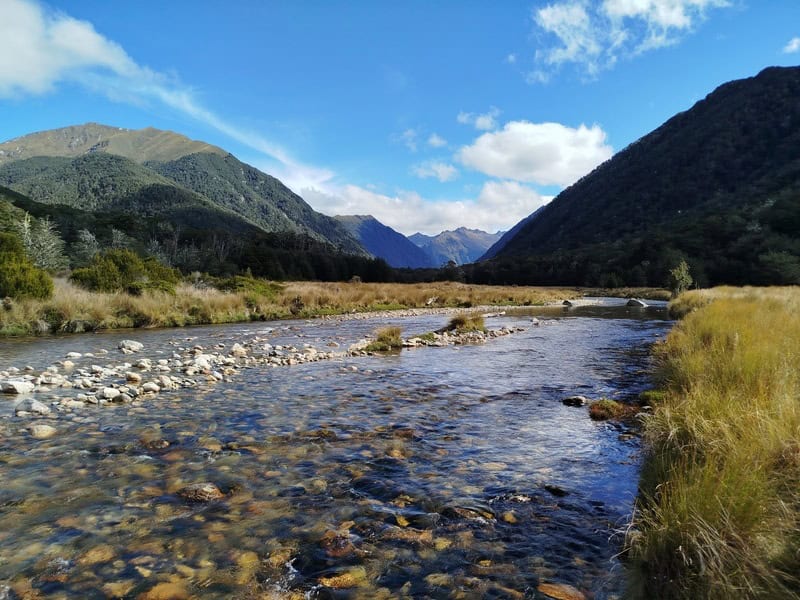
We approached the river, and took a time to have a break…enjoy the sunshine and fill up of our bottles in case water disappeared for longer than expected.
SNOW WHITE CLEARING TO TARNS
Leaving the Snow White Clearing Track was a little confusing as we really couldn’t find a track through the long tussocks. After sort of weaving for a bit, I decided we may as well just enter the bush and go from there. The first 5 metres had me worried as we pushed through the thick bush…but soon the forest had more space for us. We saw countless animal trails that we’d follow only to lose again.
One of our two goals for this section was to stay on the true right of the creek. Our other goal was to just keep going up…with about 550 metres of elevation gain in the next 2km.
We were making steady progress, but in reality, progress was slow (I think we did a 40 minute kilometre and I felt like we were moving quick). If you use the GPX file above, eventually you’ll find yourself on a trail of sorts as it flattens out towards the top. We had a GPX file from a friend and it was a massive help. So hopefully the one above helps you.
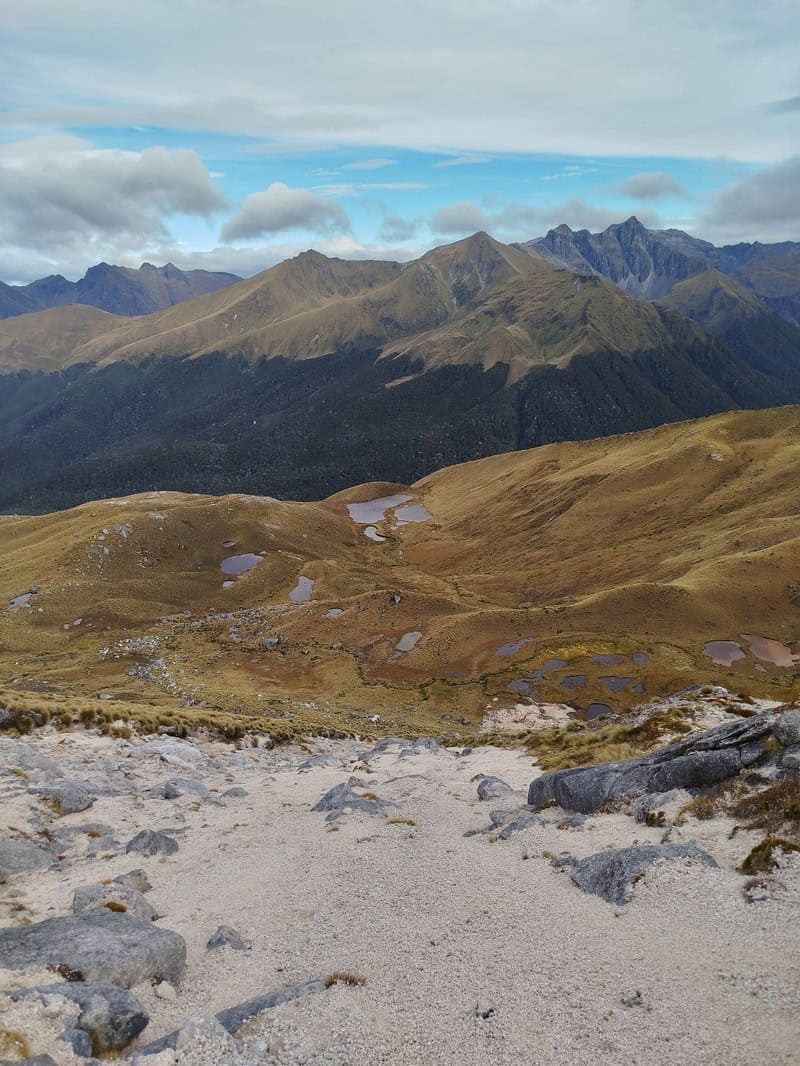
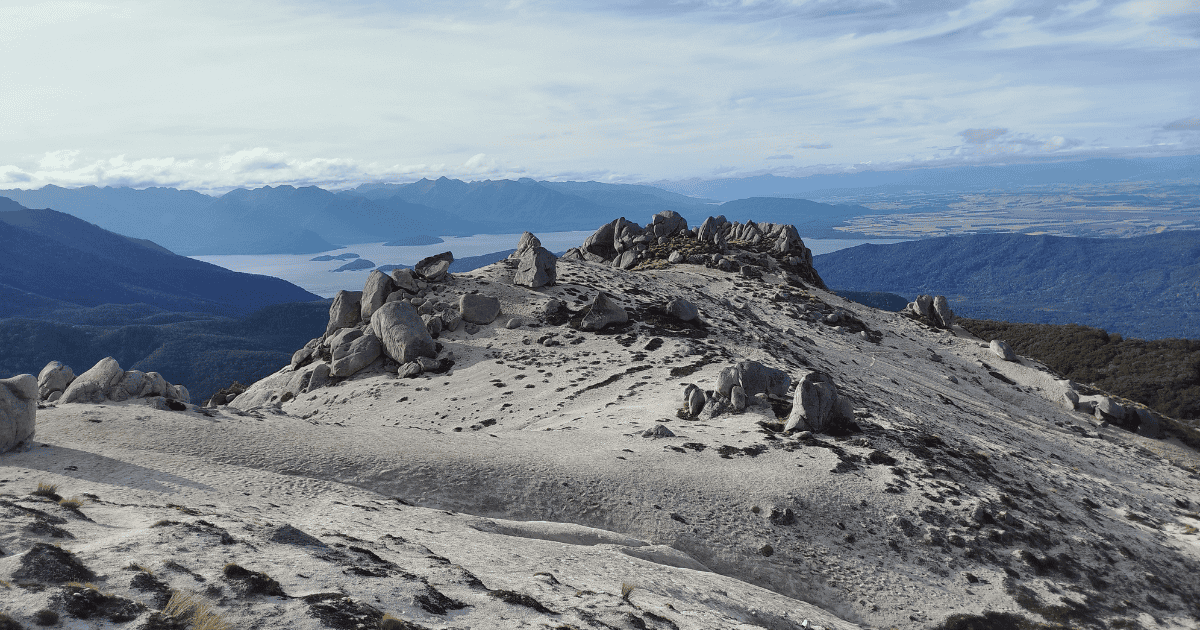
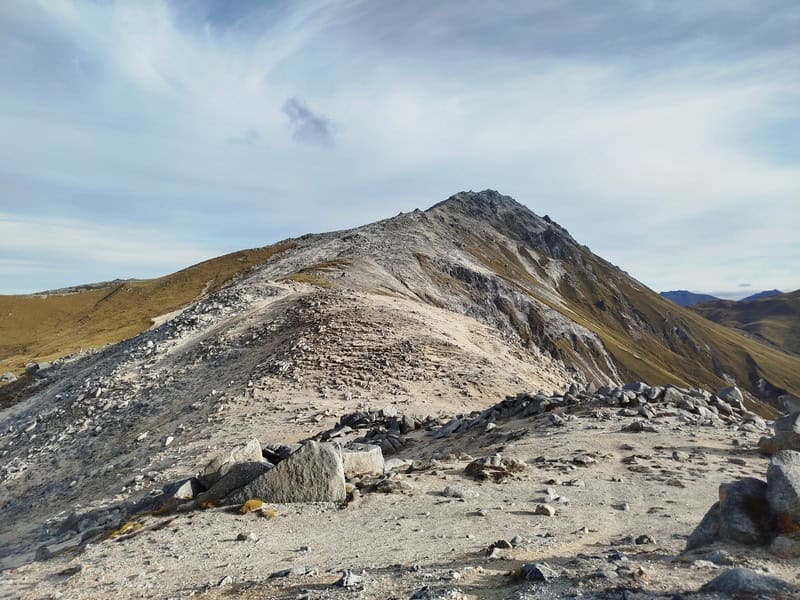
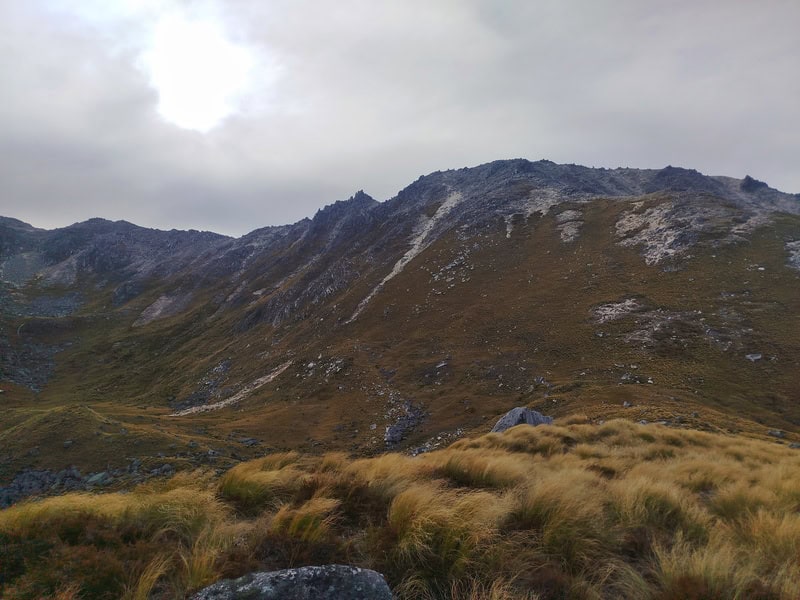
With some more bush bashing once it flattened out…we eventually, sort of unexpectedly, popped out of the treeline and wow it was worth it as we got our first glimpse of that crazy terrain that Mount Titiroa is known for. But first, it was time to enjoy the sunshine with some snacks.
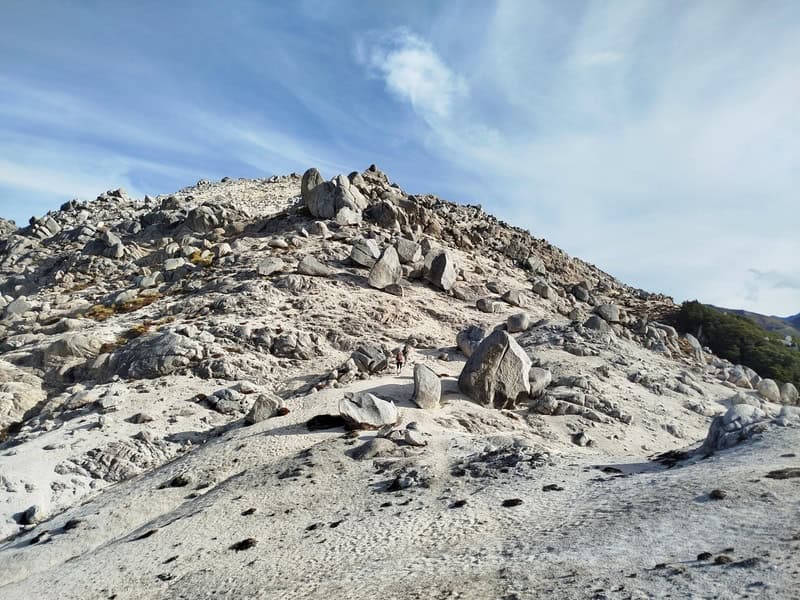
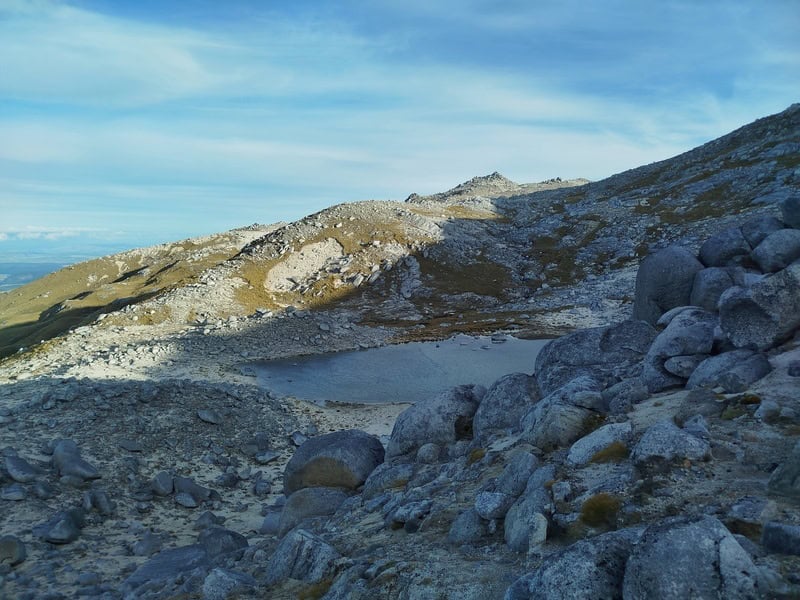
Back on track, we found a trail along a wee spur that eventually we veered off to start going towards to the ridgeline that was easy enough to sight. After a bit more climbing we finally got onto the beachy/snowy stuff we’d been waiting for. HOW GOOD.
It was softer terrain than I expected (it had rained the previous day), and provided good traction…definitely a one step toward two steps backward feeling when it was steep.
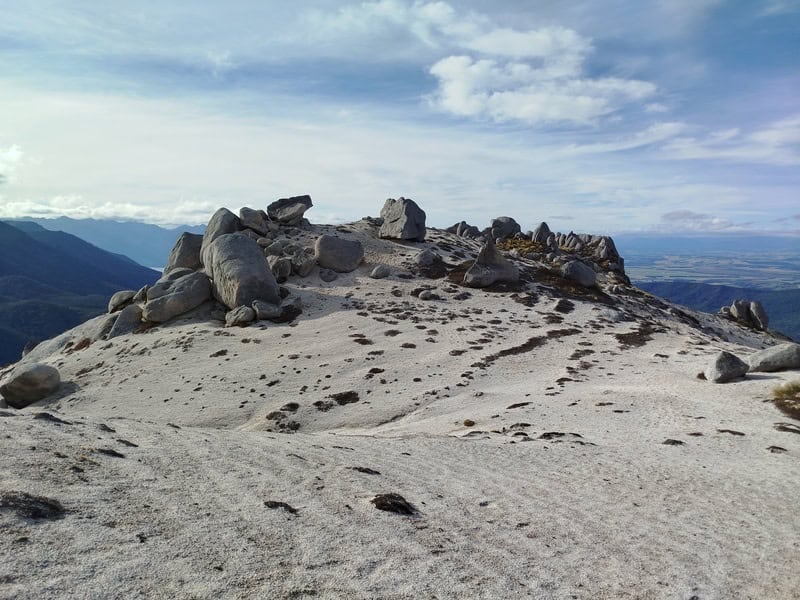
The rocks scattered about were all pretty awesome too. It was already a satisfying day. But as we got further along the ridge, we noticed the epic views back over Lake Manapouri and Te Anau. Eventually we could see over the other side of the ridge, and wow…looking deeper into Fiordland National Park was great.

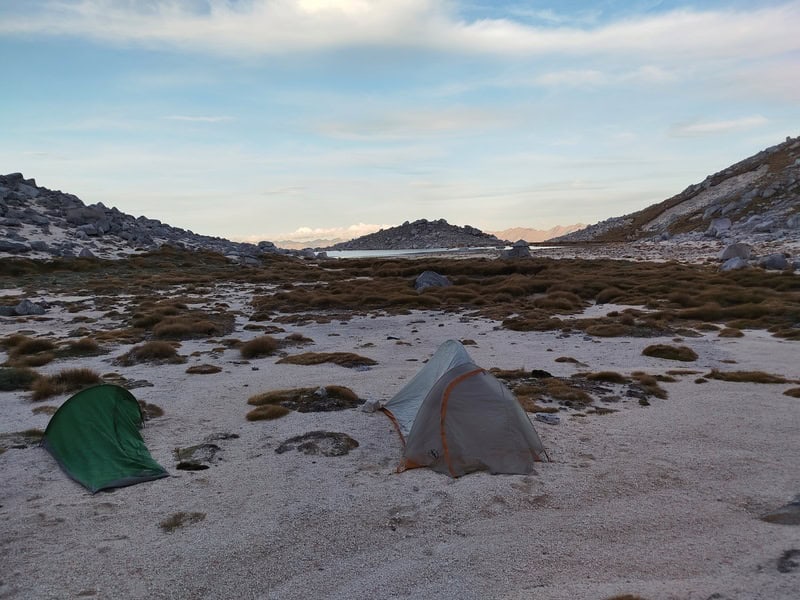
We didn’t have too much daylight left so while we faffed about with snacks, taking photos, and enjoying the views, we did want to make sure we found a campsite sooner rather than later. We decided we’d set up camp before deciding if we should head to the summit for the sunset…and in the end we decided to camp at the tarns near 1412.
We were losing direct sunlight on our campsite as we approached and wow it was getting cold quick, and the wind was stronger than we’d have liked. But we committed to camping on the west side of the tarn, and didn’t bother checking out the summit…instead, enjoying a beer and a feed before trying to keep warm.
- DAY 2
TARNS TO NORTH BORLAND LODGE VIA MOUNT TITIROA
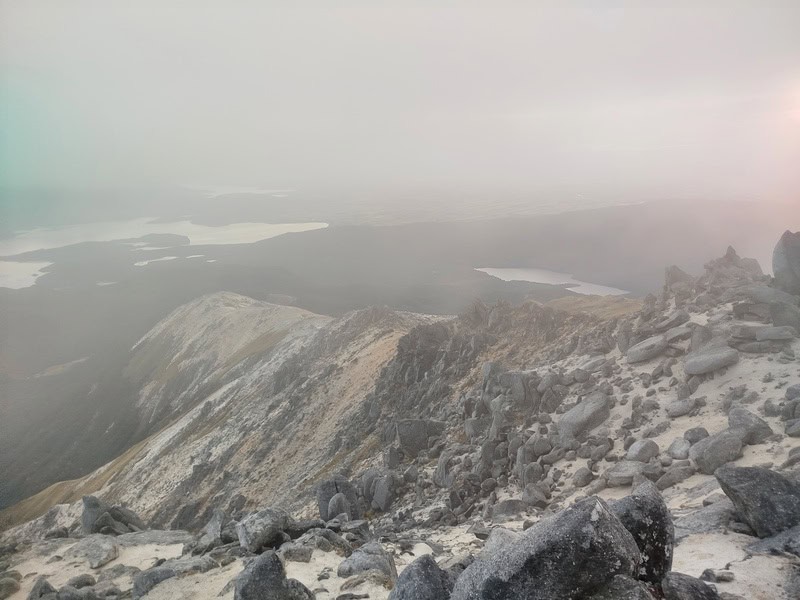
Up before sunrise, we packed up and beelined towards the summit in the FRESH COOL morning. We didn’t take the most efficient route to the summit, but as long as we went up knew we weren’t far off our goal. About 45 minutes later we were at the summit. Unfortunately some cloud was rolling through so we didn’t get the epic sunrise we’d hoped for…but what we could see, was pretty good.
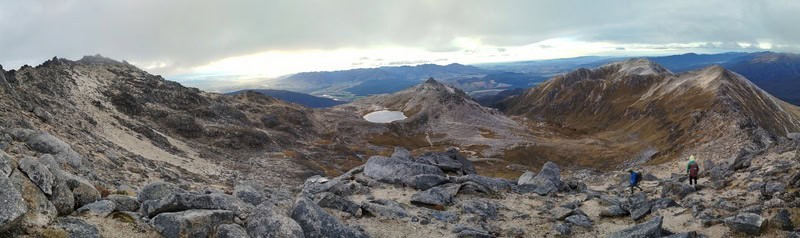
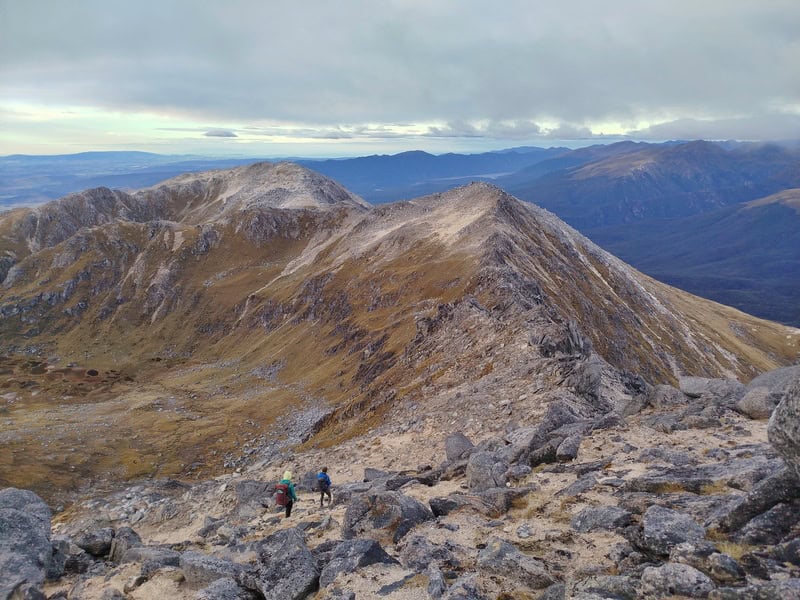
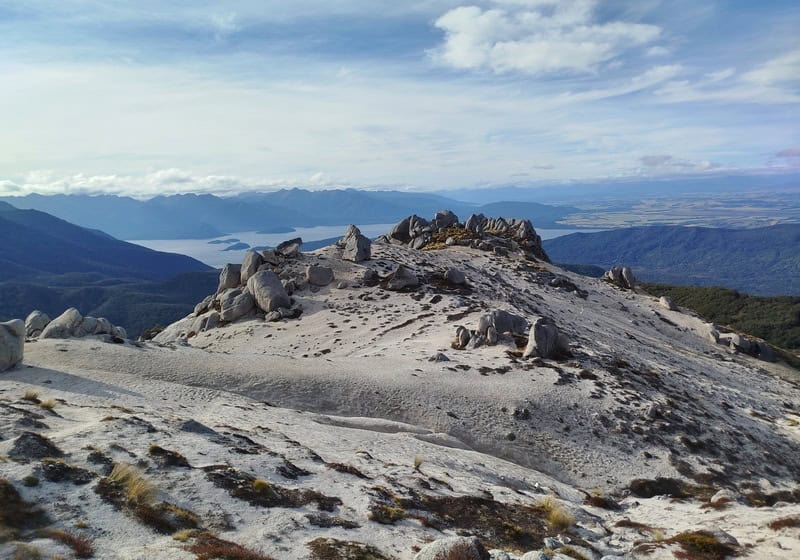
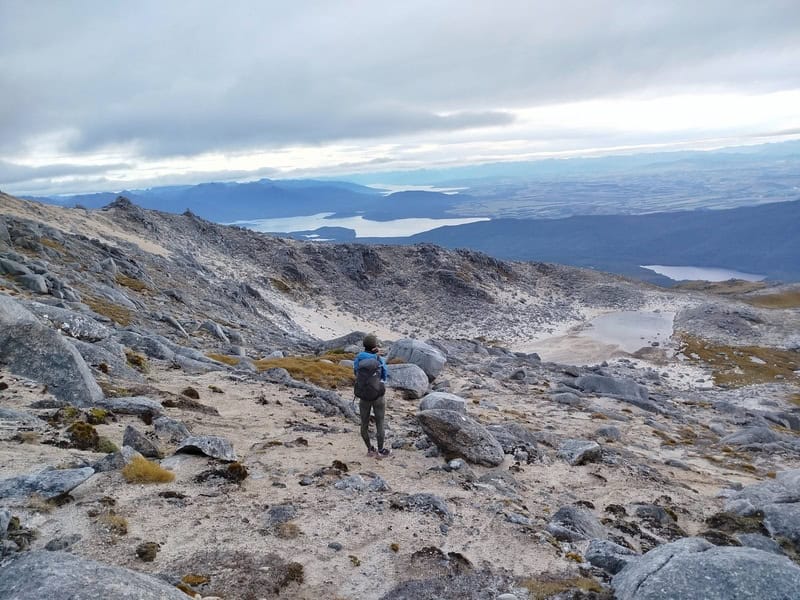
After we left the summit and began following the ridgeline, the skies started to clear up and we got some continuous epic views of the tarns, lakes, and mountains. Along with the awesome terrain right in front of us.
There was no really obvious trail to follow along the ridge but it was easier enough to figure out. The only time we backtracked is when we got near point 1537…we tried to go over the top, but backtracked and dropped down the northern side of the ridge a little to make life easier.
Once we got to point 1583, it became apparent we had a big descent coming up (in hindsight it might be easier to descend via 1581).
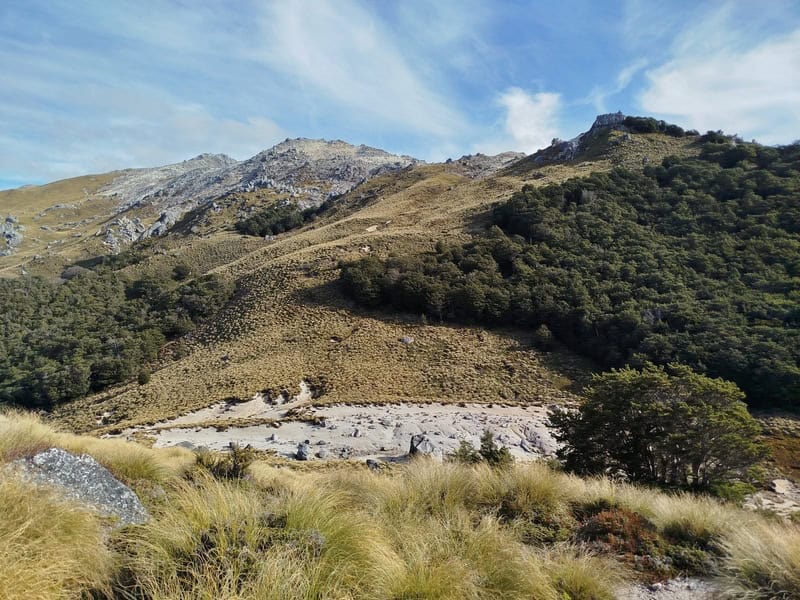
The soft sand made this doable but it was slow and we should have headed a little north of 1583 before dropping so quick. We quickly figured out the best line and we then jumped into the scree line directly above the tarns (see photo below – in the centre of the photo in the distance). It’s steep but the soft scree made a tricky descent a lot easier.
Onto the flatter surface we waded through the tussocks, trying to hit the GPX line where the bushline was. As we approached the bushline there were more things that looked like tracks, but they’d quickly disappear again.
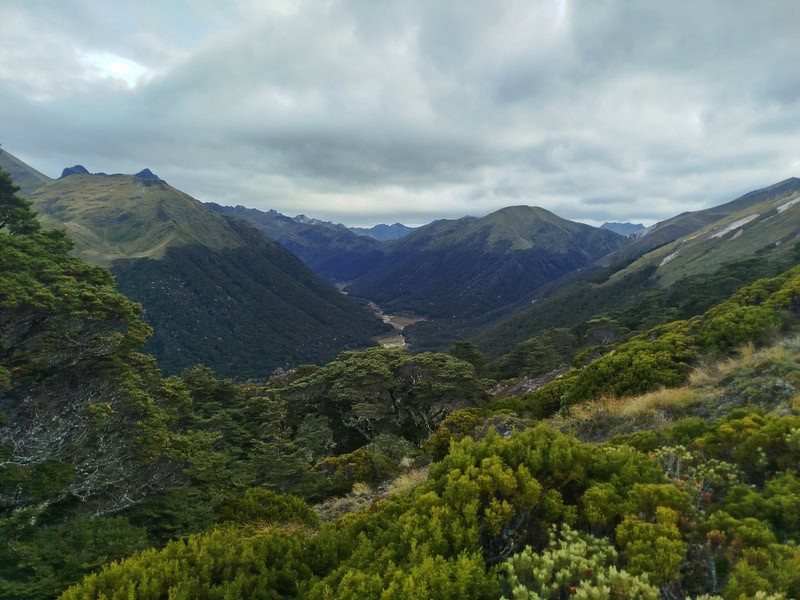
Entering the bush and it was quickly bashy. I didn’t look at the GPX line too often, happier to just pick the line of least resistance. As far as bush bashing goes on this slope, it could have been a lot worse. We were surprised how quickly we got down to the bottom of the valley and saw the Hut in sight. Woohoo.
NORTH BORLAND HUT TO BORLAND LODGE
After crossing the river, and a quick visit to the hut we were pretty relieved to be back on a formed track…the site of orange triangles/poles allowing me to put the GPX file on the phone away.
There’s almost a kilometre of tussock lined Tracks to get to the bushline, with the track seeming to disappear at times. But you can spot the orange triangle in the distance.
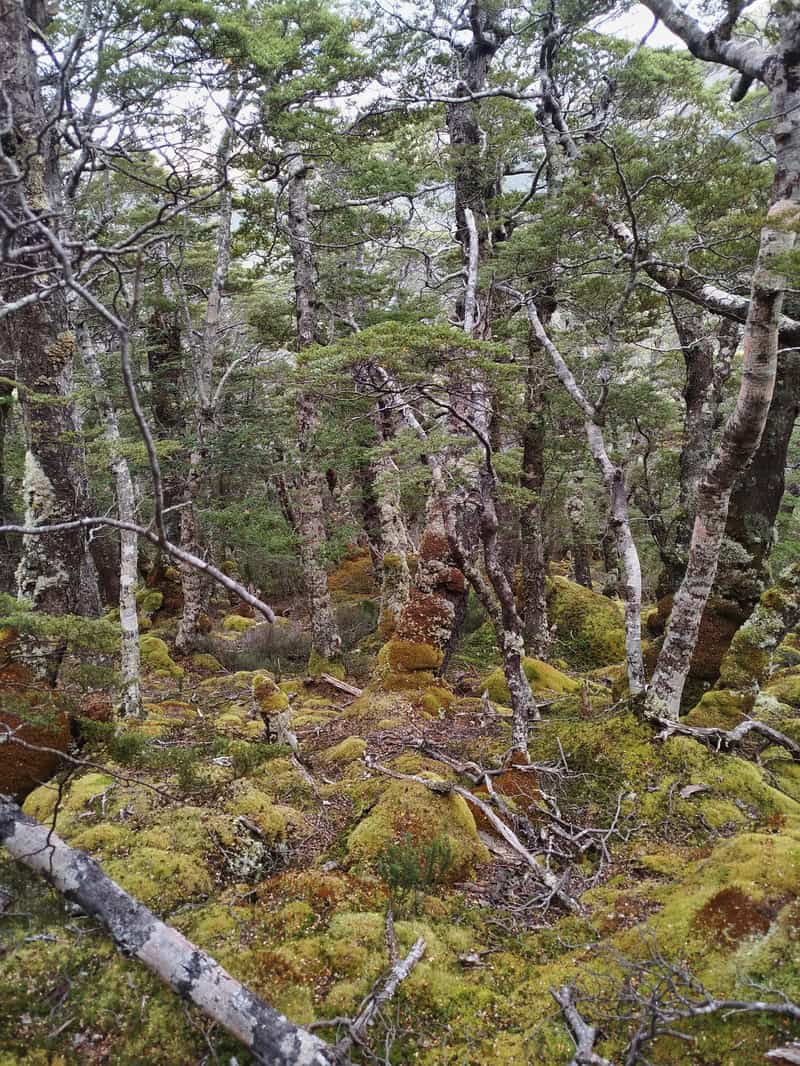
Entering the bush leads to a nice undulating walk for the next couple of hours. There’s ferns, moss, trees, and the rivers to keep you entertained (a couple of small crossings – beware slippery rocks). It’s a beautiful section of trail.
As you get closer to Borland Lodge, there is a swampy section which is a bit confusing…but just follow your nose and you’ll see orange triangles sporadically. Then the track is a cruisey finish to the carpark. Don’t forget to put snacks/beverages in your car for a reward!
THE BIKE RIDE
If you really like type 2 fun, you can trick yourself into this ~3ish hour bike ride. Just make sure you check if The Church is opening before you start dreaming of beer and chips. This was all the motivation I needed, only to find it closed on arrival. It was a Sunday, the one day The Church should be open.
If you like yourself, do a car drop.
5. MORE PHOTOS
Coming soon.
If you’ve got any questions or comments about hiking to Mount Titiroa, let me know in the comments below or email jub@churnewzealand.com.
p.s. Here’s a map of all the hikes documented on Chur New Zealand. You can click the icon to see brief details, as well as a link to read more about the hike (like this post).
Hey, it’s Jub here. I’m the guy behind Chur New Zealand, helping you have the best time hiking, trekking, walking…whatever you want to call it…in NZ. I’m based in Queenstown and am always out and about exploring trails, old & new. If you have any questions, reach out.